3. Managing Pages and Books
Introduction
Most documents are more than one page, so inserting new pages is a common practice in InDesign. You can quickly add a new blank page to a document using the Pages panel. The Pages panel allows you to visually display and navigate through all the pages in your document. When you work with multiple page documents, moving pages around is inevitable. You can simply drag pages in the Pages panel to rearrange them within a document or use the Move Page command on the Options menu to move them between documents. When you no longer need a page, you can quickly delete it from your document using the Pages panel.
A master page is one of the most important parts of creating an InDesign document. A master page holds and displays all the elements that you want to appear on every page in a document, such as headers, logos, page numbers, and footers. The master is like a background layer to a page. Everything on the background layer appears on the page in front of it. When you make a change to a master page, the change appears in all document pages unless you override the change.
Instead of creating long documents, you can break them up into smaller documents, like chapters, and then add them to a book. In InDesign, a book is not a single document. It simply keeps track of all the documents in the book and coordinates document page numbers, colors, and styles. When you create a book, you can synchronize page numbers, colors, and styles for all the documents in the book. Each book uses a file called the style source to control the style sheets, swatches, and master pages for all the documents in the book. When you make changes to the style source file, all the documents in the book are synchronized to the file.
Using the Pages Panel
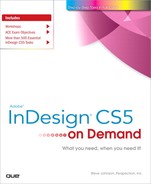
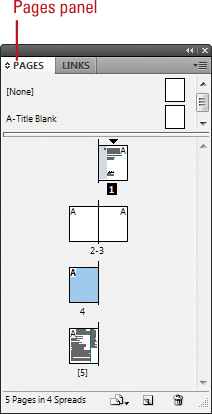
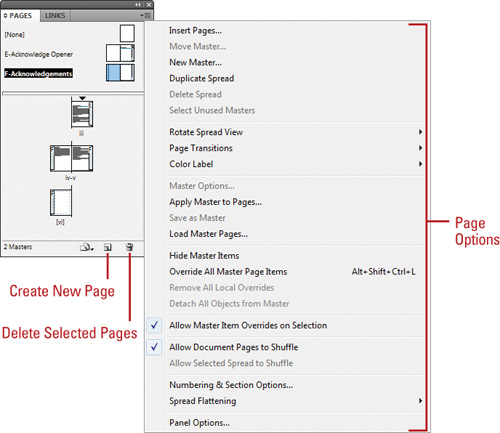
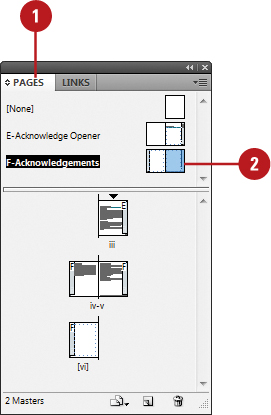
The Pages panel allows you to visually display all the pages in your document. The Pages panel shows thumbnails for each page. At the top of the panel are the master pages for the document. A master page contains elements that are repeated on every page. When you’re working with a multi-page document, the Pages panel is an essential part of working with pages. You can add and remove pages as well as navigate to and from pages. The Pages panel, like all panels, provides an Options menu where you can select page-related commands and Pages panel display options. The display options allow you to change page icons size, position, and location. In addition, you can also set options to show or hide icons for page transparency, transition, and spread rotation.
Change the Pages Panel Display
![]() Select the Pages panel.
Select the Pages panel.
• You can also click the Window menu, and then click Pages.

![]() Click the Options menu on the panel, and then click Panel Options.
Click the Options menu on the panel, and then click Panel Options.
![]() Select from the following Pages panel options:
Select from the following Pages panel options:
• Size. Specify an icon size for Pages and Masters.
• Show Vertically. Select to show page or master page icons vertically.
• Show Thumbnails. Select to show page or master page icons as thumbnails.

![]() Click the Pages on Top or Masters on Top option.
Click the Pages on Top or Masters on Top option.
![]() Click the Resize list arrow, and then select an option when you resize the Pages panel.
Click the Resize list arrow, and then select an option when you resize the Pages panel.
![]() Click OK.
Click OK.
Show or Hide Pages Panel Icons
![]() Select the Pages panel.
Select the Pages panel.
• You can also click the Window menu, and then click Pages.

![]() Click the Options menu on the panel, and then click Panel Options.
Click the Options menu on the panel, and then click Panel Options.
![]() Select from the following options for icon display:
Select from the following options for icon display:
• Transparency. Select to display icons when transparency is applied to a page or spread.
• Spread Rotation. Select to display icons when the spread view is rotated.
• Page Transitions. Select to display icons when page transitions are applied to a page or spread.

![]() Click OK.
Click OK.
Inserting Pages
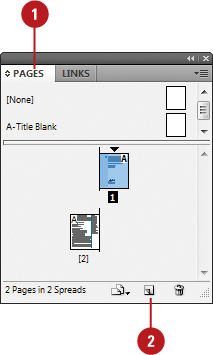
Most documents will be more than one page, so inserting new pages is a common practice in InDesign. You can quickly add a new blank page to a document using the Pages panel. You have several different methods to complete the task. You can use the New Page button on the page, drag a master page to the document area in the Pages panel, or use the Insert Pages command on the Options menu. If you’re inserting only one or two pages, the first two methods work the best. If you want to insert multiple pages, the Insert Pages command is your best option, where you can use the Insert Pages dialog box to set additional options.
Insert Pages Using the Pages Panel
![]() Select the Pages panel.
Select the Pages panel.
• You can also click the Window menu, and then click Pages.
![]() Use any of the following methods to insert a page:
Use any of the following methods to insert a page:
• Insert Page. Click the Create New Page button on the panel.
• Insert from Master Pages. Drag a master page or a nonmaster page from the master page area to the document page area of the panel.
![]() Continue to insert pages as needed.
Continue to insert pages as needed.
Did You Know?
You can duplicate a page. Select the Pages panel, select the pages or spreads you want to duplicate, and then drag the selected pages to the Create New Page button on the panel or use the Duplicate Spread command on the Options menu.
Insert Multiple Pages Using the Insert Pages Dialog Box
![]() Select the Pages panel.
Select the Pages panel.
• You can also click the Window menu, and then click Pages.

![]() Click the Options menu, and then click Insert Pages.
Click the Options menu, and then click Insert Pages.
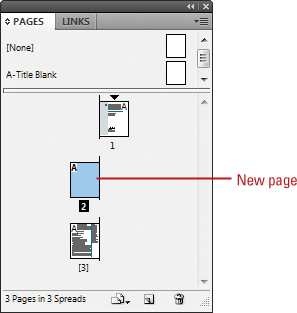
![]() Enter the number of pages that you want to insert.
Enter the number of pages that you want to insert.
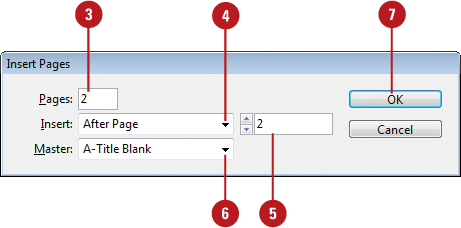
![]() Click the Insert list arrow, and then specify how you want to insert the pages:
Click the Insert list arrow, and then specify how you want to insert the pages:
• After Page. Inserts new pages after a specific page.
• Before Page. Inserts new pages before a specific page.
• At Start of Document. Inserts new pages at the start of the document.
• At End of Document. Inserts new pages at the end of the document.
![]() Specify the specific page to use when you choose After Page or Before Page as your Insert option.
Specify the specific page to use when you choose After Page or Before Page as your Insert option.
![]() Click the Master list arrow, and then select a master or nonmaster page to use as the basis for the new pages.
Click the Master list arrow, and then select a master or nonmaster page to use as the basis for the new pages.
![]() Click OK.
Click OK.
Changing the Page Size
If you need to change the size of a page in a document, you can use the Page tool (New!) on the Tools panel along with the Control panel or the Edit Page Size button in the Pages panel. You can use a pre-defined page size or create and name custom page sizes. You can have different pages within a single document (New!), which is useful keeping different sized designs, such as a business card and letter head, in the same document.
Change the Page Size
![]() Select the Pages panel.
Select the Pages panel.
• You can also click the Window menu, and then click Pages.

![]() Select the pages you want to change in the Pages panel.
Select the pages you want to change in the Pages panel.
![]() Click the Edit Page Size button.
Click the Edit Page Size button.
![]() Select from the following on the menu:
Select from the following on the menu:
• Preset Size. Changes the selected pages to the preset page size.
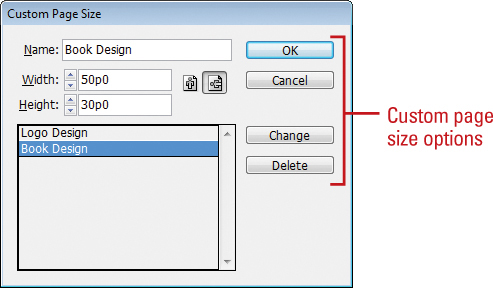
• Custom Page Size. Creates and names custom page sizes. In the Custom Page Size dialog box, do any of the following, and then click OK.
• Add. Enter a name, width and height, and then click Add.
• Remove. Select a name, and then click Delete.
• Edit. Select a name, and then click Change.
Change the Page Size Using the Page Tool
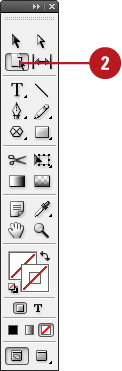
![]() Select the Page tool on the Tools panel.
Select the Page tool on the Tools panel.
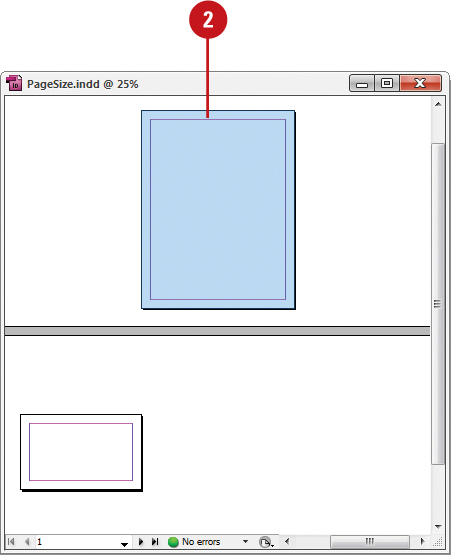
![]() Select the one or more master pages or layout pages you want to resize in the layout, not in the Pages panel.
Select the one or more master pages or layout pages you want to resize in the layout, not in the Pages panel.
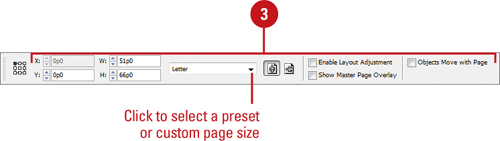
![]() Specify any of the following settings in the Control panel:
Specify any of the following settings in the Control panel:
• X and Y Values. Specify X and Y values to set the position of the page in relation to other pages in the spread.
• W and H Page Size Values. Specify the width and height for the selected page or select a preset from the Preset Size list arrow.
• Preset or Custom Size. Select a preset or custom size. Click Custom Page Size to create or delete a custom size.
• Orientation. Click the Portrait or Landscape button.
• Enable Layout Adjustment. Select to automatically adjust objects on the page when the page size changes.
• Show Master Page Overlay. Select to show a shaded box over the selected page. You can move the master page overlay so master page items appear correctly.
• Objects Move with Page. Select to move objects on the page when the page size changes.

Navigating Pages
After you insert new pages into a document, you can use the Pages panel, Layout menu commands, and Status bar to navigate between them. As you work with pages in the Pages panel, there are two types of page selections. One targets a page and the other activates a page. A targeted page is a page selected in the Pages panel, while an activated page is a working page in the document window. When you target a page, you can apply a command in the Pages panel even though it may not be the current working page in the document window.
Target or Activate on a Page
![]() Select the Pages panel.
Select the Pages panel.
• You can also click the Window menu, and then click Pages.

![]() Use any of the following methods to select a page:
Use any of the following methods to select a page:
• Target a Page. Click a page in the Pages panel.
The thumbnail is highlighted.
• Work on (Activate) a Page. Double-click a page in the Pages panel.
The thumbnail is highlighted and the page number or name below it is highlighted in black.
Navigate to Pages
• Pages Panel. Select the Pages panel, and then double-click the page in the panel that you want to work on.
• Status Bar. Use the navigation buttons on the Status bar to browse through pages or click the list arrow to select a specific page.

• Layout Menu. Click the Layout menu, and then select any of the following commands:
• First Page. Displays the first page in the document.
• Previous Page. Displays the previous page in the document.
• Next Page. Displays the next page in the document.
• Last Page. Displays the last page in the document.
• Next Spread. Displays the next spread of pages in the document.
• Previous Spread. Displays the previous spread of pages in the document.
• Go To Page. Displays the specified page in the document.
• Go Back. Displays the previously active page in the document.
• Go Forward. Displays the previously active page before the use of the Go Back command.

Adding Color Labels to Pages
In the Pages panel, you can assign color labels to the page thumbnails (New!). If page previews are enabled, the color label appears below the thumbnail. If page previews are disabled, the entire generic page thumbnail is colored. You can assign a color label to normal or master pages in the Pages panel. If you no longer want to assign a color label, you can remove it.
Add Color Labels to Pages
![]() Select the Pages panel.
Select the Pages panel.
• You can also click the Window menu, and then click Pages.
![]() Select the pages you want to assign a color label in the Pages panel.
Select the pages you want to assign a color label in the Pages panel.
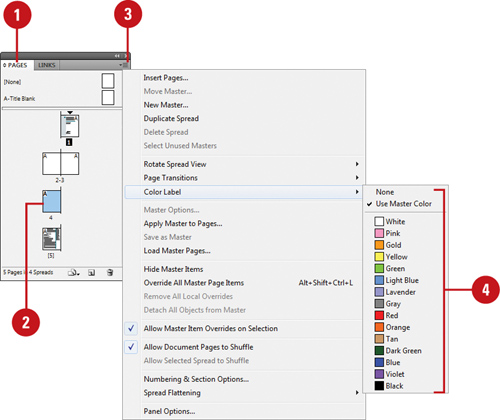
![]() Click the Options menu on the panel, and then point to Color Label.
Click the Options menu on the panel, and then point to Color Label.
![]() Select from the following:
Select from the following:
• None. Removes the color label from the selected pages.
• Use Master Color. Assigns the master page color label to the selected pages.
• Color. Assigns the selected color label to the selected pages.

Deleting Pages
When you no longer need a page, you can delete it from your document using the Pages panel. You can use the Delete Page or Delete Spread button on the panel or the same command on the Options menu. When you select a single page, InDesign uses the Delete Page button or command. When you select a spread of pages, InDesign uses the Delete Spread button command.
Delete Pages
![]() Select the Pages panel.
Select the Pages panel.
• You can also click the Window menu, and then click Pages.

![]() Select the pages that you want to delete.
Select the pages that you want to delete.
• You can use the Shift key to select contiguous pages or the Ctrl (Win) or ![]() (Mac) to select noncontiguous pages.
(Mac) to select noncontiguous pages.
![]() Click the Delete Page or Delete Spread button on the panel.
Click the Delete Page or Delete Spread button on the panel.
• You can also click the Options menu, and then click Delete Pages or Delete Spread.
Important
When you have a spread of pages selected, the button and command changes to Delete Spreads.
![]() Click OK to confirm the deletion.
Click OK to confirm the deletion.
Timesaver
Hold down the Alt (Win) or Option (Mac) key, when you select the Delete Pages button or command to bypass the confirmation dialog box.
Moving Pages
Moving and arranging pages is a common part of working with multiple page documents. You can simply drag pages in the Pages panel or use the Move Page command on the Options menu. When you drag pages, the cursor indicates new page location. With the Move Page command, you can move pages within the current document or to another open document. When you move the pages, objects in the slug and bleed areas are also moved. Page numbers in the slug area display a number rather than the pasteboard index entry.
Move Pages by Dragging
![]() Select the Pages panel.
Select the Pages panel.
![]() Click the Options menu, and then select a move related option:
Click the Options menu, and then select a move related option:
• Allow Document Pages to Shuffle. Enables or disables the shuffling of document pages.
• Allow Selected Spread to Shuffle. Enables or disables the shuffling of selected spread pages.
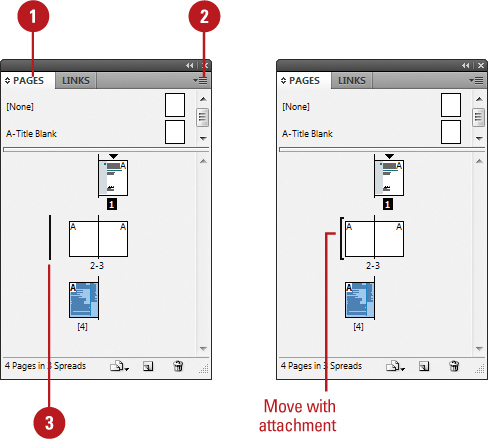
![]() Drag a page next to or between spread pages.
Drag a page next to or between spread pages.
A straight black line indicates the move location with a shuffle. A bracket black line indicates the move location with attachment.
Move Pages
![]() Select the Pages panel.
Select the Pages panel.

![]() Click the Options menu, and then click Move Pages.
Click the Options menu, and then click Move Pages.
![]() Specify the pages that you want to move. Use a hyphen to designate a range, such as 1-4.
Specify the pages that you want to move. Use a hyphen to designate a range, such as 1-4.
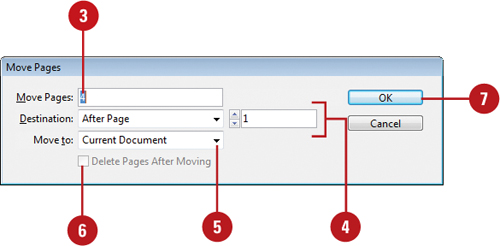
![]() Click the Destination list arrow, select an option, and then enter a page number, if necessary.
Click the Destination list arrow, select an option, and then enter a page number, if necessary.
![]() Click the Move To list arrow, and then select a document location.
Click the Move To list arrow, and then select a document location.
![]() If you are moving the page(s) to a separate open file, select the Delete Pages After Moving check box if you want to delete the pages from the current document.
If you are moving the page(s) to a separate open file, select the Delete Pages After Moving check box if you want to delete the pages from the current document.
![]() Click OK.
Click OK.
Working with Page Spreads
Most documents are either one or two page spreads. A single-page spread displays pages one at a time (top to bottom), while a two-page spread displays pages as facing pages (left and right). If you want to create a larger spread for a magazine foldout or a brochure, you can add more pages to a one or two page spread. These multiple-page spreads are also called island spreads. When you no longer want a larger spread, you can remove pages from the spread.
Add and Remove Pages from a Spread
![]() Select the Pages panel.
Select the Pages panel.

![]() Click the Options menu on the panel, and then click Allow Document Pages to Shuffle to deselect it.
Click the Options menu on the panel, and then click Allow Document Pages to Shuffle to deselect it.
![]() To add pages, drag a page from the pages area, or a master page next to the spread where you want to add the page.
To add pages, drag a page from the pages area, or a master page next to the spread where you want to add the page.
![]() To remove pages, drag a page from the spread to outside of the spread, and then click No, if necessary.
To remove pages, drag a page from the spread to outside of the spread, and then click No, if necessary.

Did You Know?
You can keep pages in a spread together. Select the Pages panel, select the spread you want to protect, click the Options menu, and then click Allow Selected Spread To Shuffle to deselect it.
Rotating Page Spreads
If you need to work on non-horizontal design elements, such as a calendar, you can rotate the current spread in 90 degree increments to make it easier to work on. When you rotate the current spread view, you have full editing capabilities. When you’re done, you can quickly clear the rotation to return to a normal view.
Rotate Page Spreads
![]() Select the Pages panel.
Select the Pages panel.

![]() Double-click the page numbers of the page spread you want to rotate.
Double-click the page numbers of the page spread you want to rotate.
![]() Click the Options menu on the panel, point to Rotate Spread View, and then click 90° CW, 90° CCW, or 180°.
Click the Options menu on the panel, point to Rotate Spread View, and then click 90° CW, 90° CCW, or 180°.
• You can also click the View menu, point to Rotate Spread, and then click 90° CW, 90° CCW, or 180°.
A rotation icon appears next to the page indicating the spread is rotated.
![]() Edit and modify the page spread the way you want.
Edit and modify the page spread the way you want.

![]() Click the Options menu on the panel, point to Rotate Spread View, and then click Clear Rotation.
Click the Options menu on the panel, point to Rotate Spread View, and then click Clear Rotation.
• You can also right-click (Win) or Control-click (Mac) the rotation icon to select a rotation spread command.
See Also
See “Using the Pages Panel” on pages 56-57 for more information on showing the spread rotation icon in the Pages panel.
Creating Master Pages
A master page holds and displays all the elements that you want to appear on every page in a document, such as headers, logos, page numbers, and footers. The master is like a background layer to a page. Everything on the background layer appears on the page above it. Master elements appear on document pages surrounded by a dotted border to make them easy to identify. When you create a new document, you also create a master page. If you want to create additional master pages, you can create them from scratch or from an existing page or spread.
Add Objects to an Existing Master Page
![]() Select the Pages panel.
Select the Pages panel.
• You can also click the Window menu, and then click Pages.

![]() Double-click the master page in the master page area of the Pages panel.
Double-click the master page in the master page area of the Pages panel.
The master page or two page spread appears in the document window.
![]() Add text boxes, graphics, or any other elements you want on the page.
Add text boxes, graphics, or any other elements you want on the page.
![]() Double-click a page in the document page area of the Pages panel.
Double-click a page in the document page area of the Pages panel.
The elements added to the master page or spread appear on the document page.
Did You Know?
You can load master pages from another document. Select the Pages panel, click the Options menu, click Load Master Pages, select the file, and then click Open.
Create a Master Page from an Existing Page
![]() Select the Pages panel.
Select the Pages panel.
• You can also click the Window menu, and then click Pages.
![]() Drag a page or a spread from the document page area to the master page area.
Drag a page or a spread from the document page area to the master page area.
• You can also select a page or spread, click the Options menu, and then click Save As Master.
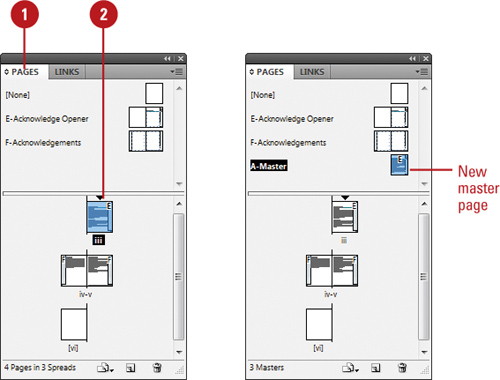
Create a Master Page from Scratch
![]() Select the Pages panel.
Select the Pages panel.
• You can also click the Window menu, and then click Pages.
![]() Click the Options menu on the panel, and then click New Master.
Click the Options menu on the panel, and then click New Master.
![]() Select from the following Pages panel options:
Select from the following Pages panel options:
• Prefix. Enter a prefix up to four characters. This identifies the applied master for each page.
• Name. Enter a name for the master page.
• Based on Master. Select an existing master on which to base the new master.
• Number of Pages. Enter the number of pages (1-10) you want in the master spread.

![]() Click OK.
Click OK.
Working with Master Pages
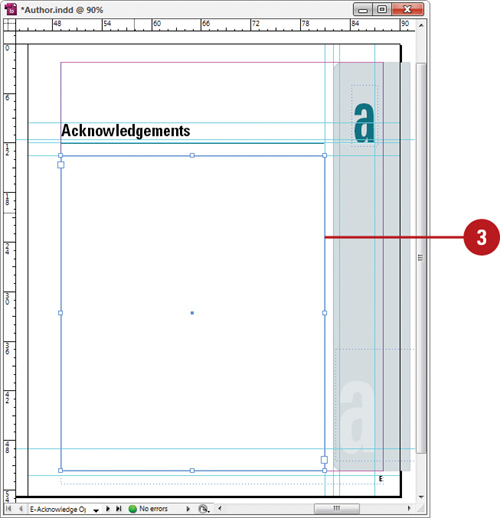
When you apply a master page to a document page, all the elements on the master page are attached and displayed on the document page. When you only want a selected number of elements from the master page on a document page, you can override or detach the elements you want. Overriding a master puts a copy of the master element on the document page and keeps the link, where you can make changes to it. The changes made on the document page don’t affect the master; however, any changes to the same element on the master (separate from the document page) still appear from the master on the document page. Detaching a master overrides a master element and removes the link. Instead of overriding or detaching master elements, you have the option of hiding them
Apply a Master Page to a Document Page
![]() Select the Pages panel.
Select the Pages panel.
• You can also click the Window menu, and then click Pages.

![]() Drag a master page or spread from the master page area to a page or spread in the document page area.
Drag a master page or spread from the master page area to a page or spread in the document page area.
![]() To apply a master to multiple pages, select the pages in the document page area, and then Alt (Win) or Option (Mac) the master page you want to apply.
To apply a master to multiple pages, select the pages in the document page area, and then Alt (Win) or Option (Mac) the master page you want to apply.
• You can also click the Options menu, click Apply Master To Pages, specify the options you want, and then click OK.
Did You Know?
You can change master page options. Select the Pages panel, select the master page, click the Options menu, click Master Options for master page name, specify the options you want, and then click OK.
Work with Master Pages
• Delete Masters. In the Pages panel, drag a master page you want to delete to the Delete Selected Pages button on the panel.
• Copy Masters. In the Pages panel, drag a master page you want to copy to the Create New Page button on the panel.
• Hide Master Elements. In the Pages panel, select the document page, click the Options menu, and then click Hide Master Items.
• Override a Master Element. In the Pages panel, click the Options menu, and then click Allow Master Item Overrides On Selection to select it. On a document page, Ctrl+Shift+click (Win) or ![]() +Shift+click (Mac) an element.
+Shift+click (Mac) an element.
• You can also click the document page in the Pages panel, click the Options menu, and then click Override All Master Page Items.
• Detach a Master Element. On a document page, Ctrl+Shift+click (Win) or ![]() +Shift +click (Mac) an element to override it (see above). In the Pages panel, click the Options menu, and then click Detach Selection From Master.
+Shift +click (Mac) an element to override it (see above). In the Pages panel, click the Options menu, and then click Detach Selection From Master.
• You can also click the Options menu, and then click Detach All Objects From Master.
• Unassign Master. In the Pages panel, drag the [None] master from the master page area to a page in the document page area.
All master elements are no longer attached to the document page.
Working with Page Numbers and Sections
One of the most common elements added to a master page is a page number. InDesign uses a special character to designate page numbers. On a master page, simply create a text box, place the insertion point in the box, and then insert the current page number marker. You can also insert and format additional text and variables in the text box to create a header or footer across the top or bottom of the page. You can also use the Numbering & Section Options dialog box to change the format of page numbers or the starting page number. If you want to insert text before the page number, you can specify a section prefix. In addition to page numbers, you can also define a section within a document with separate numbering. A section indicator icon (black triangle) appears above the page thumbnail in the Pages panel.
Add a Page or Section Number to a Page Master
![]() Select the Pages panel.
Select the Pages panel.
• You can also click the Window menu, and then click Pages.
![]() Double-click the master page in the master page area of the Pages panel.
Double-click the master page in the master page area of the Pages panel.
The master page or two page spread appears in the document window.
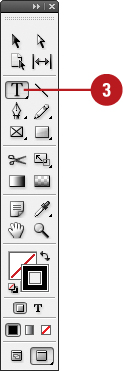
![]() Select the Type tool on the Tools panel.
Select the Type tool on the Tools panel.
![]() Click where you want to create a text box for the page or section number.
Click where you want to create a text box for the page or section number.

![]() Click the Type menu, point to Insert Special Character, point to Markers, and then click Current Page Number or Section Marker.
Click the Type menu, point to Insert Special Character, point to Markers, and then click Current Page Number or Section Marker.
A special character marker appears in the text box. The current page or section number is the prefix for the master page.
![]() For facing pages, repeat steps 3-5 for the other page.
For facing pages, repeat steps 3-5 for the other page.
Set Page Numbering and Section Options
![]() Select the Pages panel.
Select the Pages panel.
![]() Double-click the page where you want to start the page numbering or section to start.
Double-click the page where you want to start the page numbering or section to start.
![]() Click the Layout menu, and then click Numbering & Section Options.
Click the Layout menu, and then click Numbering & Section Options.
![]() Select the Start Section check box to start a new section.
Select the Start Section check box to start a new section.

![]() Click the Automatic Page Numbering or Start Page Numbering At option.
Click the Automatic Page Numbering or Start Page Numbering At option.
![]() If you selected the Start Page Numbering At option, specify the following options:
If you selected the Start Page Numbering At option, specify the following options:
• Section Prefix. Enter a prefix that will appear before the page number, if desired.
• Style. Select a style for the page number.
• Section Marker. Enter text, such as Section, for a section within a document.
• Include Prefix When Numbering Pages. Select this option if you want to add the section prefix to the page number.
![]() Click OK.
Click OK.
A section indicator icon (black triangle) appears above the page thumbnail in the Pages panel.
![]() Double-click the page where you want the section to end, and then repeat steps 3-7 for section numbering (except, in this case, you will need to deselect the Start Section check box).
Double-click the page where you want the section to end, and then repeat steps 3-7 for section numbering (except, in this case, you will need to deselect the Start Section check box).
Working with Chapter Numbers
Like page numbers, you can insert chapter numbers into documents that will be part of a book. Unlike a page number, a chapter number is a predefined text variable. The chapter number variable can be updated automatically and formatted as text. To insert a chapter number variable, create a text box, place the insertion point in the box, and then insert the variable using the Text Variable submenu on the Type menu. You can use the Numbering & Section Options dialog box to change updating options for chapter numbers.
Add a Chapter Number to a Document
![]() Select the Pages panel.
Select the Pages panel.
• You can also click the Window menu, and then click Pages.

![]() Double-click the page or master page where you want to place a chapter number.
Double-click the page or master page where you want to place a chapter number.
![]() Select the Type tool on the Tools panel.
Select the Type tool on the Tools panel.

![]() Click where you want to create a text box for the chapter number.
Click where you want to create a text box for the chapter number.

![]() Click the Type menu, point to Text Variables, point to Insert Variable, and then click Chapter Number.
Click the Type menu, point to Text Variables, point to Insert Variable, and then click Chapter Number.
Set Chapter Numbering Options
![]() Select the Pages panel.
Select the Pages panel.
![]() Double-click the page where you want to start the chapter numbering.
Double-click the page where you want to start the chapter numbering.
![]() Click the Layout menu, and then click Numbering & Section Options.
Click the Layout menu, and then click Numbering & Section Options.
![]() Click the Style list arrow, and then select a chapter numbering style.
Click the Style list arrow, and then select a chapter numbering style.

![]() Select one of the following options:
Select one of the following options:
• Automatic Chapter Numbering.
• Start Chapter Numbering At. Enter a starting chapter number.
• Same as Previous Document in the Book.
![]() Click OK.
Click OK.
Creating and Using Text Variables
A text variable is an element that varies based on circumstances in the document. You can use one of the preset text variables that comes with InDesign or you can create your own. Some of the preset variables include Running Header and Chapter Number. These are useful for adding information to master pages. Other variables, such as Creation Date, Modification Date, Output Date, and File Name, are useful for adding file information to the slug area for printing. To use a text variable, simply create a text box, place the insertion point in the box, and then insert the variable using the Text Variable submenu on the Type menu. You can also insert and format additional text along with the Running Header variable in the text box to create a header or footer across the top or bottom of the page on a document or master page.
Define a Text Variable
![]() To define text variables for all documents, close all open documents. Otherwise, the text variable is only available for the current document.
To define text variables for all documents, close all open documents. Otherwise, the text variable is only available for the current document.
![]() Click the Type menu, point to Text Variables, and then click Define.
Click the Type menu, point to Text Variables, and then click Define.
![]() Click New, or select an existing variable, and then click Edit.
Click New, or select an existing variable, and then click Edit.
![]() Type a name for the variable.
Type a name for the variable.


![]() Click the Type list arrow, and then select a variable type.
Click the Type list arrow, and then select a variable type.
![]() Specify the options you want for the selected variable type.
Specify the options you want for the selected variable type.
Options vary; some of the common options include:
• Text Before or Text After. Insert text to add before or after the text variable.
• Style. Select a style for the selected variable type.
![]() Click OK.
Click OK.
Work with Text Variables
• Insert Text Variables. Click to place the insertion point where you want the text variable (on a document or master page), click the Type menu, point to Text Variables, point to Insert Variable, and then select a variable.


• Delete Text Variables. Click the Type menu, point to Text Variables, click Define, select the variable, and then click Delete.
• Convert Text Variables to Text. Select the text variable in the document, click the Type menu, point to Text Variables, and then click Convert Variable To Text.
• To convert all instances of the text variable, click the Type menu, point to Text Variables, click Define, select the variable, and then click Convert To Text.
• Import Text Variables from Another Document. Click the Type menu, point to Text Variables, click Define, click Load, double-click the document with the variables, select the variables that you want in the Load Text Variables dialog box, and then click OK.
Creating a Book
Instead of creating long InDesign documents, you can break them up into smaller documents, like chapters, and then create a book to bring them all together. A book is not a document. It simply keeps track of all the documents in the book and coordinates document page numbers, colors, and styles. When you create a new book or open an existing book, the Book panel appears, displaying the book name in the title tab. In the Book panel, you can add, remove, move, or open documents.
Create a New Book
![]() Click the File menu, point to New, and then click Book.
Click the File menu, point to New, and then click Book.
![]() Enter a name for the book file.
Enter a name for the book file.

![]() Navigate to the location where you want to save the book.
Navigate to the location where you want to save the book.
![]() Click Save.
Click Save.
The tab for the Book panel displays the name of the book.
Open an Existing Book
![]() Click the File menu, and then click Open.
Click the File menu, and then click Open.
![]() Navigate to the location where the book you want to open is stored.
Navigate to the location where the book you want to open is stored.

![]() Select the book you want to open.
Select the book you want to open.
![]() Click Open.
Click Open.
The Book panel opens.
Add, Remove, Move, or Open Documents in a Book
![]() Open the book you want to edit.
Open the book you want to edit.

![]() Do any of the following:
Do any of the following:
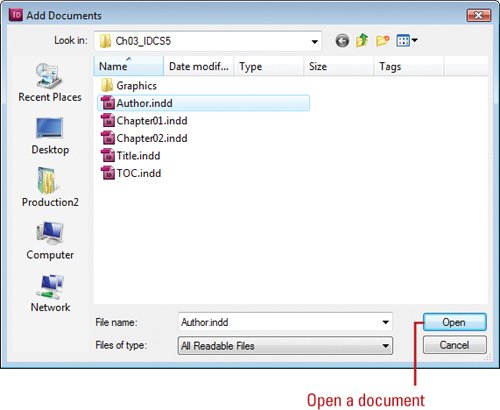
• Add a Document. Click the Add Document button on the panel, locate the document you want to add, and then click Open.
• Remove a Document. Select a document in the Book panel, and then click the Remove Document button at the bottom of the panel.
• Move a Document. Drag a document to a new position in the Book panel.
• Open a Document. Double-click a document in the Book panel. An open book icon appears, indicating the book is open.
• View a Document in Explorer or Finder. Select a document in the Book panel, click the Options menu, and then click Reveal in Explorer (Win) or Finder (Mac) (New!).
![]() Click the Save Book button on the panel.
Click the Save Book button on the panel.

![]() Click the Close button to close the book.
Click the Close button to close the book.
Did You Know?
You can replace a document in a book. Open the book, select the document that you want to replace, click the Options menu, click Replace Document, select the replacement file, and then click Open.
You can print an entire book. Open the book, and then click the Print Book button on the panel.
Managing Books
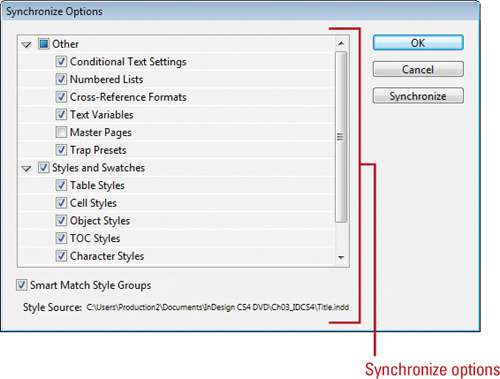
When you create a book, you can synchronize page numbers, colors, and styles for all the documents in the book. Each book uses a file called the style source to control the style sheets (including character, paragraph, table, and object styles), swatches, conditional text, numbered lists, text variables, and master pages for all the documents in the book. When you make changes to the style source file, all or selected documents in the book are synchronized to the file. You can set synchronizing options to specify the features that you want to keep up-to-date in the Synchronize Options dialog box. With the Smart Match Style Groups synchronize option, you can synchronize a book without creating duplicate styles.
Synchronize Books
• Synchronize Options. Open the book, click the Options menu, click Synchronize Options, select the options you want to synchronize, and then click OK.
• Set Style Source. Open the book, and then click the Style Source box next to the name of the document.
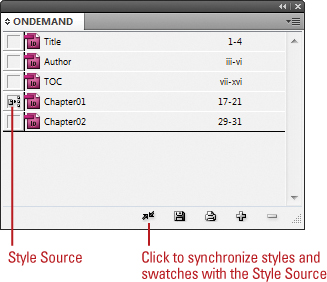
• Synchronize Style Source for a Book. Open the book, and then click the Synchronize Book button on the panel.
• Synchronize Style Source for a Document. Open the book, select the document, click the Options menu, and then click Synchronize Selected Documents.
Did You Know?
You can set page numbers for each document in a book. Open the book, click the Options menu, click Document Numbering Options, specify the options you want, and then click OK. See “Working with Page Numbers and Sections,” on page 74-75 for details about the page numbering options.
Set Page Numbering Options in a Book
![]() Open the book you want to change.
Open the book you want to change.

![]() Click the Options menu, and then click Book Page Numbering Options.
Click the Options menu, and then click Book Page Numbering Options.
![]() Select one of the following Page Order options:
Select one of the following Page Order options:
• Continue from previous document. Starts new pages in sequence.
• Continue on next odd page. Starts new pages on an odd number.
• Continue on next even page. Starts new pages on an even number.

![]() Select any of the following options:
Select any of the following options:
• Insert Blank Page. Select to insert a blank page when using odd or even page numbers.
• Automatically Update Page & Section Numbers. Select to automatically adjust page numbers in book documents.
![]() Click OK.
Click OK.
![]() To update numbering in a book, click the Options menu, choose Update Numbering, and then click any of the following:
To update numbering in a book, click the Options menu, choose Update Numbering, and then click any of the following:
• Update Page & Section Numbers.
• Update Chapter & Paragraph Numbers.
• Update All Numbers.
Creating a Table of Contents
A table of contents (TOC) appears at the beginning of a document, typically a long one, with page numbers associated with the beginning of main sections of the document. InDesign creates a table of contents based on the styles applied to paragraphs in the document. The table of content displays the text and page number associated with the paragraph styles. For example, when you apply different styles for chapter and topic titles in this book, you create a table of contents based on chapters and topics. So, before you can create a table of contents, you need to apply paragraph styles to text in your document.
Prepare for and Create a Table of Contents
![]() To prepare for creating a table of contents, do the following:
To prepare for creating a table of contents, do the following:
• Add Page for TOC. Add a page for the table of contents.
• Add Paragraph Styles. Apply different paragraph styles to the text that you want to use in the table of contents.
![]() Click the Layout menu, and then click Table of Contents.
Click the Layout menu, and then click Table of Contents.
![]() Enter text for the title of the table of contents, and then use the Styles menu to select a style for the title text.
Enter text for the title of the table of contents, and then use the Styles menu to select a style for the title text.
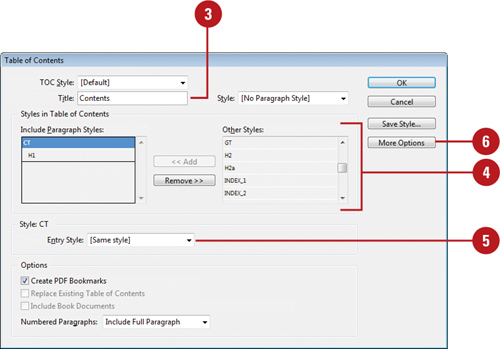
![]() Select the paragraph styles that are applied to text in your document (under Other Styles), and then click Add to include them in the other list (under Include Paragraph Styles).
Select the paragraph styles that are applied to text in your document (under Other Styles), and then click Add to include them in the other list (under Include Paragraph Styles).
• To remove a style, select it (under Include Paragraph Styles), and then click Remove.
![]() To format an entry in the table of contents, select the entry (under Include Paragraph Styles), click the Entry Style list arrow, and then select a style.
To format an entry in the table of contents, select the entry (under Include Paragraph Styles), click the Entry Style list arrow, and then select a style.
![]() Click More Options to display additional options.
Click More Options to display additional options.
![]() Select any of the following advanced options:
Select any of the following advanced options:
• Page Number. Select a position for the entry’s page number.
• Between Entry and Number. Select a separator character between the entry and the number.
• Sort Entries in Alphabetical Order. Select to alphabetize the table of contents.
• Level. Select an indent level for each entry in the table of contents.
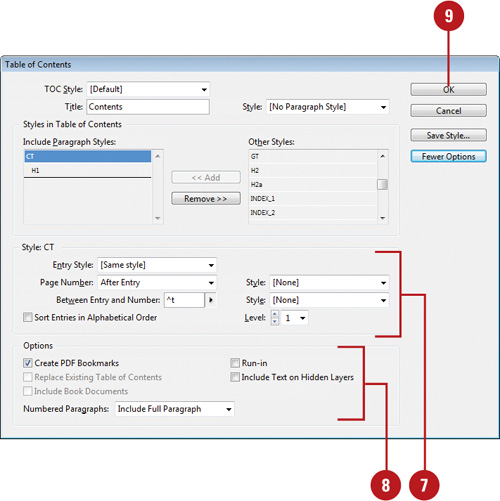
![]() Select any of the following options:
Select any of the following options:
• Create PDF Bookmarks. Select to add bookmarks to the PDF created from the table of contents.
• Replace Existing Table of Contents. Select to update or change the table of contents.
• Include Book Documents. Select to create a table of contents of all the documents in a book.
• Numbered Paragraphs. Select to format how paragraphs with auto numbering are formatted.
• Run-In. Select to create a single paragraph table of contents with each entry separated by a semicolon (;) and a space.
• Include Text on Hidden Layers. Select to use hidden text on layers.
![]() Click OK.
Click OK.
Starting an Index
An index is a table of entries in alphabetical order that reference topics, names, and other information in a book. The entries usually provide the page on which a particular word or topic is located in the book. The index is typically located in the back of a book. In InDesign, you can create only one index for a document or book. The single index can be a simple or comprehensive one to the information in a document or book. To create an index, you create a topic list (optional), create index entries (assign index markers to topics), generate the index, and then flow the index into a story. You create, edit, and preview an index in the Index panel, which displays index information using the Reference and Topic modes. The Reference mode displays complete index entries, while the Topic mode displays only topic (no page references and cross-references—“See” or “See also”). Instead of typing each topic when you create an index entry, you can create or import a list of topics to save time and create consistency.
Create or Edit a List of Index Topics
![]() Open the document or book you want to index.
Open the document or book you want to index.
![]() Select the Index panel.
Select the Index panel.
• You can also click the Window menu, point to Type & Tables, and then click Pages.

![]() Click the Topic option.
Click the Topic option.
![]() To view index entries from any open documents in a book, select the Book check box.
To view index entries from any open documents in a book, select the Book check box.
![]() Click the Create New Index Entry button to create a new topic or double-click a topic to edit it.
Click the Create New Index Entry button to create a new topic or double-click a topic to edit it.
![]() Type the topic name in the first box under Topic Levels. To create subtopics, type a name in the boxes below. Each item is indented a level.
Type the topic name in the first box under Topic Levels. To create subtopics, type a name in the boxes below. Each item is indented a level.
• To change an existing topic, double-click it, and then make the changes you want.

![]() To change the order, click the Up Arrow and Down Arrow button.
To change the order, click the Up Arrow and Down Arrow button.
![]() Click Add to apply it, and then click Done or OK.
Click Add to apply it, and then click Done or OK.
Create an Index Entry Using Keyboard Shortcuts
![]() Open the document or book you want to index.
Open the document or book you want to index.

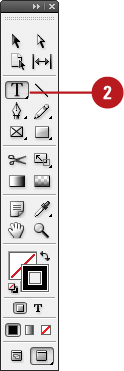
![]() Select the Type tool on the Tools panel.
Select the Type tool on the Tools panel.
![]() Select the word or words in the document you want to index.
Select the word or words in the document you want to index.
![]() Use any of the following keyboard shortcuts:
Use any of the following keyboard shortcuts:
• Standard Words. Press Shift+Alt+Ctrl+[ (Win) or Shift+Option+Command+[ (Mac). A standard word consists of any word.
• Proper Names. Press Shift+Alt+Ctrl+] (Win) or Shift+Option+Command+] (Mac). A proper name consists of a name, such as Gary O’Neal, which are indexed in reverse order. The name Gary O’Neal is indexed by O’Neal.
The index entry is added to the index using default settings.
Did You Know?
You can create a new entry from an existing one. Click an insertion point in the document or select text, click the Reference option in the Index panel, and then drag the existing entry to the New Entry button, make any changes, and then click Add or OK.
You can import a topic list. In the Index panel, click the Options menu, click Import Topics, select the document with the topic list (where each topic entry is separated by a enter (Win)/return (Mac), tab, semicolon, or a comma), and then click Open.
Creating an Index Entry
An index entry consists of a topic and a reference. You can create or import topics ahead of time or provide them when you create an index entry. A reference is a page number, page range, or cross-reference. Instead of indexing to a page number or range, you can index to a cross-reference, which refers to equivalent terms (denoted by “See”) or another related entry (denoted by “See also”) in the index. You can add an index entry several different ways in InDesign. You can use the New Page Reference dialog box, shortcut keys (see previous page for details), or the Index panel. If you want to index all occurrences of a word in a document or book, you can use the Add All button in the New Page Reference dialog box.
Create an Index Entry
![]() Open the document or book you want to index.
Open the document or book you want to index.
![]() Select the Type tool on the Tools panel, and then click to place the insertion point where you want to put the index marker or select in the document to use as the entry.
Select the Type tool on the Tools panel, and then click to place the insertion point where you want to put the index marker or select in the document to use as the entry.

![]() Select the Index panel.
Select the Index panel.
• You can also click the Window menu, point to Type & Tables, and then click Pages.
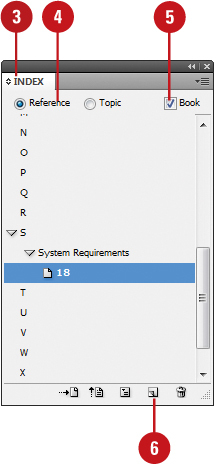
![]() Click the Reference option.
Click the Reference option.
![]() To view index entries from any open documents in a book, select the Book check box.
To view index entries from any open documents in a book, select the Book check box.
![]() Click the Create New Index Entry button to create a new topic or double-click a topic to edit it.
Click the Create New Index Entry button to create a new topic or double-click a topic to edit it.
![]() Type the topic name in the first box under Topic Levels. To create subtopics, type a name in the boxes below. Each item is indented a level.
Type the topic name in the first box under Topic Levels. To create subtopics, type a name in the boxes below. Each item is indented a level.
• To change an existing topic, double-click it, and then make the changes you want.
![]() To change the order, click the Up Arrow and Down Arrow button.
To change the order, click the Up Arrow and Down Arrow button.
![]() To sort the entry in the index, type the word you want to sort by in the Sort By box.
To sort the entry in the index, type the word you want to sort by in the Sort By box.
• You can also select the sort order of number, symbols, and languages.

![]() Click the Type list arrow, and then select any of the following:
Click the Type list arrow, and then select any of the following:
• Page Range. Select a type relating to a range (top of menu), such as Current Page, or those options starting with To Next, To End, or For Next, which extend from the index marker to the specified place.
• No Pages. Click Suppress page Range.
• Cross-reference. Select a type relating to references (bottom of menu), those options starting with See, and then type a topic or drag an existing topic from the bottom list to the Referenced box.
![]() To add emphasis to an index entry, select the Number Style Override check box, and then select a character style.
To add emphasis to an index entry, select the Number Style Override check box, and then select a character style.
![]() To add an index entry, do any of the following:
To add an index entry, do any of the following:
• Add. Adds current entry to the index and leaves the dialog box open.
• Add All. Locates all instances of the selected text and adds entries for each one to the index. InDesign considers only whole words, and searches are case-sensitive. You might end up with some duplicate entries.
• OK. Adds current entry to the index and closes the dialog box.
![]() When you’re finished, click Done or OK.
When you’re finished, click Done or OK.
Creating an Index
After you add index entries and preview them in the Index panel, you can create an index. When you create an index, InDesign compiles all of the index entries in the Index panel and page numbers in a document or across a book to generate an index story, which you can place within the existing document or in a separate document. If you make changes to any of the index entries or page numbering in your document or book, you need to update the index. In addition to generating an index, you can also select paragraph and character styles to format the appearance of the index the way you want.
Create an Index
![]() Open the document or book you want to index.
Open the document or book you want to index.

![]() Select one of the following:
Select one of the following:
• Document. Create an empty page at the end.
• Book. Create or open the document you want in the book.

![]() Select the Index panel.
Select the Index panel.
![]() Click the Generate Index button.
Click the Generate Index button.
![]() Select the following options:
Select the following options:
• Title. Enter the text that appears at the top of the index.
• Title Style. Select a style for the title text.
• Replace Existing Index. Select to update an existing index.
• Include Book Documents. Select to create a single index for all documents in the book. Deselect to create an index for the current document.
• Include Entries On Hidden Layers. Select to index entries on hidden layers.
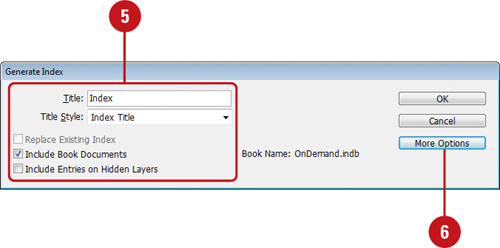
![]() To add formatting, click the More Options button, and then specify any of the following options:
To add formatting, click the More Options button, and then specify any of the following options:
• Nested or Run-in. Nested formats in the default indented paragraph style, while Run-in formats in the non-indented paragraph style.
• Include Index Section Headings. Select to create section headings (A, B, C, etc.).
• Include Empty Index Sections. Select to create sections headings for all letters even if an entry doesn’t exist for one.
• Level Style. Select a paragraph style for the different levels.
• Section Heading. Select a paragraph style for the headings.
• Page Number. Select a character style for the page numbers.
• Cross-reference. Select a character style for “See” or “See also.”
• Cross-referenced Topic. Select a character style for the related cross-reference topic.
• Following Topic. Specify a special character to separate the entry and page number.
• Between Page Numbers. Select to index entries on hidden layers.
• Between Entries. Specify a special character to separate an entry and subentry (for Run-in) or two cross-references under a single entry (for Nested).
• Before Cross-reference. Specify a special character to separate a reference and cross reference.
• Page Range. Specify a special character to separate a page range.
• Entry End. Specify a special character to appear at the end of entries.

![]() Click OK.
Click OK.
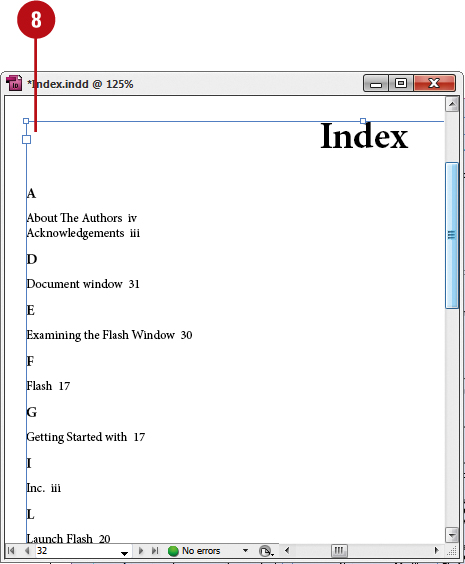
![]() With the place cursor, click where you want to insert the index.
With the place cursor, click where you want to insert the index.
Managing an Index
After you create an index, you can perform several common index management tasks, such as view all topics in a book, removing unused topics, find entries, edit entries, and delete entries. When you make changes to index entries or page numbering in your document or book, you need to update the index (generate a new one). If you just want to update the preview area in the Index panel, you can use the Update preview button on the panel.
Manage an Index
• View All Index Topics in a Book. Open the book file and all of its documents, open the Index panel, and then select the Book check box.

• Show Unused Topics from the Topic List. In the Index panel, click the Options menu, and then click Show Unused Topics.
• Remove Unused Topics from the Topic List. In the Index panel, click the Options menu, and then click Remove Unused Topics.
• Edit an Index Entry. In the Index panel, click the Topic option to edit a topic and update all entries using the topic or click the Reference option to edit an individual entry. Double-click an index entry or page reference, edit the entry, and then click OK.

• Delete an Index Entry. In the Index panel, select the entry or topic you want to remove, click the Delete Selected Entry button, and then click Yes.
• Find an Index Entry. In the Index panel, click the Options menu, click Show Find Field, type the name of the entry you want to locate, and then click the Up Arrow or Down Arrow.
• Locate Index Markers in a Document. Click the Type menu, click Show Hidden Characters, open the Index panel, click the Reference option, select the entry you want to locate, and then click the Go To Selected Marker button on the Index panel.
• Capitalize Index Entries. In the Index panel, select the entry you want to change, click the Options menu, click Capitalize, select an option to capitalize what you want, and then click OK.

• Update the Index Preview. In the Index panel, click the Update Preview button on the Index panel to update the preview area in the Index panel after a change in the document.
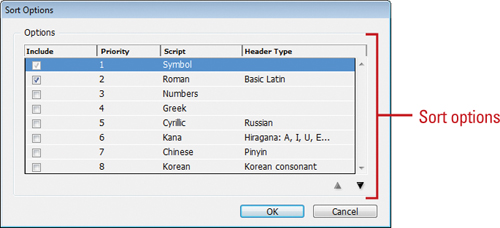
• Change Language Sort. In the Index panel, select the entry you want to change, click the Options menu, click Sort Options, select the check boxes for the languages you want, use the Up Arrow and Down Arrow buttons to move items in the order you want, and then click OK.
Did You Know?
You might see codes in the Index panel. Before the index is generated, codes appear in place of page references in Reference mode. The codes include: PB (on pasteboard), HL (on a hidden layer), HT (in a hidden condition), PN (in overset text), and Master (on a master page). Click the Update Preview button in the Index panel to view them.
Adjusting Layouts
If you ever need to change the page size or margins after you have already added a document page or created a master page, you can enable the Layout Adjustment option to have InDesign adjust the layout and position of elements on document and master pages. The Layout Adjustment dialog box allows you to enable the option and set other related adjustment options, such as Allow Graphics and Groups to Resize and Ignore Object and Layer Locks.
Change Layout Adjustment Options
![]() Click the Layout menu, and then click Layout Adjustment.
Click the Layout menu, and then click Layout Adjustment.
![]() Select the Enable Layout Adjustment check box.
Select the Enable Layout Adjustment check box.

![]() Select from the following options:
Select from the following options:
• Snap Zone. Enter a distance value for snapping an object to a margin, column guide, or page boundary.
• Allow Graphics and Groups to Resize. Select to allow graphics and groups to resize during the adjustment.
• Allow Ruler Guides to Move. Select to allow ruler guides to move during the adjustment.
• Ignore Ruler Guide Alignments. Select to keep objects from moving along ruler guides during the adjustment.
• Ignore Object and Layer Locks. Select to move locked objects and layers during the adjustment.
![]() Click OK.
Click OK.
See Also
See “Setting Up a Document” on pages 34-35 for more information on changing the document page size and margins.