
Chapter 9
Developing Batch Processes and Scripts
IN THIS CHAPTER
![]() Choosing batch-processing and scripting options
Choosing batch-processing and scripting options
![]() Using localized batch processing
Using localized batch processing
![]() Creating scripts and using localized script execution
Creating scripts and using localized script execution
![]() Using aws-shell
Using aws-shell
The chapters up to this point in the book rely on performing tasks one at a time using a variety of methods that include the console GUIs, Command Line Interface (CLI), and specially designed applications. That is, you perform tasks one at a time without any chance of automating the task. That’s the best approach while you’re discovering how the various services work. However, after you know how the services work and need to perform tasks quickly, you’re ready to add automation.
You can automate AWS tasks using two techniques: batch processing (requesting that AWS perform a series of related tasks on a schedule) and scripting (writing code to perform unrelated tasks at any desired time). This chapter begins by reviewing the options you have for performing both levels of automated processing.
Most developers use automation to perform tasks, so you might already have tools that you like using. The next three sections of the chapter discuss methods of performing both batch processing and scripting using traditional methods. Your specific method might not appear in the chapter, but the basic techniques for performing localized batch and script processing remain essentially the same.
It doesn’t take long for popular environments such as AWS that have enough complexity to attract custom tool development. The final section of the chapter helps you work with aws-shell, a custom tool developed by Amazon developers to make working with AWS services considerably easier. Because aws-shell is custom built to work with AWS, it includes many automation features that your favorite tool doesn’t have. This final section helps you understand the benefits of using aws-shell but doesn’t seek to move you from your favorite tool to something that might seem unfamiliar or less useful.
Considering the Batch-Processing and Script Options
Batch processing and scripting both have the same essential focus: to automate tasks. To be productive, developers need some way to automate tasks, which allows a focus on unique development needs. However, batch processing and scripting go about the automation process in different ways, and they each have a different place in the developer’s toolbox. The following sections discuss differences between batch processing and scripting, and help you understand the role of each. In addition, you consider the options available for accomplishing each automation type.
Defining the difference between batch processing and scripting
Batch processing and scripting have different purposes when it comes to working with AWS (or any other cloud-based application strategy for that matter). Here’s a basic summary of the differences between the two:
-
Batch processing: Uses a data focus to manage data directly either online or offline. The purpose of batch processing is to manipulate the data in some way to make it easier to process. For example, updating the data with the latest numbers requires a batch process. You can also use batch processing for data shaping. Removing redundant records or filling in missing data also works well as a batch process. The point is that batch processing focuses on data manipulation using repetitive methodologies.
 Batch processing does have some specific characteristics. Developers often associate batch processes with highly variable usage patterns that have significant usage peaks. For example, end-of-the-month data processing falls into this category. The batch process is the same each month, but the pattern can vary significantly depending on the amount of data to process and any special requirements (such as the addition of year-end processing). A batch-processing scenario can also require a complex setup using multiple AWS services to keep track of jobs, provide job status updates, track job performance, and automate fault tolerance by automatically resubmitting failed jobs.
 -
Scripting: Uses a task focus to accomplish goals that may not directly change data. For example, measuring application efficiency or adding new application modules both work as scripted tasks. Most scripts run in real time, but you can also schedule scripts to run later. Scripts tend to provide greater flexibility than batch processes, but scripts also require more work to create. Scripts offer a task-specific approach to perform both application and data manipulation using flexible methodologies.
Scripting solutions tend to handle uncertainty better than batch solutions. When performing a batch task, you know that certain data will require manipulation at given times to meet specific goals. A scripting scenario may handle uncertain data at unusual intervals to meet goals based on conditions, some of which are unforeseen. For example, you don’t create new users every day, and the data and requirements for adding a user changes over time; consequently, adding users is a task that you handle better using scripts. - Overlapping and Combining: As with everything, no absolute rule exists saying that you must use a particular approach for a particular need. For example, it’s perfectly acceptable to perform ad hoc monitoring using a batch process or data manipulation using scripting approaches. Often, the best approach is the one that you’re most familiar with and that allows you to perform the task most quickly. In addition, you must consider the availability of tools and the costs involved in automating the task. You may also find that you need to combine scripting and batch processing, creating another type of overlap between the two. For example, you might create a script that calls on a batch file and then schedule that script to run at a particular time each day.
Understanding the batch-processing options
You have access to a wide assortment of batch-processing options when working with AWS. In fact, so many options are available that covering them all in a single book chapter isn’t possible. This book is written with the developer in mind, so the following sections address batch-processing options that involve various levels of complexity and flexibility. For example, using AWS Batch is simple, but it may lack some of the flexibility you need to address specific needs.
Using AWS Batch
AWS Batch (https://aws.amazon.com/batch/) is possibly the simplest cloud-based batch-processing solution that you’ll find. It’s also easy to set up, and you don’t pay for anything but the resources that the service uses. As with most AWS services, you have access to an API for interacting with AWS Batch (http://docs.aws.amazon.com/batch/latest/APIReference/Welcome.html), so you can easily add batch processing directly to your application. According to the article at https://venturebeat.com/2016/12/01/aws-launches-batch-processing-service-in-preview/, Amazon introduced AWS Batch in response to similar services offered by other cloud-based vendors.
AWS Batch may sound like a perfect solution, but you need to know that the simplicity and ease of setup come at the cost of flexibility. For example, if you need to integrate local data or work with other cloud-based solutions, AWS Batch won’t do the job unless you’re willing to perform a lot of custom development. The kludge you create to glue things together will be fragile, which means that you also need to consider the reliability of the result. AWS Batch is a good solution, but you need to think about its limitations before delving into it.
Extending AWS Batch with Docker (https://www.docker.com/) is possible. Of course, this still means creating a custom solution of sorts, but Docker provides great support for creating a wealth of application types. According to http://docs.aws.amazon.com/batch/latest/userguide/Batch_GetStarted.html, you can simply submit your Docker image to AWS Batch instead of creating a batch job as normal. The article at https://aws.amazon.com/blogs/compute/creating-a-simple-fetch-and-run-aws-batch-job/ gives you the information needed to build a basic fetch-and-run job. You can use this information to begin creating more complicated batch-job scenarios.
Using Amazon EC2 Spot
Many developers will find that using a simple solution such as AWS Batch won’t work, but that doesn’t mean you can’t rely on AWS to create a batch-processing solution. The article at https://aws.amazon.com/blogs/compute/cost-effective-batch-processing-with-amazon-ec2-spot/ describes how you can couple various AWS services together to create a batch-processing solution that’s both robust and flexible. The problem is that now you’re looking at a significant amount of complexity because the solution in question relies on a number of services:
- EC2: Provides processing power.
- S3: Individual buckets hold incoming and outgoing data.
- Lambda: Triggers event processing when new data arrives in the incoming bucket.
- SQS: Holds the job-processing queue.
- DynamoDB: Contains status information about the various jobs and allows for job updates.
- EFS: Provides file system-type storage for EC2.
Depending on how you configure the setup, the number of services can increase. Yes, this is a complete solution based exclusively on AWS, but to obtain the flexibility and scalability that most businesses need, you also have to consider the complexity and the potential fragility of the setup.
Creating a batch process using CLI
One of the ways you can use to reduce the complexity of creating a purely AWS approach to batch processing is to rely on CLI scripts. The article and resources at https://github.com/danilop/SampleBatchProcessing provide one such approach to the problem. As with most flexible solutions, this one relies on a number of AWS services to get the job done. However, by scripting the setup, you make creating new configurations as needed easier.
Understanding the scripting options
As with batch processing, too many script solutions exist to discuss in a single chapter. In fact, if anything, you have more scripting choices when working with AWS than you have batch solutions. The script solutions also tend to vary more in approach, functionality, and flexibility.
Scripts can also execute automatically based on events. Chapter 10 discusses one such option using Lambda. The following sections provide an overview of common scripting options to meet generalized scripting scenarios. You need to do your homework and view the wide variety of options before making a final choice. These sections help make you aware of the potential solutions so that you can wade through the vast number of options with greater ease.
Working with SDKs
Most people associate scripting with simple languages. However, today developers often create script-like applications using languages capable of complex tasks such as Java and Python. With this in mind, the first place a developer should look for scripting solutions is at the SDKs that Amazon provides at https://aws.amazon.com/code. The page includes SDKs for many major languages, and you use the SDKs to simplify development tasks that can include scripting various configuration tasks.
 Note that this same page includes a variety of example applications based on the SDKs. Many of these examples actually show how to implement scripting solutions. For example, the Simple E-mail Service (SES) scripts found at
 https://docs.aws.amazon.com/ses/latest/DeveloperGuide/Welcome.html fall into the scripting category because they really aren’t end-user applications. Another such example appears at https://aws.amazon.com/code/4026240853893296. This example shows how to bootstrap applications using AWS CloudFormation. The point is that you can use your favorite language to create needed AWS scripts.
Using AWS OpsWorks
AWS OpsWorks (https://aws.amazon.com/opsworks/) is a Chef-based (https://www.chef.io/solutions/infrastructure-automation/) application configuration management system that performs essential tasks automatically. The interesting thing about this setup is that if you know how to write Chef scripts (https://docs.chef.io/resource_script.html), you can use the same knowledge to automate AWS actions (see the article at http://docs.aws.amazon.com/opsworks/latest/userguide/cookbooks-101-basics-commands.html).
One of the benefits of relying on a product such as Chef is that it works across multiple environments (https://www.chef.io/solutions/cloud-management/). This means that you can use Chef scripts to integrate multiple cloud solutions and help them work together to achieve specific goals. Chef currently works with these cloud-based environments:
- Amazon AWS
- Google Compute Engine
- HP Cloud
- IBM Smartcloud
- Microsoft Azure
- OpenStack
- Rackspace
- VMWare
Relying on the EC2 Run Command
The EC2 Run command (https://aws.amazon.com/ec2/run-command/) gives you the means to run scripts from a remote location. As with some other AWS solutions, this one is free except for the resources used to complete any requested tasks. This is an AWS-only solution, which means that you can run commands anywhere across AWS (including across multiple EC2 instances), but you can’t use the scripts to perform tasks on other cloud-based environments or on your local system. As a result, the potential for integration of task environments is limited. The article at https://www.infoq.com/news/2016/07/aws-multi-cloud-scripting offers some additional insights about this solution.
Depending on third-party solutions
Many third-party solutions out there promise to make scheduling tasks easier and provide a level of automation similar to that found in scripting. For example, ParkMyCloud (http://www.parkmycloud.com/) makes it easy to schedule a wide range of tasks that you might normally script using custom code. The blog posts at http://www.parkmycloud.com/blog/ obviously try to convince you that you can’t live without this solution, but they also offer good food for thought even if you choose not to use ParkMyCloud.
Using a third-party solution may save time and effort scripting, but it also gives you ideas for creating scripts that will truly make you productive. The point is that you need to choose options that help save money so that your development budget isn’t wasted on resources you don’t actually use. Unlike a local development environment, a cloud environment offers options such as turning off running instances. By optimizing your development environment, you keep costs under control and may find that developing in the cloud is actually less expensive and more efficient than using local resources.
Performing Batch Processing Locally
Localized batch processing uses the built-in capabilities of systems owned by an organization. You can use batch processing for a variety of tasks. Larger businesses will naturally want to use cloud-based batch processing for common needs, partly because their IT departments are large and complex. However, a smaller business could use localized batch processing for all needs depending on what those needs are. Something as simple as Task Scheduler (https://msdn.microsoft.com/library/windows/desktop/aa383614.aspx) on Windows can enable you to perform tasks and a schedule on AWS. Interestingly enough, many localized task-scheduling applications include programmable access through APIs, so you can turn even a rudimentary capability into something better suited to meet needs in the cloud. Here are some issues to consider for localized batch processing:
- Management: Many organizations want to reduce software management requirements and localized batch processing does need local talent to maintain. However, offsetting the need for additional human resources is the capability to maintain firm control over the batch process.
- Integration: Cloud-based batch processing may not work well with local batch-processing needs. Where you need to integrate local and cloud resources, using a localized batch-processing strategy may work better.
- Reliability: There is a misperception that cloud-based means extreme reliability. However, AWS can and does go offline. The stories at
https://www.geekwire.com/2017/amazon-explains-massive-aws-outage-says-employee-error-took-servers-offline-promises-changes/andhttps://www.theregister.co.uk/2017/03/01/aws_s3_outage/tell you how bad things can get. In this case, AWS didn’t even tell anyone it was down, so no one could know there was even a need to recover. A localized batch-processing solution can prove to be every bit as reliable as a cloud-based solution. The difference is the kinds of issues that will affect the two solution types. A localized solution is more susceptible to local events, such as outages due to weather. Cloud-based solutions are more susceptible to global events or to human error (because far more humans are involved, more potential failure points exist). - Security: Using local batch processing is generally more secure than using cloud-based batch processing because you can exercise tighter control over when and how the batches execute. The more sensitive the data you manage using batch processes, the more careful you need to be with regard to security.
- Speed: No matter how you look at it, unless your data resides with just a single cloud provider in just one location and you have no need to integrate local data, local batch processing is going to be faster than a cloud-based solution. Given that developers are constantly fighting time (in that users want everything fast, and then faster still), speed is a major concern when considering the use of localized batch-processing techniques.
Developing Scripts
Creating scripts often means working with the CLI to determine how to create the required commands. This development process involves playing with AWS to ensure you understand what is going on at a low level. Fortunately, the CLI does provide some functionality to make it easier to perform tasks and develop scripts resulting from your efforts faster.
- Client-side filtering: Trying to process every result, even if you may eventually need them, consumes a lot of local resources. You can fine-tune the results you actually use on the client side by adding the
--querycommand line switch. To use this switch, you must make your request using the JSON Matching Expression Path (JMESPath, which is pronounced James Path) language described athttp://jmespath.org/. The article athttp://opensourceconnections.com/blog/2015/07/27/advanced-aws-cli-jmespath-query/provides some interesting examples of how to use JMESPath with AWS. - Command completion: When working with Linux systems, you can enable command completion. This feature enables you to press Tab to complete a command rather than type the entire command from scratch. You can discover more about command completion at
http://docs.aws.amazon.com/cli/latest/userguide/cli-command-completion.html. - Multiple profiles: The
awsutilityconfigfile (found in the user’s.awsfolder) can contain multiple profiles, each of which can contain different IAM user role settings. These profiles appear in a[profile name]block where you replacenamewith the name of the profile. Using multiple profiles also lets you perform tasks using the appropriate credentials. Modify theawsutilitycredentialsfile to add other credentials to the list. Each credential pair (private and public key) appears in a separate[name]block. To switch between roles, you add the--profile namecommand-line switch to your command. - Server-side filtering: By default, AWS serves up a list of 1,000 for various requests. Moving that data across the network slows your script to a crawl. The
--filtercommand-line switch supplied with many commands enables you to reduce the number of results coming from the server to the client, thereby improving overall scripting speed. - Service configuration defaults: The
awsutilityconfigfile can contain default settings for the various services. The use of default settings makes it possible to type shorter commands and ensures that you execute the commands consistently. Each default setup appears with the service name, an equals sign, and the settings. For example, here is a default S3 setup:s3 =
max_concurrent_requests = 100
max_queue_size = 10000 - Text output: Often you need to have text-only output to pass to another command in a pipe. In this case, you use the
--output textcommand-line switch to remove the extra characters that often cause problems with textual output. - Waiting: Some script commands require quite a bit of time to execute, and you can’t proceed to the next step until they complete. In this case, you can add the
waitargument to the command to tell the CLI that you want to wait for the command to complete before proceeding. The wait argument always appears after the service name, such asaws ec2 wait.
Using Scripts Locally
Some developers get caught up with all kinds of fancy scripting schemes when a simple solution will do just fine. In many cases, all you really need is the scripting capabilities provided by your local platform. The main reasons to use this approach are simplicity and speed.
The command processor for platforms such as Windows will repeat any series of aws utility commands as a script. All you really need to do is record the commands you commonly use in a text file with an appropriate extension, such as .bat. Depending on the platform capabilities, you may have access to complex flow control functionality as well, but even the most basic command processor supports limited flow control.
Using an ad hoc scripting approach like this is also fast because you can put the script together in minutes. You won’t want to create a complex script this way, but a simple series of steps will work fine. The idea is to keep the task small and approachable.
After you get past basic needs, however, a command-processor approach won’t work. You still have access to options such as Anaconda. The notebooks you can create by using Python code in Anaconda can become extremely complicated. Performing any task from your system that you could perform from a cloud-based solution is possible; however, you must consider the following issues when using this approach:
- Availability: The script you create is available only on your system (or network). Consequently, if someone else needs the script, you must send it separately because you lack a centralized repository of scripts that anyone in your organization can use.
- Security: Keeping scripts local does tend to ensure that only people who have a need to access the script can actually access it. In addition, you can more easily control when and how someone uses the script.
- Speed: Because localized scripts drag every piece of data across the network, you incur a speed penalty using them. However, using techniques such as filtering can mitigate this issue, and you might actually find that your scripts execute faster when you must couple the AWS output with information from local sources.
Interacting with aws-shell
Trying to remember every aws utility command, even with the availability of help, is tough. In fact, it’s downright impossible. So you can spend hours with the online documentation and type endless experimental commands, or you can get some type of help. The aws-shell utility works with the aws utility to provide an interactive CLI experience. You use it to make working with aws easier. The following sections discuss how you can use aws-shell to make your script and batch-process experience better.
Considering aws-shell features
The aws-shell utility (https://aws.amazon.com/about-aws/whats-new/2015/12/aws-shell-accelerates-productivity-for-aws-cli-users/) comes with a host of interesting features. The interactivity alone makes it worth using, but you also get these additions as part of the package (make sure to also check out the blog that is available from within the preceding article link):
- Auto-completion: As you type commands, you see a list of available options to complete the next step. For example, after you type aws, you see a list of services that you can add as the next step in the command process.
- Auto-suggestion: If the shell recognizes a pattern to the values you type, it gives you a completed command. Pressing Tab automatically enters the remaining text.
- Command history: Even though most command-prompt and terminal-window implementations retain a command history, the information is available for only the current session. The
aws-shellutility stores this information in a file for later use. - Dot (.) commands: The
aws-shellgives you access to additional aws-shell–specific commands through the dot (.) prompt. Here are a few examples:- .edit: Provides the means for saving the commands you type as part of a shell script.
- .profile: Modifies the profile used to execute commands so that you don’t have to include the
--profileargument every time you type a command. - .cd: Changes the directory to the specified location on disk.
- Fuzzy searches: You may not remember an argument or other command component precisely. Typing a value that appears as part of the actual argument displays a list of suggestions that you can use in place of that part you remember.
- Inline documentation: Help is always available as part of the shell. As you type values, the shell automatically displays help for that value so that you can be sure you’re typing the right information.
- Server-side auto-complete: Typing a command component that requires a server-side value, such as an ARN, usually requires a lookup on your part. When using
aws-shell, the shell performs the lookup for you and displays a list of acceptable values. - Shell command access: If you need to access the underlying operating system commands, type an exclamation mark (!) before the command. For example, type ! dir and press Enter to obtain a directory listing on a Windows system.
- Shorthand auto-complete: You can use shorthand notation to define a specific longer sequence of commonly used commands. Typing the shorthand form is the same as typing the full sequence.
- Toolbar options: The status bar shows a list of function keys that you can press to obtain specific functionality from aws-shell. For example, you can turn fuzzy searches on or off as needed.
Getting aws-shell
Because you have Anaconda installed on your system, you also have an appropriate version of Python installed, and you can use the pip utility to perform the task. To install aws-shell, open a command prompt or terminal window, type pip install --upgrade aws-shell, and press Enter. You see a series of installation messages as pip performs the installation process, as shown in Figure 9-1.

FIGURE 9-1: Perform the installation of the aws-shell using pip.
To test your installation, type aws-shell and press Enter. You see the initial display, shown in Figure 9-2. Note that the status bar shows the function keys you can press to enable or disable specific aws-shell features. At this point, you might want to get a cup of coffee because the documentation must download; waiting for a few minutes for this process to complete makes using aws-shell easier.
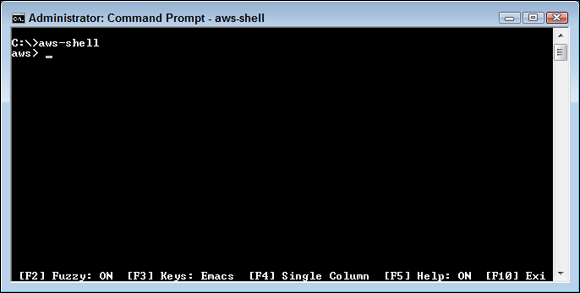
FIGURE 9-2: Start aws-shell for an initial test.
Performing simple tasks
Most previous commands found in this book begin with aws or some other CLI command. Note the prompt in Figure 9-2. Every command you type assumes that you have preceded it with aws. Consequently, if you want to perform a task using Elastic Beanstalk, you type elas to display a list of commands. It’s then possible to press the down-arrow key to select one of these commands as shown in Figure 9-3.

FIGURE 9-3: Use the down-arrow key to select a command.
Press the spacebar to continue the command. You now see a list of commands that you can type, along with help information, as shown in Figure 9-4. Note that the help information is actually getting in the way in this case. You can turn it off by pressing F5. (Unfortunately, pressing F5 right at this moment will cause the command to terminate, but you can start it again without a problem.)

FIGURE 9-4: The aws-shell utility provides you with all the information needed to create useful commands quickly.
The service name appears in red letters. Type des after the space. You see a listing of possible commands, as shown in Figure 9-5. As before, you press the down-arrow key to select a particular command. For this example, select describe-environments. When you select a particular command, the text turns turquoise.

FIGURE 9-5: Choose a command to execute.
The default setup for aws for this book is to output information in tabular form. Type -- to display a list of options for this command, as shown in Figure 9-6. Use the down-arrow key to select --output. Note that the options appear in dark green. The help screen also tells you what to type next. In this case, you type a string that contains the format you want to use for the output.

FIGURE 9-6: Select options to modify command execution.
Press the spacebar to select the command. This time, you don’t see any help information; you must know that text is one of the options. Type text and press Enter. You see the command output, as shown in Figure 9-7.

FIGURE 9-7: After the command executes, you see the output just as you would when using aws.
Of course, you can just as easily see the output in JSON format. Press the up-arrow key and you see the command repeated. Press Backspace to remove text and type json. Press Enter. Figure 9-8 shows the new output. This technique relies on using the command history. Interestingly enough, even after you stop and restart aws-shell, you have access to this command simply by using the command history.

FIGURE 9-8: Using the history feature makes modifying commands easy.
The display has gotten messy at this point. You can clean it up on most platforms using the clear screen (cls) command. Of course, this means accessing the underlying command processor. Type !cls and press Enter. If your system supports the cls command, you see the screen cleared.
Obtaining help
One of the commands that you don’t see listed when you work with aws-shell is help. The command is still there, but you have to remember that it is available. For example, to see the help associated with the ec2 service, type ec2 help and press Enter. You see output similar to that shown in Figure 9-9. The aws-shell utility automatically uses any paging utility available on your platform to display one page of help information at a time.

FIGURE 9-9: The aws-shell utility provides full access to aws help.
Editing your commands
One of the handiest features of aws-shell is the capability to save your commands in permanent form. After you experiment for a while and know you have the right set of commands in place, it’s time to create a script or batch file. To perform this task, type .edit and press Enter. What you see is the text file editor for your particular platform with the history of the commands you have typed, as shown in Figure 9-10.

FIGURE 9-10: Commands you type appear in the text file that you save as a script.
Note that the file lacks the !cls command that you type in the “Performing simple tasks” section, earlier in this chapter. The only commands you see are those that you actually type for aws. You can edit this file and then save it as needed. For example, when working with Windows, you can save the file with a .bat file extension and repeat the commands as a script.
Of course, if you want to use aws-shell as a means for creating scripts, you really do need to clear the history before each session. No command exists for performing this task now. Consequently, you must delete the history file found in the .awsshell folder of your system. This folder also contains an awsshellrc file that you can use to change the default settings for your aws-shell setup.