
CHAPTER 43
DESIGN QUALITY ASSURANCE (QA) PLAY
How do I test the quality of the designed vs. engineered experience designs?
Engineering a product experience that deviates from the designs that have been delivered always results in a subpar product. This play will help you incorporate more rigor by being mindful of a design QA process within your organization. It will ensure that the engineering team has implemented the actual experience designed, maintaining product quality and consistency.
Who Are the Key players in the Design QA play?
| ROLE | WHO’S INVOLVED | RESPONSIBILITIES |
|---|---|---|

DRIVER |
|
|
 CONTRIBUTOR |
|
|
|
|
THE HOW
To run an effective design QA, you need to be mindful of:
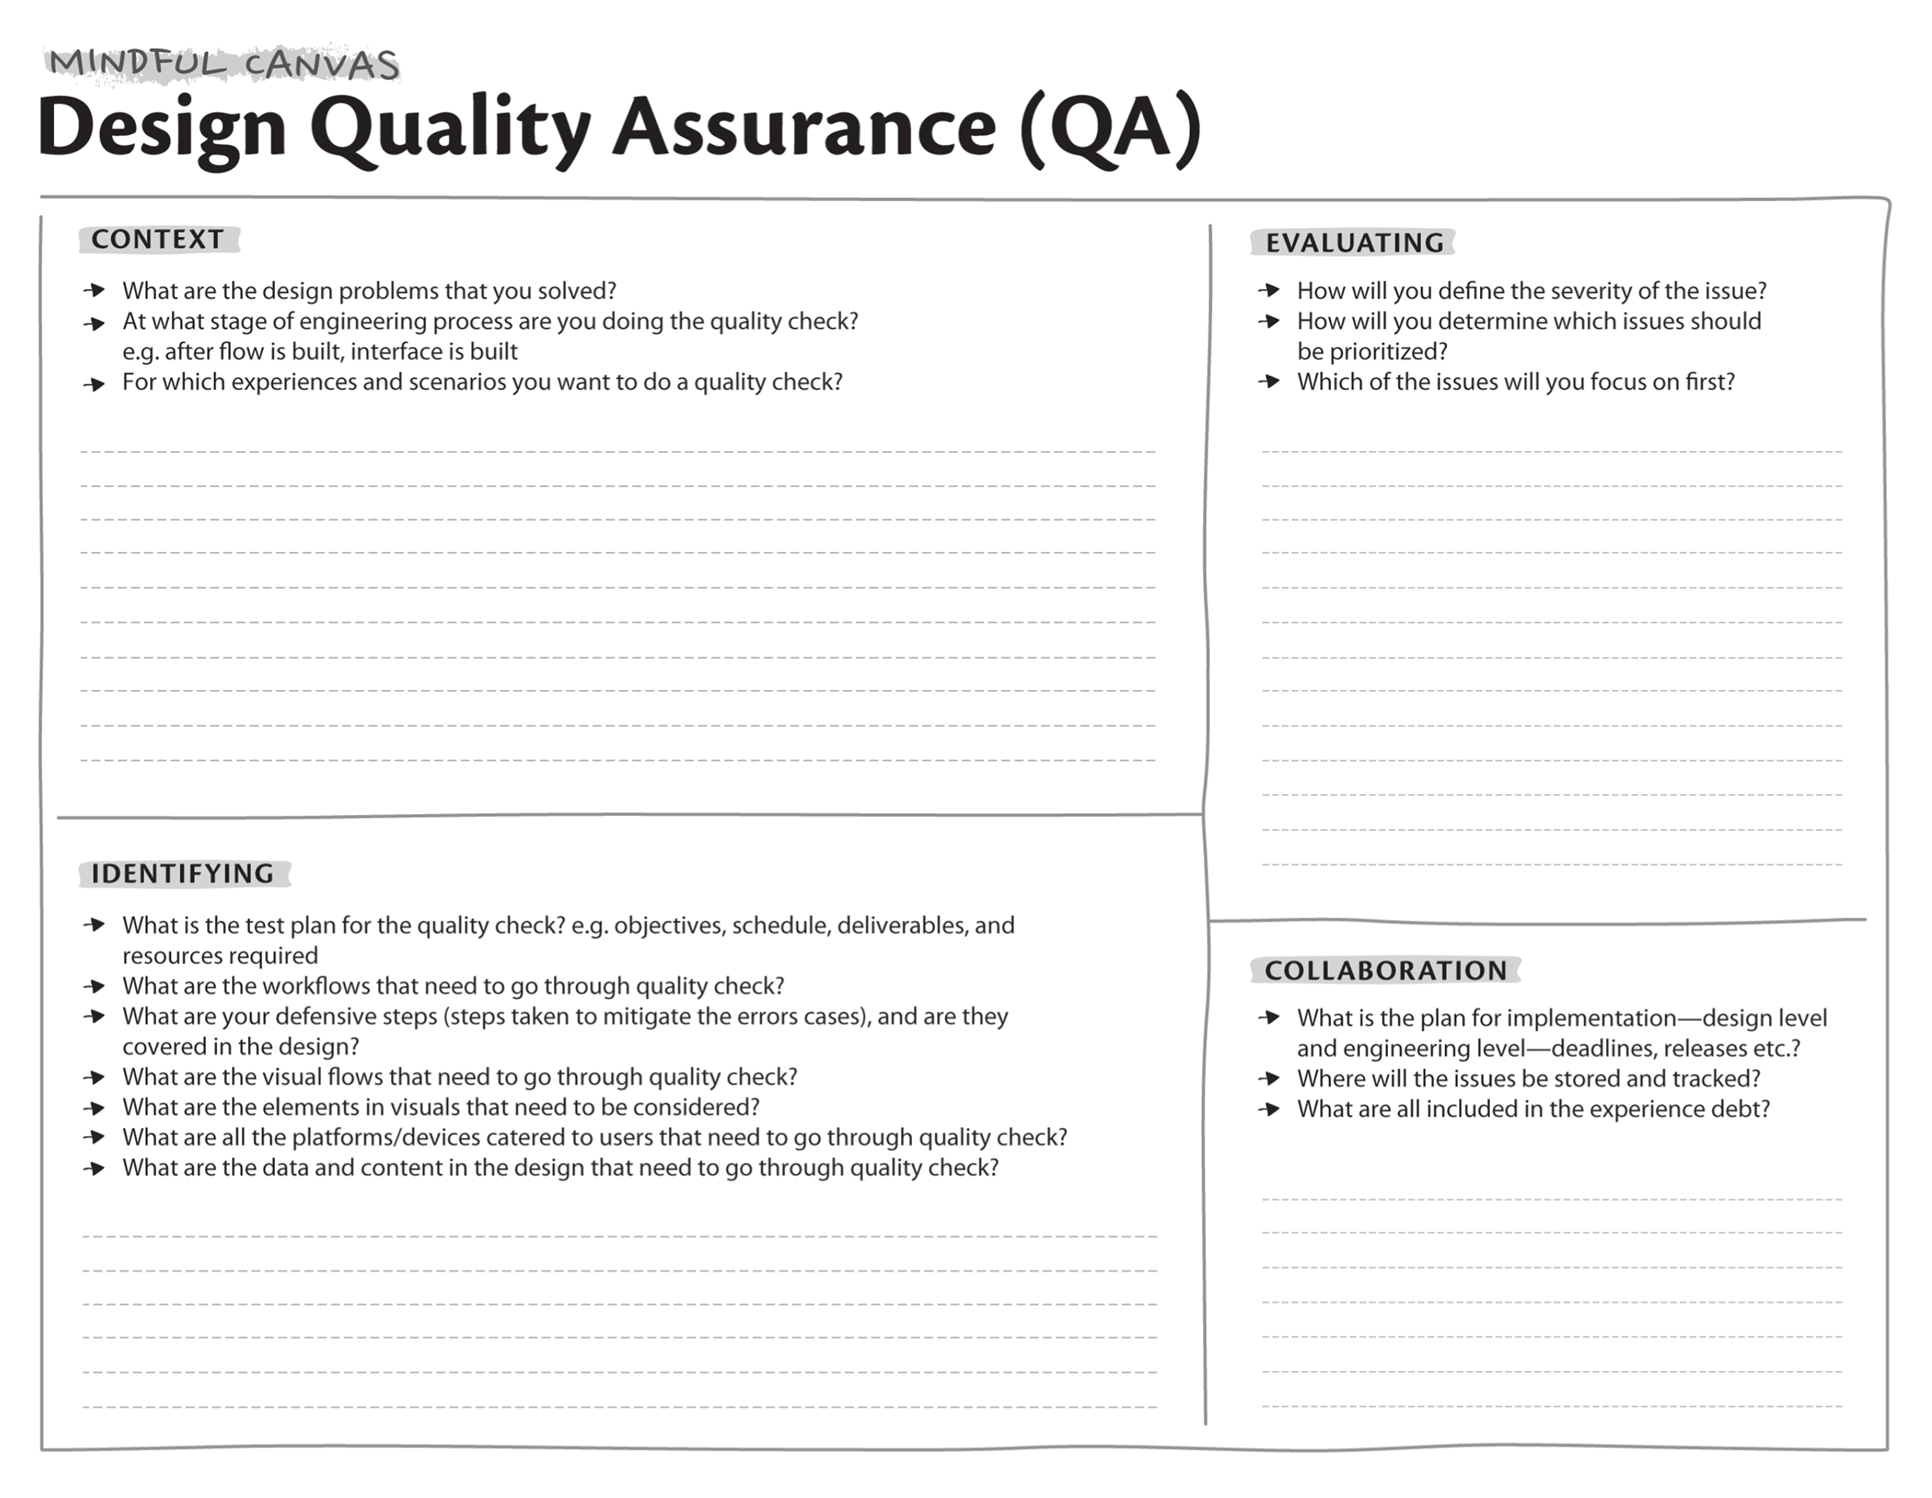
1. The CONTEXT
To catalyze an effective design QA process, first recall the design problems you set out to solve. This will help you to keep an eye out for them while doing the QA. Then, identify the experiences and scenarios you want to perform the quality check on. Determine when the quality check takes place in the engineering process: for example, after the framework is built, after a particular flow is built, or after the entire end‐to‐end product is built. This will help you define your scope and allocate resources better. Investing time in a frequent and progressive design QA will save subsequent time and resources.
Socialize the process with the peer practitioners to ensure there is awareness of what will come, and to ensure you have access to the latest build.
2. IDENTIFYING the Issues
Create a plan for the quality check that describes the objectives, schedule, milestones, deliverables, resources required, and so forth. Be sure to review the entire engineered product and use it once before the QA. This will give you a high‐level understanding of the issues that are present in the product. Keep the design system in hand as a source of truth for the intent and specifications of the design (Chapter 42: “Design System Play”).
Start doing the quality check on both a system and a design level.
The system‐level quality check includes reviewing experiences, journeys, workflows, and the steps that users should follow to achieve their intended goal.
Quality checks should be performed for different scenarios and contexts. You typically will see three types of issues:
- Experience: Key context and friction points have not been addressed.
- Flow: Incorrect linkage of flows, mostly from screen to screen.
- Usability: The designed solution is not intuitive, learnable, or efficient.
The design‐level check includes reviewing colors, padding, asset sizes, error states, and data and content types used.
Quality checks should be performed on all of the different platforms and devices catering to your users. You typically will see two types of issues:
- Components and patterns: Inconsistencies in components and behavioral design patterns.
- Aesthetic: Inconsistencies in colors, typography.
Ensure all the issues are appropriately documented in a way that is easy for stakeholders to understand and prioritize. Include a detailed description of the issue, an image, and any relevant links.
3. EVALUATING the Issues
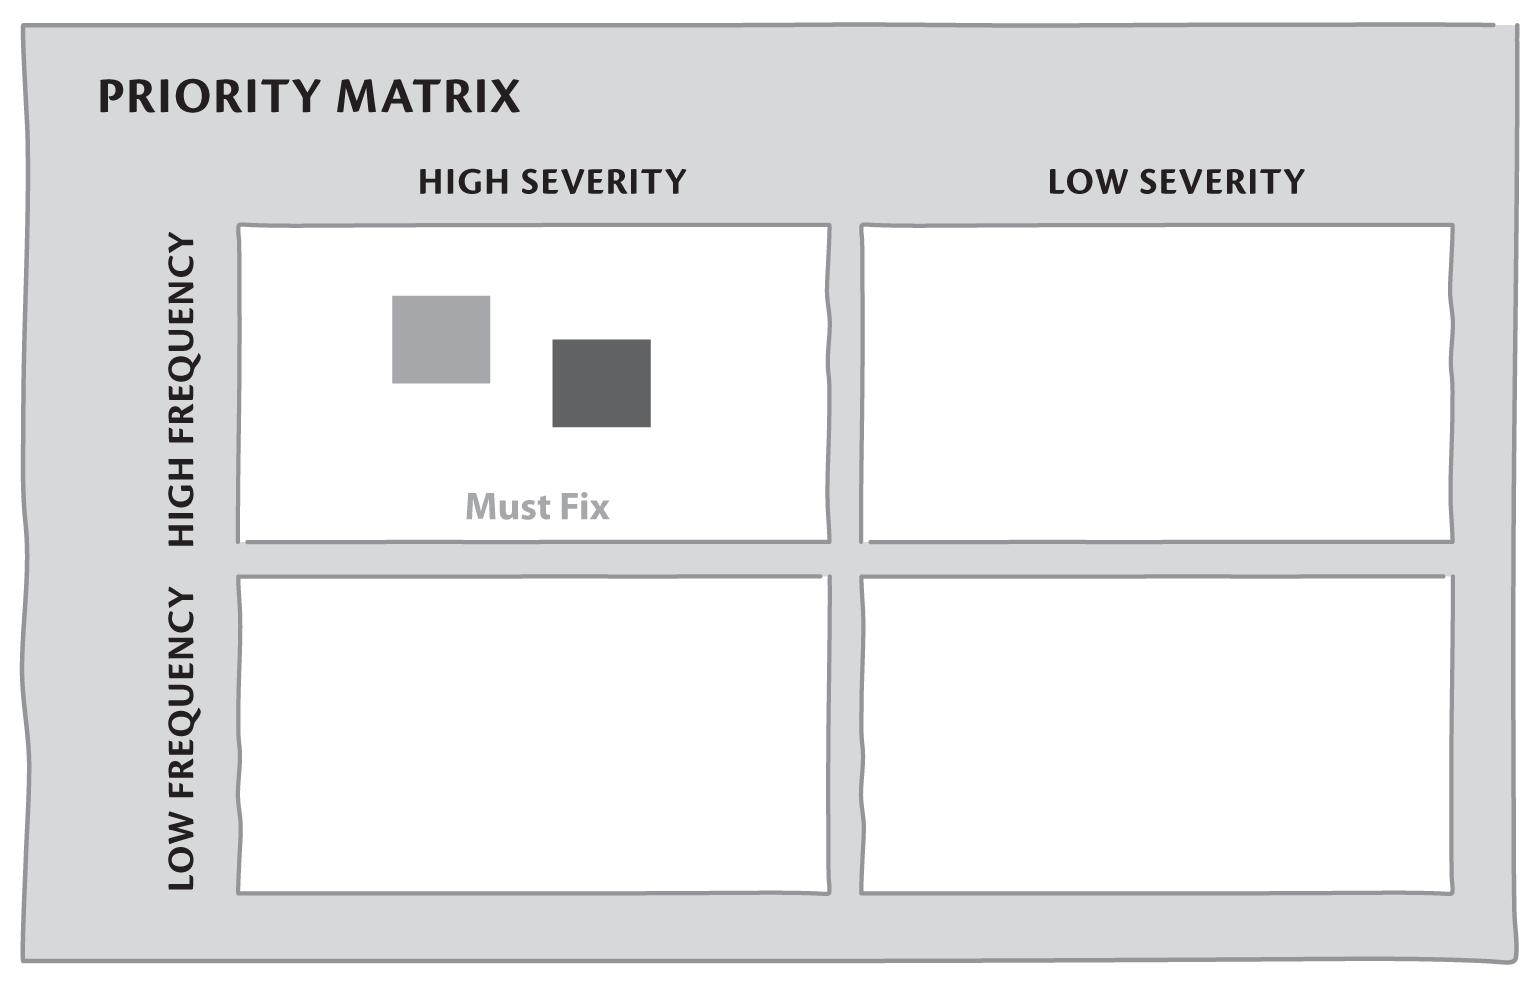
As you identify and document the issues, determine their severity. Severity defines the impact of the issue on the system and user. Severity can be at various levels. If you identify an issue that should be fixed before launch, such as uncompleted flows where users might get stuck and not know what to do next, mark it as high severity. If the issue causes irritation and users can find a workaround, or if the issue is cosmetic, mark it as medium severity.
Once you determine the severity, prioritize the issues using a 2x2 decision matrix, where frequency and severity are the two variables. This will allow the collaboration trinity to anticipate the scope of changes and make an implementation plan. Once prioritization is done, share your findings with all the stakeholders, highlighting which priorities must be fixed before the product goes live.
4. COLLABORATING with Stakeholders
Coordinate a timeline for rectifying issues with the product manager and engineering team. Ensure the findings and agreements are recorded in a way that can be tracked.
There will likely be some technical challenges during implementation. Support the engineering team with alternate designs that achieve the same outcomes. At times, constraints such as release dates or competing product engineering plans may mean that every issue can’t be fixed immediately.
De‐prioritize issues that create less positive impact on the experiences for the user, but document them as experience debt (unresolved flow‐, pattern‐, and aesthetic‐level issues). Once the engineering team fixes the issues, do a second round of quality checks, testing the initial improvements while also keeping an eye out for any new issues that may have arisen.

IN ORDER TO MAXIMIZE THE VALUE OF THIS PLAY
- Make a note of all issues, irrespective of size or severity.
- Create a design QA checklist, so you don’t miss a thing.
- As you go through the product identifying and evaluating issues, progressively disclose your findings to your shareholders to help set expectations about the extent of the delta. This also will help them get a head start on resolving some issues.
 RELATED PLAYS
- Chapter 42: “Design System Play”