The color and positioning of light plays a huge role in the success of both indoor and outdoor shoots. In this chapter, you learn the importance of light and how it pertains to achieving a high–quality video image. You also learn how to adjust the camera to accommodate various lighting scenarios with automatic and manual settings, as well as learn lighting techniques to add depth to your videos.
Explore the Color of Light 100
Understanding White Balance for Color Accuracy 102
Use Auto White Balance Settings 104
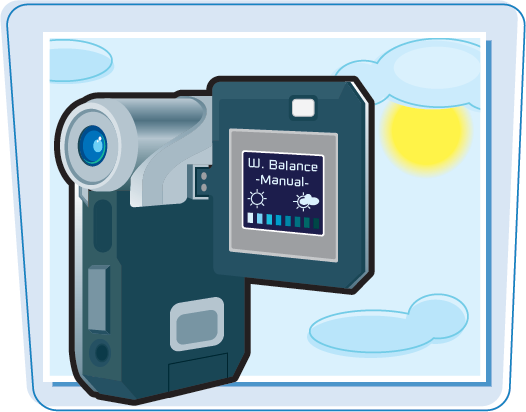
Perform a Manual White Balance 106
Use White Balance Settings for Creative Purposes 108
Shoot Video Indoors 110
Use a Camera-Mounted Light 112
Diffuse Light 114
Use Three-Point Lighting 116
Shoot Video in Sunlight 118
Utilize Lens Filters 120
Shoot Video in Low Light 122
Solve Backlight Problems 124
Everything that you shoot with your digital video camera is painted with light. Learning the characteristics of light can help you understand how your camera interacts with it, enabling you to create high-quality video.
Light and Color
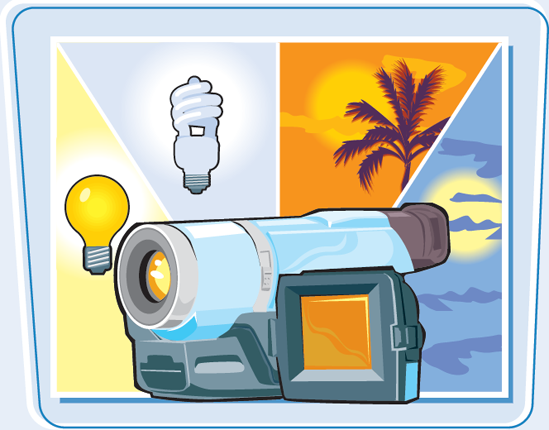
The temperature of light dictates the amount of a particular color within the light, which is largely due to its source. The color of light is constantly changing around you. You wake up in the morning and eat your breakfast under the yellowish-orange glare of tungsten lights over the kitchen table. Early in the morning, when you leave home for work, the rising sun bathes everything in reddish orange. You take your lunch break under the bluish light of the midday sun. After a long day at work, you return home under the bluish cast of a full moon.
Sunrise
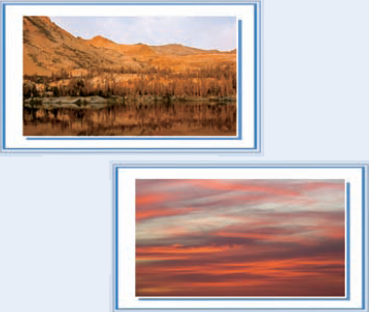
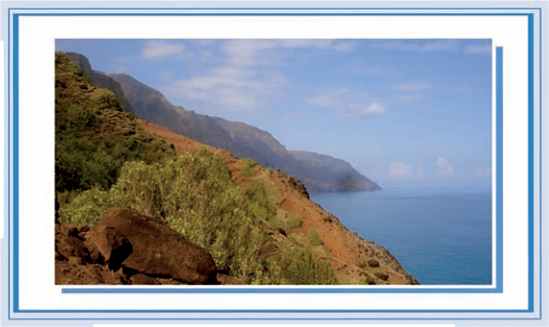
When the sun rises in the morning, the sunlight must travel through more of the earth's atmosphere due to its angle to the earth than if it were directly overhead. Due to this low angle, more red light is let through than blue, which results in beautiful red hues and warm golds. The first and last hour of sunlight in the day are often referred to as the magic hour, or golden hour. Many videographers as well as photographers believe these hours of the day are the best time to shoot video and take pictures due to the beautiful ambience of light passing through the atmosphere. The lighting is very soft at these times.
Midday
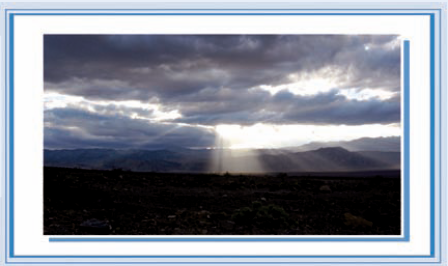
When the sun is directly overhead during the midday, the rays have less distance to travel through the earth's atmosphere. The warm and cool light effectively combines to form a bluish colorcast. Also, the light at this time can be hard, creating defined shadows from the objects below, and producing high-contrast images. This light can prove more difficult to shoot in on a sunny day. If time permits, you can wait until he sun moves behind clouds, which diffuses the light, before you begin shooting.
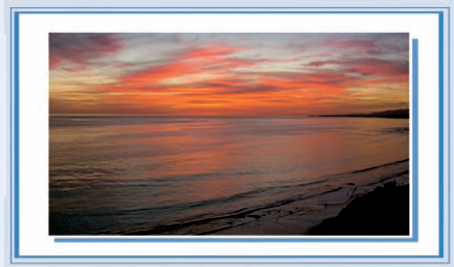
Just before, during, and shortly after sunset, a spectacular variation of red, yellow, and gold permeates the atmosphere, which casts a rich and intense glow on everything below. This dramatic change in light is great for recording dramatic landscapes, cityscapes, and wildlife videography.
Household
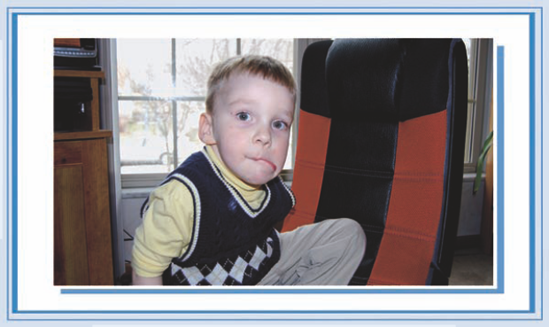
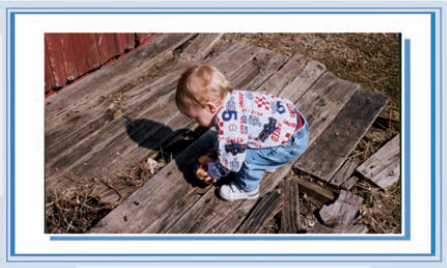
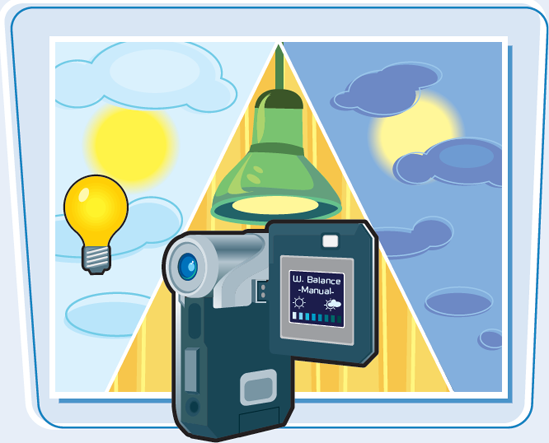
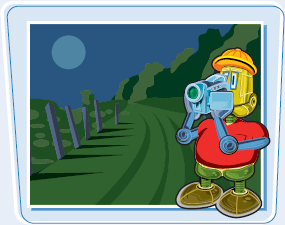
Incandescent light or tungsten light, in reference to the coiled tungsten filament in these lamps, is commonly used in homes. Tungsten lights are in the warm color range and produce a yellow/orange cast, as displayed in this video. Much of the studio-based and field lighting for video is tungsten.
Fluorescent Light
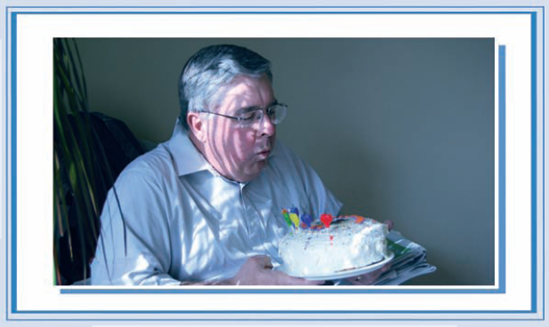
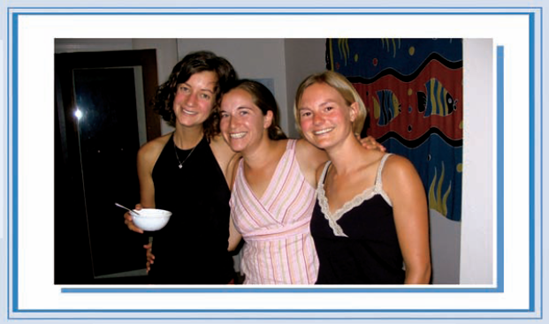
Fluorescent light is generally used in public places and produces a greenish cast, as seen in this video. It may not be evident to your naked eye that the cast is green, but to the eye of the camera, it is green. Fluorescent light is not as forgiving on the skin as tungsten light. If not properly calibrated for, fluorescent lighting can really do a number on blonde hair, light skin tones, and white clothing, tainting them with an undesirable greenish hue.

Along with the quantity of light, the color of light is an important component to recording great video. The white balance feature of your digital video camera helps to accurately reproduce colors when you are shooting in various lighting situations, so that neutral colors such as white and gray are truly neutral, and all other colors are rendered without undesired colorcasts. Understanding the importance of white balancing helps you to create higher-quality video.
Correct for Light In spite of all the optical advancements of digital video cameras, the eye of the camera does not work as well as the human eye. Your eyes are many times more accurate than the camera's sensor; in conjunction with your brain, they can decipher a white envelope under a yellow light. The camcorder needs your assistance to reach that conclusion. Each time you shoot a scene under a different light source, you have to show your camera what constitutes a neutral color before it can accurately depict other colors. If the camera is not properly adjusted to the light, the scene colors can be muted, and the video shrouded in an undesired colorcast. 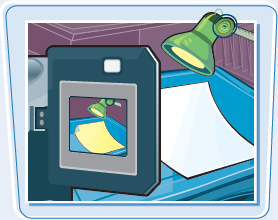 | Color Temperature Color temperature describes the spectrum of light emitted and is measured in degrees Kelvin. Here are approximate temperature measurements for various types of lighting: Tungsten bulbs (household) 1500–3500 K; fluorescent lamps 4,000–5000 K; sunset and sunrise (clear day) 5000–6500 K; overcast day 9000–1000 K. Understanding color temperature helps you make more informed white balance decisions in the field. 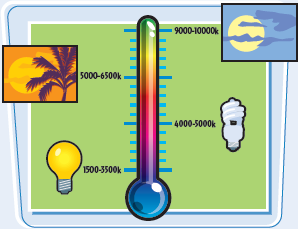 |
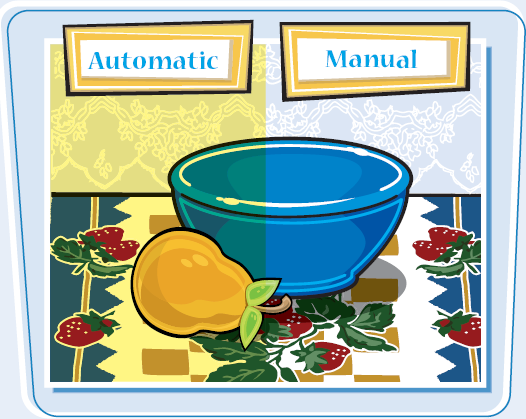
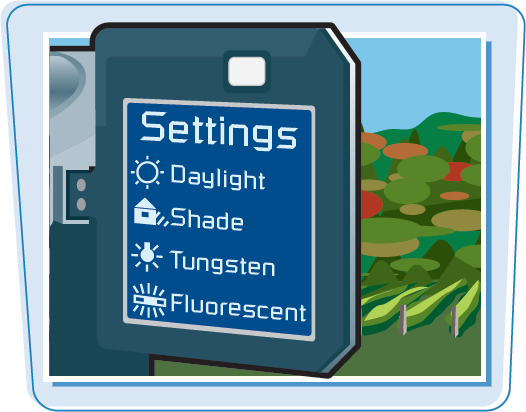
By default, most digital video cameras are set to automatic white balance (AWB), which means the camera will automatically adjust for white balance, as well as other settings. Many video cameras also come equipped with additional preset options that can be chosen for specific lighting conditions such as daylight, shade, cloudy, tungsten, and fluorescent. The presets often perform better in very specific lighting scenarios than the automatic white balance setting.
Manual White Balance
The automatic white balance feature and white balance presets are very convenient, but in some situations, setting a manual white balance can yield better results. This is true in some circumstances where the automatic white balance overcompensates while attempting to balance the color in a given shot. When performing a manual white balance, you focus the camera on a white target and press a white balance button on the camera to adjust to light.
Automatic white balance and white balance presets allow you to quickly adjust to the light in a scene. With this convenience also come some shortcomings in ever-changing lighting conditions. Understanding automatic white balance, white balance presets, and their shortcomings enables you to make better decisions when adjusting to various lighting conditions.
Automatic White Balance
By default, just about all cameras are set to adjust white balance automatically, meaning the camera performs the adjustments for various lighting conditions completely on its own. In essence, the camera performs calculations using the image from the image sensor to measure the color temperature of a scene the best it can. The automatic white balance is very useful when it is impractical to white-balance the camera manually during a shoot. The automatic setting is not as accurate as performing a manual white balance.
Automatic White Balance Issues
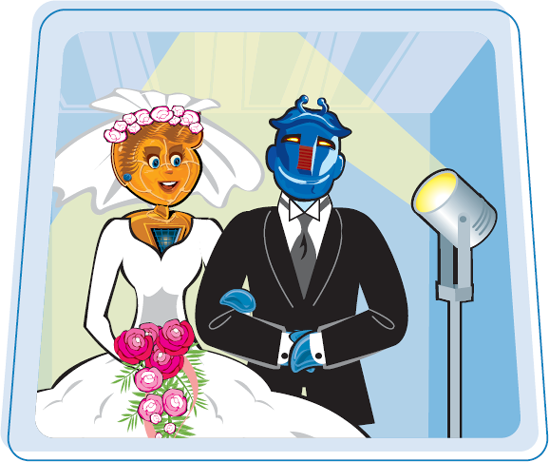
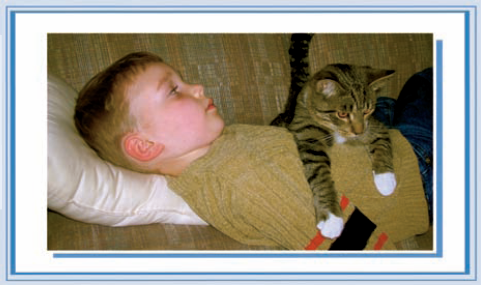
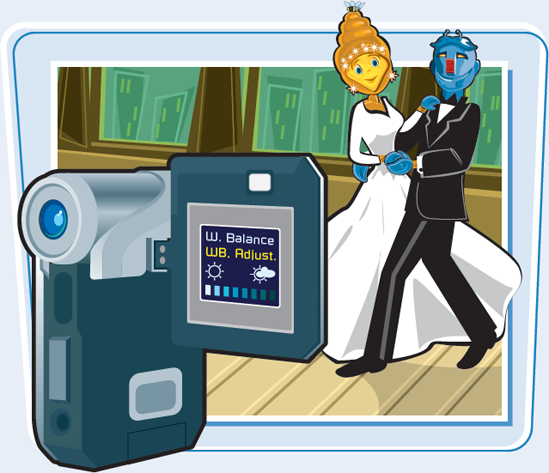
The automatic white balance can sometimes overcompensate to try and balance the color in a shot, such as when you zoom tightly into a face. The automatic white balance (AWB) feature is great for wide shots, but when you zoom into a face, depending on the skin, it can add too much blue to compensate. The automatic white balance also does not perform well in locations with mixed or multiple light sources. If the camcorder's white balance is adjusted for artificial indoor lighting, but the subject is bathed in natural sunlight pouring in from a window, this can result in muted colors and an undesirable colorcast as shown in this video.
Preset White Balance Settings
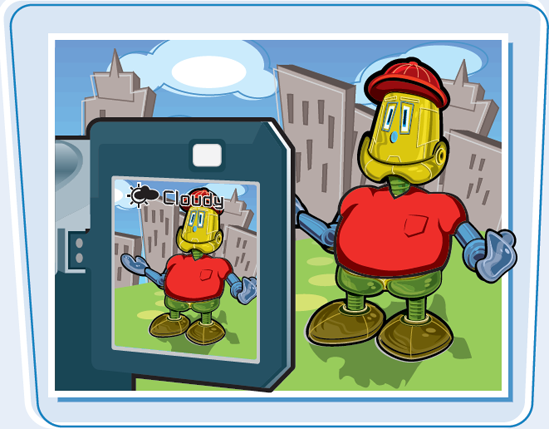
White balance presets are preprogrammed camera settings that enable the videographer to make a selection in the menu system to quickly adjust for a particular lighting situation. If you are shooting on a sunny day, the daylight preset can adjust the white balance for that particular color temperature so that colors are accurately re-created. You can also use the settings for artificial light such as Tungsten and Fluorescent to adjust for indoor lighting. Some common white balance presets are Daylight, Shade, Cloudy, Tungsten, and Fluorescent. These presets are usually marked with symbols such as a sun, cloud, light bulb, and so on. The presets are not as accurate as a manual white balance.
Some cameras have a manual or custom white balance option. A manual white balance is usually the best option for accurate color reproduction. Performing a manual white balance means that you are providing the camera with a reference of what is true white. When you white-balance properly, the camera can most accurately reproduce colors in the scene. Understanding how to set a manual white balance can help you achieve the best color reproduction possible.
Set a White Balance
Setting a manual or custom white balance requires that you have something true white on which you can focus the camera. This can be a sheet of paper, white fabric, or a special white card made for such purposes. The white reference needs to be placed under the same lighting in which you are recording. You can go into the menu system and set the camera in manual white balance mode. Zoom into the white reference card so that it fills the entire screen and make sure that it is in sharp focus. Press the white balance button on the camera and the camera indicates when the white balance is complete.

White Balance at Every New Location
A manual white balance requires that you white-balance whenever the lighting changes. This can be from room to room, shooting indoors and moving outdoors, and even when the sun changes positions or goes behind a cloud. Always be aware of changing lighting conditions and adjust the white balance properly. Although some video editing programs have color correcting tools that can help with an improper white balance, the best results come from getting it right the first time.
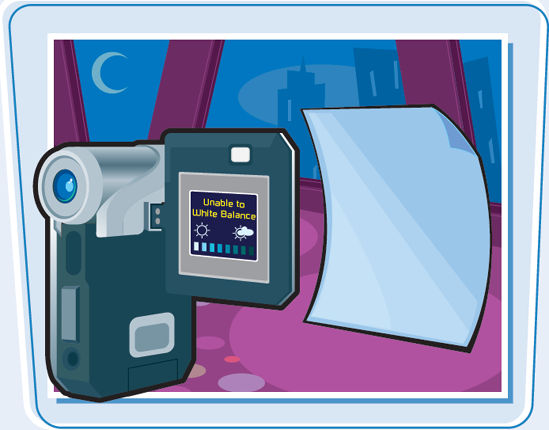
Inability to White Balance
If the reference card from which you are performing a white balance is over- or underexposed, you may be unable to perform the manual white balance, or at the least perform a poor white balance. Make sure that you perform a manual white balance in a place sufficiently well lit.
The white balance controls of your digital video camera have a direct impact on the color of your video images. You can use the manual or custom white balance feature of your camera to create a unique look and feel to your video. By understanding how to use white balance settings creatively, you can exercise more control of your video.

Experiment with White Balance Settings
The card that you use as a manual or custom white balance reference does not always have to be white. White balancing with cards that are different shades of blue and green, referred to as warm cards, can shift the entire range of colors in a recorded scene. You can create a warmer or cooler look for your video depending on which card you choose. Keep in mind that when you manipulate white balance settings creatively, the adjustments become a permanent part of your video. Although many of these effects can be achieved using color correcting tools in some video editing programs, warm cards can help you avoid processing the images in post production.

Cool It Down
Using a particular color shade as a reference neutralizes that card's particular shade from the image, shifting the entire color range. A card for a cooler white balance neutralizes warmer colors. A cooler white balance can provide a sense of suspense or even an unsettling feeling to your video. Make a cold scene look even colder or even less comfortable for creative purposes with a cooler white balance.
Warm It Up
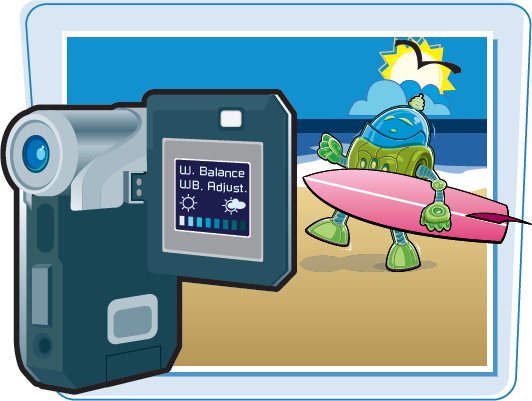
You can use a warmer white balance to make a day at the beach appear especially bright and sunny. Warmer tones can be used to make neutral skin tones appear more vibrant, healthy, and flattering. You can choose from various shades of blue cards that can lessen or intensify the warming effect by eliminating cooler colors from the color range in the recorded video. When using these cards, make sure that color remains consistent throughout your shots, unless there is a specific reason for an aesthetic change.
Without purchasing extra lighting equipment, most of your indoor shooting is done under the ambient light in a room, which can often be inadequate for recording high-quality video. If the lighting is not adequate, you notice more grain in your video. When you understand the challenges of shooting video indoors, you can better prepare for a successful shoot.
Deal with Mixed Lighting
Rooms can also have artificial light mixed with natural light let in through windows. This can cause problems if you are tracking shots across a room. As the light changes, the automatic white balance can fail you. Use stationary shots in a room with mixed lighting. If possible, avoid mixed lighting situations altogether or eliminate one of the light sources. Set a manual or custom white balance for more accuracy.

Some digital video cameras come equipped with a built-in light that you can use if the lighting is inadequate. If your camera does not have a built-in light, you may be able to attach a camera-mounted light to the hot shoe located on top of the camera. Neither one of these options is ideal because built-in camera lights and mounted lights cast a hard light, but they can provide acceptable results. Make sure that the light is placed just below eye level of your subject to avoid creating any heavy eye shadows. Make sure that the subject is far enough way from any walls to eliminate shadows in the shot.
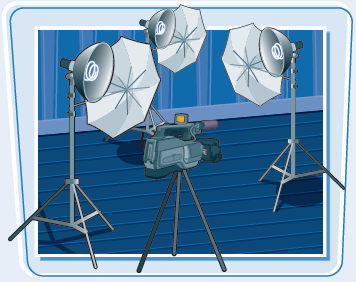
Set Up Extra Lights
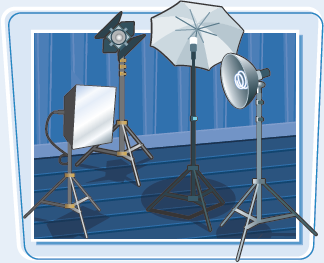
An inexpensive lighting setup can do wonders for an inadequately lit room. A basic lighting kit with two floodlights, stands, and umbrellas for diffusion can provide you the light you need to adequately light your video. One light may serve as your lighting kit, but two or even three can prove much better for achieving the best-looking video. Multiple lights provide flexibility when shooting interviews or just improving the overall light in a room.
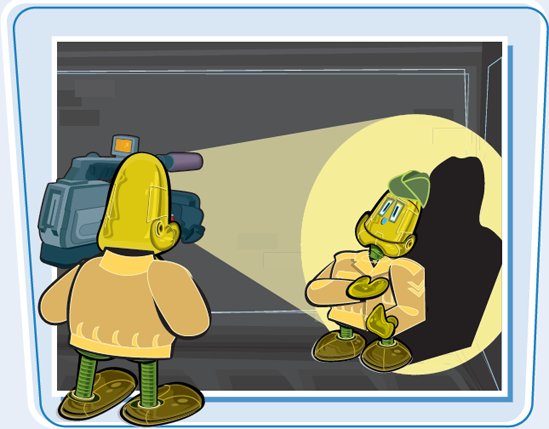
A camera-mounted light or a built-in light can be a minimal but effective lighting kit for general shooting. When shooting on the run where no other light is available, a single camera-mounted light can provide acceptable results. With that being said, camera-mounted lights have their drawbacks. By knowing your options for lights and understanding the issues that arise when using camera-mounted lights, you can make better decisions when using them.

Camera-Mounted Lights
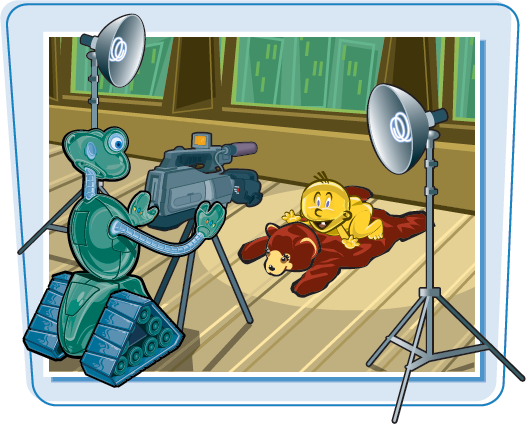
Camera-mounted lights are small and create flat light, which is not flattering to the face. Lights such as these are akin to shining a flashlight directly into someone's face. The hard, concentrated light that camera-mounted lights produce can cast well-defined shadows from your subjects if you shoot them close to walls. If your goal is to remain inconspicuous during the party, a camera-mounted light does not help you do this. Camera-mounted lights work very well for run-and-gun shoots such as adventure racing, where you are forced to shoot in multiple lighting conditions, including low light conditions such as in shaded areas and caves. These lights are also good for countering strong backlight on a subject.
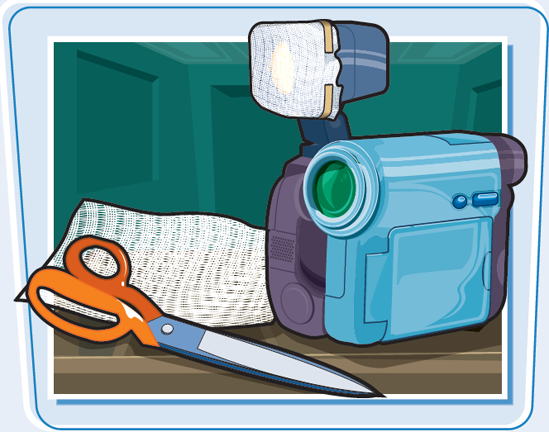
Soften the Light
One way to soften and diffuse the hard, concentrated light of a camera-mounted light is to use a light-diffusing material called Tough Spun. This material can produce a wider, less-intense light source that is kinder to video. The Tough Spun material is especially made to withstand the heat of concentrated lights much bigger and hotter than are used with small consumer cameras. For this reason, if your camera is small, you will have to cut the material to fit over your particular light, and attach it with a clamp.
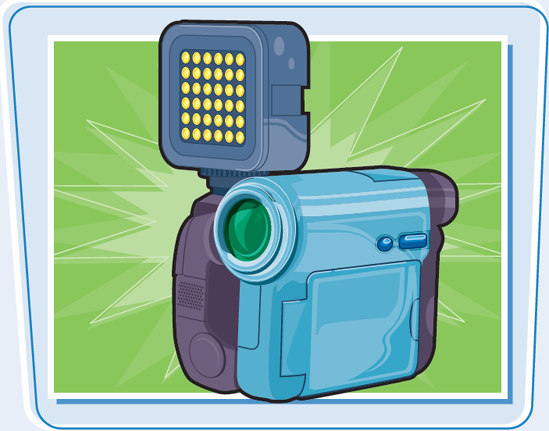
LED Lights
A more practical choice for a consumer camera-mounted light is LED lights. These lights are compatible with most digital video cameras and attach to the hot shoe located on top of the camera—and, they do not get hot. Many boast that they are many times brighter than the standard bulb, but make sure that you read consumer reviews before investing in one. Some have built-in diffusers for more even lighting, and you will have to charge them between uses. These lights can be found in your local electronics store as well as online.
Do not aim a concentrated light source straight at your subject without some kind of diffusion. Diffused, even lighting is most kind to recording video. The ability to diffuse your lighting source, whether it is your floodlights or the sun, is essential to shooting great video.


If you have the lights but no reflective umbrellas, you can aim the light at the ceiling or a wall and let the diffused light cast back onto the subject. A white surface is the most evenly reflective and tends to work best. Be mindful that the height of the ceiling can be a determining factor in the success of this lighting practice. If the ceiling is too high, the amount of light cast back onto the subject may be too little. If the ceiling is too low, the amount of light cast back onto the subject may too intense. Go with what looks good in the eye of the camera.

Inexpensive Diffusion Methods
You can use poster board to diffuse light and redirect it to your subject. You can have someone hold the poster board while you shoot, or if your ceiling is not white, you can tape poster board to a surface. When using homemade do-it-yourself solutions such as this, always be mindful of safety. Lights are hot, and if you set them up too close to the poster board for extended periods of time, the material may start to smoke and eventually catch fire.

Studio photographers and filmmakers have used the basic three-point lighting setup for many years to add more visual depth to their subjects. Understanding the basic guidelines of three-point lighting not only helps you to present more compelling subjects, but it also puts you well on the way toward creating more creative and dramatic lighting schemes for your videos.

Three-Point Lighting The three-point lighting setup helps shape the subject using light and shadow for a more compelling and dramatic image. The three-point lighting setup involves as many as three and as few as one light placed in specific locations around the subject. Each light in the set performs a specific function in shaping the image. The suggested angles for the three-point lighting setup are not meant to be exact instructions, but merely starting points. Videographers use all kinds of light combinations to achieve the look they desire. 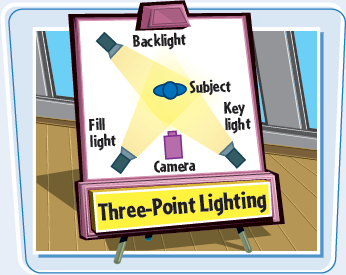 | Key Light The key light is the primary light source for your subject and is usually the strongest of the three. This light is usually placed at the half past seven or half past four o'clock position, to the left or right of the subject, shining on the subject at a 45-degree angle from above, aimed at the face. The key light can be a single floodlight with a narrow beam, but beware: When used alone, the light can create hard shadows on the subject and be unflattering to skin tones. 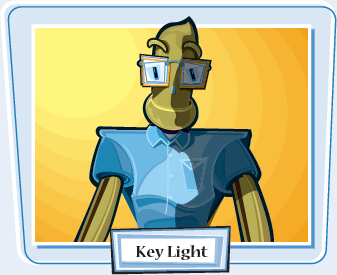 |
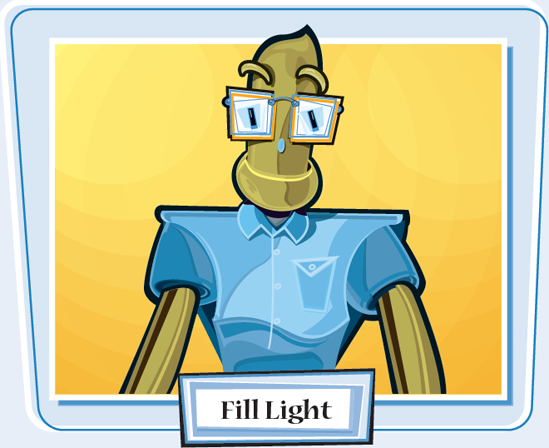
The purpose of the fill light is to soften and reduce shadows created by the key light and is about half the intensity. The placement of this light is very subjective, depending on the feel you are going for. The less fill light you use, the more contrast you create on the subject, giving a more dramatic feel. More fill light provides more even lighting, as is often used in news interviews. This light is placed at the four or eight o'clock position on the opposite side of the key light, raised to shine from a 45-degree angle above the subject. So if the key light is at the half past four o'clock position to the right of the subject, the fill should be at the eight o'clock position to the left.
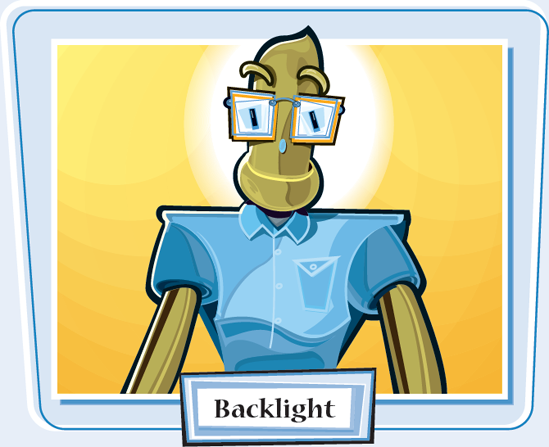
Backlight
Backlight provides light to the back of the subject, from a slightly elevated position to separate the subject from its background. This light is placed at the half past ten or half past one o'clock position with the light shining on the subject's head and shoulders, from a raised 45-degree angle.
Few environments offer the aesthetic benefits of shooting in the majesty and beauty of the great outdoors. With that being said, shooting outdoors does have its challenges. As the position of the sun changes throughout the day, so do quality, quantity, and direction of the sunlight. You must make sure that you have proper white balance and exposure. Automatic settings can perform well, but a manual white balance ensures that your whites are truly white. Being able to adjust to changing outdoor conditions is crucial if you want to produce the highest-quality outdoor video.
Adjust the LCD Display When shooting in bright sunlight, the LCD panel of the camera can become increasingly difficult to see. If you rely heavily on the flip-out LCD to compose your shots, you need to know how to adjust the LCD display so that you can continue to monitor the shot. Some digital video cameras enable you to adjust the brightness of the LCD display for easier viewing in various lighting conditions. 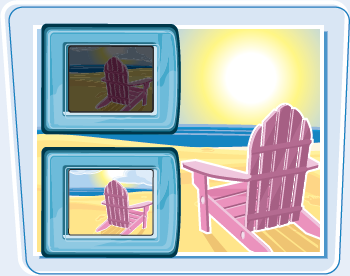 | Consider the Position of the Sun The position of the sun can play a major role in how you set up for a shot. As a rule of thumb, lower the contrast by choosing an evenly lit area to shoot. If you are in a situation where you do not have a way to diffuse light, shoot the subject with the sun at your back and your subject facing the camcorder. If the sun is unobstructed and is facing the back of the subject, and you point the camera into it, you are likely to get a halo effect around the outline of the subject. You will also get lens flare, glare, and an underexposed subject.  |
You can choose a place in the shade in which to shoot your subject. If too much light is being blocked from the subject and the shot is too dark, you can always redirect sunlight to your subject with a low-cost reflector or even a white poster board. In this scenario, the reflector becomes the primary source of light. With the obstructed sun behind the subject at about the eleven or twelve o'clock position, you can stand the reflector between the four and eight o'clock position to bounce in some light. Keep the reflector close to the subject and just below eye level to limit the shadows around the chin, nose, and eyes.
Diffuse Sunlight
Buildings and trees are natural diffusers of light. Also, if you can wait it out, wait until the sun dips behind a cloud to begin recording. Clouds soften the rays of the sun before they reach the objects on the ground, resulting in more even, soft light. Another option for shooting in hard, direct sunlight is to diffuse the sunlight with a translucent white material of your own. You can place a white bedsheet between your subject and the sun to act as a diffuser. Use clotheslines, stands with clips, or even two friends to hold the material above the subject. This way, the light will be scattered before reaching the subject.

Use Lens Filters
A neutral density (ND) filter is an accessory that attaches directly to the front of the camera lens and helps to reduce the intensity of light on a bright day. There are times when the subject is evenly lit, but too much light is getting through the lens, resulting in an overexposed image. If your camera accepts lens filters, you should have this filter with you at all times before going out to shoot in sunny conditions.
Some video camera accept lens filters, which are specially crafted glass that attach directly to the camera lens and are used to manipulate light as it enters the camcorder lens. Some have practical purposes such as filtering out ultraviolet (UV) light to reduce haze and blue cast; others are used to create effects. When you use filters to achieve a certain aesthetic while acquiring the image, the less you have to do in post. The only drawback is that the effect becomes a permanent part of the video and cannot be removed. By understanding the effect and use of lens filters, you are able to make better decisions on which are right for you.

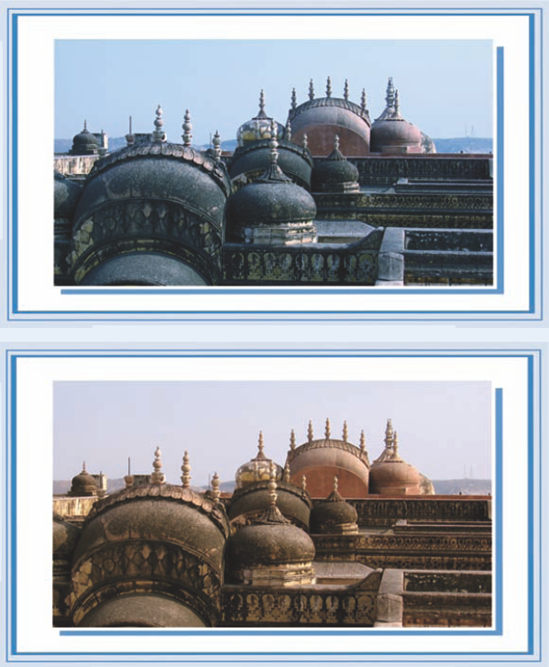
Ultraviolet (UV) Filters Ultraviolet (UV) filters are mainly used to protect the lens of a camera, and they also prevent blue colorcasts from appearing in your video when shooting at high altitudes. Consider using a UV filter when shooting in environments that you think may prove hazardous to the lens, such as sandy and dusty conditions. Be mindful that although UV filters offer great protection, they can sometimes cause lens flares and internal reflections, so consider going without, unless it is necessary. Make sure that you purchase the best multicoated UV filter you can afford because you do get what you paid for.  | Neutral Density (ND) Filters An ND filter is a neutral-colored or gray piece of glass that reduces the amount of light that can pass through the lens by absorbing light evenly throughout the visible spectrum. This particular filter does not affect the overall color of the image, so it is great for preventing overexposed video while shooting on a bright, sunny day. One particular type of ND filter is a graduated/gradient filter, which is heavily tinted at the top and fades to transparent at the bottom. The graduated filter helps tame the brightness of the sky but does not darken the rest of the image. 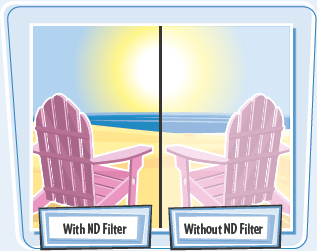 |
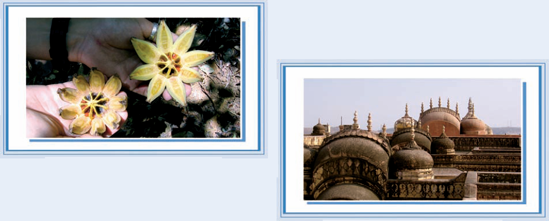
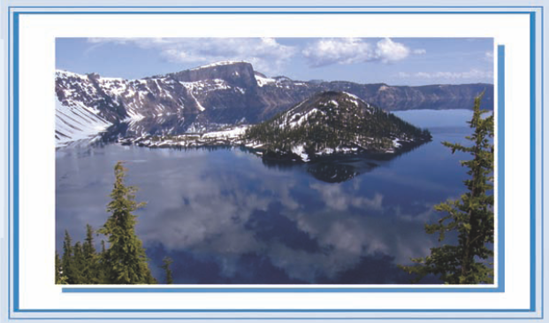
Polarizing filters reduce glare in water, glass, and other shiny, nonmetallic surfaces. This is a great filter to own if you expect to shoot through display cases. Polarizing filters also intensify colors, making them bold and rich, so they are great to have when you are shooting vegetation and flowers to showcase their vibrancy.
Color Correcting Filters
Color correcting filters can be a creative tool to help you set the tone for a short film. A cool blue or green tint can lend an air of mystery, whereas highly saturated warm colors can add an upbeat feel. Keep in mind that whatever effect you achieve with your lens is permanent. To keep your options open on how you will use the video in the future, consider adding effects such as these during the editing process.
Digital video cameras on the market today are a lot more sensitive to light than what they were just a few years ago, but without extra lighting accessories, producing a high-quality image in very low light is hard. You need to understand the nuances of shooting in low light with your camera and how to address them before you begin the shoot.
Examine the Characteristics of Shooting in Low Light The video you record in low light is not going to look as good as the video you shoot in a well-lit environment. Video shot in low light can be grainy, and your automatic focus is not as responsive or accurate as you are used to. When shooting in low light, look for opportunities to carefully compose shots that contain highlights, playing on the ratio of darkness to brightness for interesting shots. 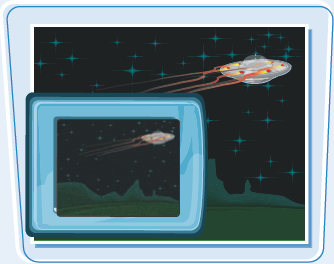 | Avoid Zooming When you increase the camera's focal length by zooming in, in turn, you are reducing the amount of light entering into the lens, making the subject even darker. This makes your subjects darker in the eye of the camera. Pull the zoom all the way out and use wide angles. If you need a closer shot, physically move yourself closer to the subject to get the shot you want. The image stabilizer is also less effective when shooting in extremely low light situations, so minimize your movements and use a tripod to stabilize the camera. 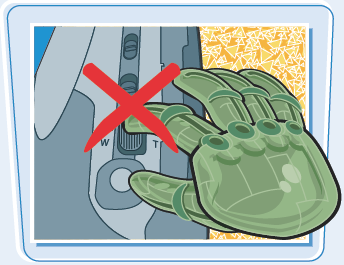 |
Bring your own light accessories if there is no extra light at the location. A camera-mounted light is perhaps the most minimal lighting setup you can have, but it can be obtrusive. If there is a chance that it can disrupt the event, make sure that you get permission before you use one. If it is an important event, bring a lighting kit. A relatively inexpensive, basic lighting kit can consist of two floodlights, stands, and umbrellas for diffusion. Be sure that you have the space and the electrical outlets to set up all of your equipment before you arrive at the shoot.
Consider the Gain
Some cameras have a gain feature where the signal from the image sensor is amplified for a brighter picture. This feature is convenient for low light situations, but beware: This feature compromises the quality of your video. The higher you set the gain, the more noise or grain appears in the picture. Consider using the gain feature when you have already opened the aperture as far as it can go by setting it to the lowest value and the shutter speed is low, but the image is still too dark. Use this feature sparingly.

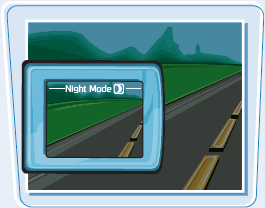
Consider Night Mode
You can use the night recording mode on your camera to record in low light conditions. If you are unsure if your camera possesses such a mode, check your camera manual. Keep in mind that motion blurring can occur with fast-moving objects, given the use of a low shutter speed in this mode, and the autofocus can also struggle. Focus manually when possible.
Practice Safety
Shooting in dark environments can be dangerous, so always take precaution to ensure that no one gets hurt. Bring flashlights to help you set up in the extreme darkness and secure any wires or cables that could be tripped over. If you are shooting in an environment unknown to you, keep an eye on the perimeter for any strangers who may invade your shooting space. Make sure that cell phones are fully charged in case of an emergency.
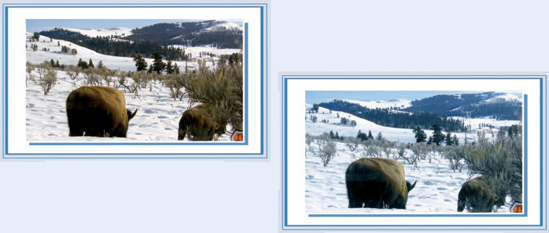
A powerful backlight on a subject standing in a dimly lit area can cause problems for a digital video camera. A backlight much brighter than your subject can make the subject appear underexposed or overexposed depending on which light you compensate for. You can follow these tips to help eliminate backlight issues in your video.

Avoid Bright Backgrounds The best way to combat backlight problems is to avoid them altogether. If possible, try moving the location of your subject to a more evenly lit area. If you are outdoors, try using natural diffusers of light such as trees and buildings. Do not shoot your subject with his or her back to the unobstructed sun on a clear day. When shooting indoors, avoid placing the subject in front of a window with bright sunlight pointing in. Choose your shooting location carefully and keep in mind that video likes soft, diffused, even light.  | Perform a Manual Exposure The camera's automatic exposure can overcompensate for the powerful backlight and properly expose for the brightest parts of the images, making the subject too dark. If your camera enables you to set exposure manually, do so, and expose properly for the subject. By manually setting exposure, you are able to focus on the detail present in the main subject, even though it stands against a very bright backdrop. 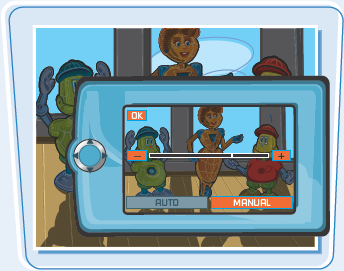 |
To balance the lighting, you can add another light source to increase the light falling in front of the subject. It may be a light on a stand, overhead lights in the room, or a camera-mounted light. Narrowing the dynamic range, the disparity between the lightest and darkest parts of the image, makes it easier for the camera sensor to capture the scene. In a mixed lighting situation, make sure that you manually set the white balance to get a proper setting.
Use Automatic Backlight Correction
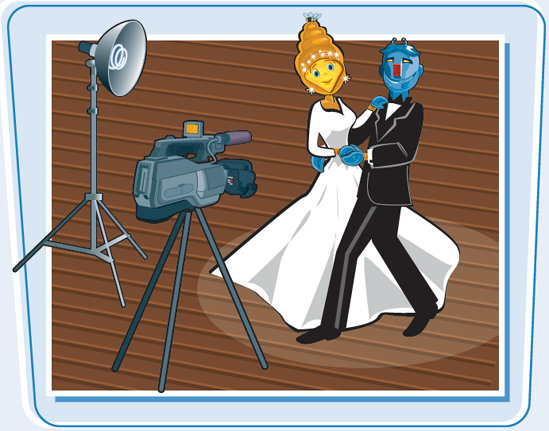
Some video cameras use automatic backlight correction, which automatically adjusts for a backlit subject that has been under- or overexposed. You can simply hold down this button on the camera when shooting a strongly backlit subject and let the camera make the necessary adjustments for a better exposed scene, as seen in this video.