
We have already seen how to use plugins from the very beginning of this book. The management plugin itself is a plugin actually. However, our intent is to show further uses of plugins.
In this recipe, we will see how to enable the STOMP plugin and the further possibilities it provides to RabbitMQ.
With Simple (or Streaming) Text Orientated Messaging Protocol (STOMP), (http://stomp.github.io/), RabbitMQ increases its language interoperability. With the plugin installed, the RabbitMQ broker can operate not only with the AMQP protocol, but with STOMP as well.
In order to run this recipe, you need to perform the following steps:
- From root (Linux) or from the RabbitMQ Command Prompt (Windows), check the current plugin state with the following command:
rabbitmq-plugins list - Then enable the STOMP plugin by issuing the following command:
rabbitmq-plugins enable rabbitmq_stomp - Restart RabbitMQ with the following command:
service rabbitmq-server restartAt this point, you can try to submit some STOMP messages using Netcat, the
nccommand (http://en.wikipedia.org/wiki/Netcat), from the terminal session (Windows users can usetelnet): - From a shell prompt, type the following
nccommand:nc localhost 61613 CONNECT ^@ SEND Destination:/queue/test This the 1st stomp message ^@
- From a second terminal, type the following
nccommand:nc localhost 61613 CONNECT ^@ SUBSCRIBE destination:/queue/test ^@
By listing the available plugins (step 1), we get an output as shown in the following screenshot:
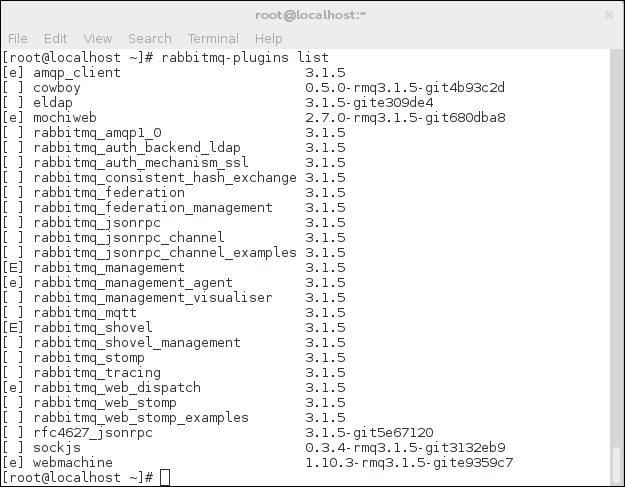
These are all the built-in plugins available. The plugins marked with empty brackets are not installed. The ones marked with [E] are plugins that are explicitly installed. The ones marked with [e] are implicitly installed, that is, plugins are automatically installed because of their dependencies on other plugins.
After we install the STOMP plugin, we need to restart the broker to let the change be effective. Once the plugin is activated, you can use the simple, textual STOMP protocol to send a message to the queue test (step 4). This will give what you can see in the following screenshot:

On another terminal, we can start consuming messages from the queue test (step 5). This will give what you can see in the following screenshot:

Note that the text from MESSAGE to the end has not been typed—that's the actual received message.
In this recipe, we have used the standard STOMP configuration. However, it is possible to customize the STOMP port, SSL usage, and STOMP users by adding the proper configuration options in the RabbitMQ configuration file.
You can find more details at http://www.rabbitmq.com/stomp.html.
Note
Note that STOMP is not exactly the same as Web-Stomp, which is STOMP encapsulated within WebSockets. See the Developing web monitoring applications with STOMP recipe in Chapter 5, Using RabbitMQ in Web Applications. The two protocols are not interoperable.
Furthermore, it's possible to send other kinds of messages with STOMP. It's possible to send RPC messages with temporary queues, and send/receive messages to/from exchanges.
In this recipe, we have shown how to interact with RabbitMQ and its STOMP plugin by using Netcat as a textual client. However, this is not the typical way to use STOMP at the client side. There are a lot of STOMP client APIs available.
You can find a list of the available client libraries at http://stomp.github.io/implementations.html.