
![]()
Testing LDAP Code
In this chapter, you will learn
- The basics of unit/mock/integration testing.
- Testing using an embedded LDAP server.
- Mock testing using EasyMock.
- Generating test data.
Testing is an important aspect of any software development process. As well as detecting bugs, it also helps to verify that all requirements are met and that the software works as expected. Today, formally or informally, testing is included in almost every phase of the software development process. Depending on what is being tested and the purpose behind the test, we end up with several different types of testing. The most common testing done by developers is unit testing, which ensures that individual units are working as expected. Integration testing usually follows unit testing and focuses on the interaction between previously tested components. Developers are usually involved in creating automated integration tests, especially the tests that deal with databases and directories. Next is system testing where the complete, integrated system is evaluated to ensure that all the requirements have been met. Non-functional requirements such as performance and efficiency are also tested as part of system testing. Acceptance testing is usually done at the end to make sure that the delivered software meets the customer/business user needs.
Unit Testing
Unit testing is a testing methodology where the smallest parts of the application, referred to as units, are verified and validated individually in isolation. In structural programming, the unit could be an individual method or function. In object-oriented programming (OOP), an object is the smallest executable unit. Interaction between objects is central to any OO design and is usually done by invoking methods. Thus, unit testing in OOP can range from testing individual methods to testing a cluster of objects.
Writing unit tests requires a developer’s time and effort. But this investment has been proven to deliver several undeniable benefits.
![]() Note It is important to measure how much of the code is covered by unit tests. Tools like Clover and Emma provide metrics for code coverage. These metrics can also be used to highlight any paths that are exercised by few unit tests (or none at all).
Note It is important to measure how much of the code is covered by unit tests. Tools like Clover and Emma provide metrics for code coverage. These metrics can also be used to highlight any paths that are exercised by few unit tests (or none at all).
The biggest advantage of unit testing is that it can help identify bugs at early stages of development. Bugs that are discovered only during QA or in production consume a lot more debugging time and money. Also, a good set of unit tests acts as a safety net and gives confidence when code is refactored. Unit tests can help improve design and even serve as documentation.
Good unit tests have the following characteristics:
- Every unit test must be independent of other tests. This atomic nature is very important and each test must not cause any side effects to other tests. Unit tests should also be order independent.
- A unit test must be repeatable. For a unit test to be of any value, it must produce consistent results. Otherwise, it cannot be used as a sanity check during refactoring.
- Unit tests must be easy to set up and clean up. So they should not rely on external systems such as databases and servers.
- Unit tests must be fast and provide immediate feedback. It would not be productive to wait on long-running tests before you make another change.
- Unit tests must be self-validating. Each test should contain enough information to determine automatically if a test passes or fails. No manual intervention should be needed to interpret the results.
Enterprise applications often use external systems like databases, directories, and web services. This is especially true in the DAO layer. Unit testing database code, for example, may involve starting a database server, loading it with schema and data, running tests, and shutting down the server. This quickly becomes tricky and complex. One approach is to use mock objects and hide the external dependencies. Where this is not sufficient, it may be necessary to use integration testing and test the code with external dependencies intact. Let’s look at each case in little more detail.
The goal of mock testing is to use mock objects to simulate real objects in controlled ways. Mock objects implement the same interface as that of the real objects but are scripted to mimic/fake and track their behavior.
For example, consider a UserAccountService that has a method to create new user accounts. The implementation of such a service usually involves validating the account information against business rules, storing the newly created account in a database, and sending out a confirmation e-mail. Persisting data and e-mailing information are usually abstracted out to classes in other layers. Now, when writing a unit test to validate the business rules associated with the account creation, you might not really care about the intricacies involved in the e-mail notification part. However, you do want to verify that an e-mail got generated. This is exactly where mock objects come in handy. To achieve this, you just need to give the UserAccountService a mock implementation of the EmailService that is responsible for sending e-mails. The mock implementation will simply mark the e-mail request and return a hardcoded result. Mock objects are a great way to isolate tests from complex dependencies, allowing them to run faster.
There are several open source frameworks that make working with mock objects easier. Popular ones include Mockito, EasyMock, and JMock. A complete comparison list of these frameworks can be found at http://code.google.com/p/jmockit/wiki/MockingToolkitComparisonMatrix.
Some of these frameworks allow creating mocks for classes that don’t implement any interfaces. Regardless of the framework used, unit testing using mock objects usually involves the following steps:
- Create a new mock instance.
- Set up the mock. This involves instructing the mock what to expect and what to return.
- Run the tests, passing the mock instance to the component under test.
- Verify the results.
Even though mock objects serve as great placeholders, very soon you will run into cases where faking will not be enough. This is especially true for DAO layer code where you need to validate SQL query executions and verify modifications to database records. Testing this kind of code falls under the umbrella of integration testing. As mentioned earlier, integration testing focuses on testing interactions between components with their dependencies in place.
It has become common for developers to write automated integration tests using unit-testing tools, thereby blurring the distinction between the two. However, it is important to remember that integration tests don’t run in isolation and are usually slower. Frameworks such as Spring provide container support for writing and executing integration tests easily. The improved availability of embedded databases, directories, and servers enables developers to write faster integration tests.
JUnit has become the de facto standard when it comes to unit testing Java applications. The introduction of annotations in JUnit 4.x made it even easier to create tests and assert test results for expected values. JUnit can easily be integrated with build tools like ANT and Maven. It also has great tooling support available in all popular IDEs.
With JUnit, the standard practice is to write a separate class that holds test methods. This class is often referred to as a test case, and each test method is intended to test a single unit of work. It is also possible to organize test cases into groups referred to as test suites.
The best way to learn JUnit is to write a test method. Listing 4-1 shows a simple StringUtils class with an isEmpty method. The method takes a String as parameter and returns true if it is either null or an empty string.
public class StringUtils {
   public static boolean isEmpty(String text) {
   return test == null || "".equals(test);
  }
}
Listing 4-2 is the JUnit class with a method to test the code.
public class StringUtilsTest {
    @Test
    public void testIsEmpty() {
      Assert.assertTrue(StringUtils.isEmpty(null));
      Assert.assertTrue(StringUtils.isEmpty(""));
      Assert.assertFalse(StringUtils.isEmpty("Practical Spring Ldap"));
    }
}
Notice that I have followed the convention <Class Under Test>Test for naming the test class. Prior to JUnit 4.x, test methods needed to begin with the word “test”. With 4.x, test methods just need to be marked with annotation @Test. Also notice that the testIsEmpty method holds several assertions for testing the isEmpty method’s logic.
Table 4-1 lists some of the important annotations available in JUnit 4.
Table 4-1. JUnit 4 Annotations
| Annotation | Description |
|---|---|
| @Test | Annotates a method as a JUnit test method. The method should be of public scope and have void return type. |
| @Before | Marks a method to run before every test method. Useful for setting up test fixtures. The @Before method of a superclass is run before the current class. |
| @After | Marks a method to be run after every test method. Useful for tearing down test fixtures. The @After method of a superclass is run before the current class. |
| @Ignore | Marks a method to be ignored during test runs. This helps avoid the need for commenting half-baked test methods. |
| @BeforeClass | Annotates a method to run before any test method is run. For a test case, the method is run only once and can be used to provide class level setup work. |
| @AfterClass | Annotates a method to run after all the test methods are run. This can be useful for performing any cleanups at a class level. |
| @RunWith | Specifies the class that is used to run the JUnit test case. |
Testing Using Embedded LDAP Server
ApacheDS, OpenDJ, and UnboundID are open source LDAP directories that can be embedded into Java applications. Embedded directories are part of the application’s JVM, making it easy to automate tasks such as startup and shutdown. They have a small startup time and typically run fast. Embedded directories also eliminate the need for a dedicated, standalone LDAP server for each developer or build machine.
![]() Note Note Concepts discussed here serve as the foundation for the LdapUnit open source project. You will be using LdapUnit for testing code in all future chapters. Please visit http://ldapunit.org to download project artifacts and browse through the complete source code.
Note Note Concepts discussed here serve as the foundation for the LdapUnit open source project. You will be using LdapUnit for testing code in all future chapters. Please visit http://ldapunit.org to download project artifacts and browse through the complete source code.
Embedding an LDAP server involves programmatically creating the server and starting/stopping it. However, despite their maturity, programmatically interacting with ApacheDS or OpenDJ is cumbersome. In the next section, you will look at the setup necessary to configure and use ApacheDS LDAP server.
Central to ApacheDS is the directory service that stores data and supports search operations. Thus, starting an ApacheDS LDAP server first involves creating and configuring a directory service. Listing 4-3 shows the code associated with creating a directory service. Note that you are simply using the DefaultDirectoryServiceFactory and initializing it.
DirectoryServiceFactory dsf = DefaultDirectoryServiceFactory.DEFAULT;
dsf.init( "default" + UUID.randomUUID().toString() );
directoryService = dsf.getDirectoryService();
ApacheDS uses partitions to store LDAP entries. (A partition can be viewed as a logical container that holds an entire DIT). It is possible that a single ApacheDS instance can have multiple partitions. Associated with each partition is a root Distinguished Name (DN) called the partition suffix. All the entries in that partition are stored under that root DN. The code in Listing 4-4 creates a partition and adds it to the directoryService created in Listing 4-3.
PartitionFactory partitionFactory =
     DefaultDirectoryServiceFactory.DEFAULT.getPartitionFactory();
/* Create Partition takes id, suffix, cache size, working directory*/
Partition partition = partitionFactory.createPartition("dc=inflinx,dc=com", "dc=inflinx,dc=com", 1000, new File(
                directoryService.getWorkingDirectory(),rootDn));
partition.setSchemaManager(directoryService.getSchemaManager());

// Inject the partition into the DirectoryService
directoryService.addPartition( partition );
You create the partition using the partition factory. In order to create a new partition, you must provide the following information: a name that uniquely identifies the partition, a partition suffix or rootDn, cache size, and a working directory. In Listing 4-4, you have used the rootDn as the partition name also.
With the directory service created and configured, the next step is to create an LDAP server. Listing 4-5 shows the code associated with it. To the newly created LDAP Server, you provide a name. Then you create a TcpTransport object that will be listening on port 12389. The TcpTransport instance allows a client to communicate with your LDAP server.
// Create the LDAP server
LdapServer ldapServer = new LdapServer();
ldapServer.setServiceName("Embedded LDAP service");
TcpTransport ldapTransport = new TcpTransport(12389); ldapServer.setTransports(ldapTransport);
ldapServer.setDirectoryService( directoryService );
The final step is to start the service, which is achieved with the following code:
directoryService.startup();
ldapServer.start();
This completes the implementation of the startup method. The implementation of the shutdown method is described in Listing 4-6.
public void stopServer() {
   try {
      System.out.println("Shutting down LDAP Server ....");
      ldapServer.stop();
      directoryService.shutdown();
      FileUtils.deleteDirectory( directoryService.getWorkingDirectory() );
      System.out.println("LDAP Server shutdown" + " successful ....");
   }
   catch(Exception e) {
      throw new RuntimeException(e);
   }
}
In addition to invoking the stop/shutdown method, notice that you have deleted the DirectoryService’s working directory. The complete code for the embedded ApacheDS implementation is shown in Listing 4-7.
package org.ldapunit.server;

import java.io.File;
import java.util.UUID;
import org.apache.commons.io.FileUtils;
import org.apache.directory.server.core.DirectoryService;
import org.apache.directory.server.core.factory.DefaultDirectoryServiceFactory;
import org.apache.directory.server.core.factory. DirectoryServiceFactory;
import org.apache.directory.server.core.factory.PartitionFactory;
import org.apache.directory.server.core.partition.Partition;
import org.apache.directory.server.ldap.LdapServer;
import org.apache.directory.server.protocol.shared. transport.TcpTransport;

public class ApacheDSConfigurer implements EmbeddedServerConfigurer {

   private DirectoryService directoryService;
   private LdapServer ldapServer;
   private String rootDn;
   private int port;

   public ApacheDSConfigurer(String rootDn, int port) {
      this.rootDn = rootDn;
      this.port = port;
   }

   public void startServer() {
      try {
         System.out.println("Starting Embedded " +
         "ApacheDS LDAP Server ....");
         DirectoryServiceFactory dsf = DefaultDirectoryServiceFactory.
         DEFAULT;
         dsf.init( "default" + UUID.randomUUID().toString());
         directoryService = dsf.getDirectoryService();

         PartitionFactory partitionFactory = DefaultDirectoryServiceFactory.
         DEFAULT.getPartitionFactory();

         /* Create Partition takes id, suffix, cache size, working
         directory*/
         Partition partition = partitionFactory.
         createPartition(rootDn,rootDn, 1000, new File(directoryService.
         getWorkingDirectory(), rootDn));
         partition.setSchemaManager(directoryService.getSchemaManager());

         // Inject the partition into the DirectoryService
         directoryService.addPartition( partition );

         // Create the LDAP server ldapServer = new LdapServer();
         ldapServer.setServiceName("Embedded LDAP service");
         TcpTransport ldapTransport = new TcpTransport(port);
         ldapServer.setTransports(ldapTransport);

         ldapServer.setDirectoryService( directoryService );
         directoryService.startup();
         ldapServer.start();

         System.out.println("Embedded ApacheDS LDAP server" + "has started
         successfully ....");
      }
      catch(Exception e) {
         throw new RuntimeException(e);
      }
   }

   public void stopServer() {
      try {
         System.out.println("Shutting down Embedded " + "ApacheDS LDAP
         Server ....");
         ldapServer.stop();
         directoryService.shutdown();
         FileUtils.deleteDirectory( directoryService.getWorkingDirectory() );

         System.out.println("Embedded ApacheDS LDAP " + "Server shutdown
         successful ....");
      }
      catch(Exception e) {
         throw new RuntimeException(e);
      }
    }
}
Creating Embedded Context Factory
With the above code in place, the next step is to automatically start the server and create contexts that you can use to interact with the embedded server. In Spring, you can achieve this by implementing a custom FactoryBean that creates new instances of ContextSource. In Listing 4-8, you start the creation of the context factory.
package com.practicalspring.ldap.test;

import org.springframework.beans.factory.config. AbstractFactoryBean;
import org.springframework.ldap.core.ContextSource;
import org.springframework.ldap.core.support.DefaultDirObjectFactory;
import org.ldapunit.server.ApacheDSConfigurer;
import org.apache.directory.server.ldap.LdapServer;

public class EmbeddedContextSourceFactory extends
AbstractFactoryBean<ContextSource> {

   private int port;
   private String rootDn;
   private ApacheDSConfigurer apacheDsConfigurer;

   @Override
   public Class<?> getObjectType() {
      return ContextSource.class;
   }

   @Override
   protected ContextSource createInstance() throws Exception {

      // To be implemented later.
      return null;
   }
   public void setRootDn(String rootDn) {
      this.rootDn = rootDn;
   }
   public void setPort(int port) {
      this.port = port;
   }
}
Notice that the EmbeddedContextSourceFactory bean uses two setter methods: setPort and setRootDn. The setPort method can be used to set the port on which the embedded server should run. The setRootDn method can be used to provide the name of the root context. Listing 4-9 shows the implementation of the createInstance method, which creates a new instance of ApacheDSConfigurer and starts the server. Then it creates a new LdapContenxtSource and populates it with the embedded LDAP server information.
apacheDsConfigurer = new ApacheDSConfigurer(rootDn, port);
apacheDsConfigurer.startServer();

LdapContextSource targetContextSource = new LdapContextSource();
targetContextSource.setUrl("ldap://localhost:" + port);
targetContextSource.setUserDn(ADMIN_DN);
targetContextSource.setPassword(ADMIN_PWD);
targetContextSource.setDirObjectFactory(DefaultDirObjectFactory.class);
targetContextSource.afterPropertiesSet();

return targetContextSource;
The implementation of destroyInstance is provided in Listing 4-10. It simply involves cleaning up the created context and stopping the embedded server.
@Override
protected void destroyInstance(ContextSource instance) throws Exception {
     super.destroyInstance(instance);
     apacheDsConfigurer.stopServer();
}
The final step is to create a Spring context file that uses the new context factory. This is shown in Listing 4-11. Notice that the embedded context source is being injected into the ldapTemplate.
<?xml version="1.0" encoding="UTF-8"?>

<beans xmlns="http://www.springframework.org/schema/beans"
   xmlns:xsi="http://www.w3.org/2001/XMLSchema-instance"
   xmlns:context="http://www.springframework.org/schema/context"
   xsi:schemaLocation="http://www.springframework.org/schema/beans
   http://www.springframework.org/schema/beans/spring-beans.xsd
   http://www.springframework.org/schema/context
   http://www.springframework.org/schema/context/spring-context.xsd">

   <bean id="contextSource" class="com.inflinx.ldap.test.
   EmbeddedContextSourceFactory">
      <property name="port" value="12389" />
      <property name="rootDn" value="dc=inflinx,dc=com" />
   </bean>

   <bean id="ldapTemplate" class="org.springframework.ldap.core.
   LdapTemplate">
      <constructor-arg ref="contextSource" />
   </bean>
</beans>
Now you have the entire infrastructure needed to write JUnit test cases. Listing 4-12 shows a simple JUnit test case. This test case has a setup method that runs before each test method. In the setup method you load the data so that the LDAP server will be in a known state. In Listing 4-12, you are loading data from employees.ldif file. The teardown method runs after each test method is run. In the teardown method, you are deleting all the entries in LDAP server. This will allow you to start clean with a new test. The three test methods are very rudimentary and simply print the information on the console.
package com.inflinx.book.ldap.test;

import java.util.List;

import org.junit.After;
import org.junit.Before;
import org.junit.Test;
import org.junit.runner.RunWith;

import org.springframework.beans.factory.annotation.Autowired;
import org.springframework.core.io.ClassPathResource;
import org.springframework.ldap.core.ContextMapper;
import org.springframework.ldap.core.ContextSource;
import org.springframework.ldap.core.DirContextAdapter;
import org.springframework.ldap.core.DistinguishedName;
import org.springframework.ldap.core.LdapTemplate;
import org.springframework.test.context.ContextConfiguration;
import org.springframework.test.context.junit4.SpringJUnit4ClassRunner;

@RunWith(SpringJUnit4ClassRunner.class )
@ContextConfiguration(locations= {"classpath:repositoryContext-test.xml"})
public class TestRepository {

   @Autowired
   ContextSource contextSource;

   @Autowired
   LdapTemplate ldapTemplate;

   @Before
   public void setup() throws Exception {
      System.out.println("Inside the setup");
      LdapUnitUtils.loadData(contextSource, new ClassPathResource
      ("employees.ldif"));
   }

   @After
   public void teardown() throws Exception {
      System.out.println("Inside the teardown");
      LdapUnitUtils.clearSubContexts(contextSource, new DistinguishedName
      ("dc=inflinx,dc=com"));
   }

   @Test
   public void testMethod() {
      System.out.println(getCount(ldapTemplate));
   }

   @Test
   public void testMethod2() {
      ldapTemplate.unbind(new DistinguishedName("uid=employee0,ou=employees,
      dc=inflinx,dc=com"));
      System.out.println(getCount(ldapTemplate));
   }

   @Test
   public void testMethod3() {
      System.out.println(getCount(ldapTemplate));
   }

   private int getCount(LdapTemplate ldapTemplate) {
      List results = ldapTemplate.search("dc=inflinx,dc=com",
      "(objectClass=inetOrgPerson)", new ContextMapper() {
          @Override
          public Object mapFromContext(Object ctx) {
              return ((DirContextAdapter)ctx).getDn();
          }
      });
      return results.size();
   }
}
In the previous section you looked at testing your LDAP code using an embedded LDAP server. Now let’s look at testing LDAP code using the EasyMock framework.
EasyMock is an open source library that makes creating and using mock objects easy. Beginning with version 3.0, EasyMock natively supports mocking both interfaces and concrete classes. The latest version of EasyMock can be downloaded from http://easymock.org/Downloads.html. In order to mock concrete classes, two additional libraries namely CGLIB and Objenesis are needed. Maven users can obtain the required jar files by simply adding the following dependency in their pom.xml:
<dependency>
       <groupId>org.easymock</groupId>
       <artifactId>easymock</artifactId>
       <version>3.2</version>
       <scope>test</scope>
</dependency>
Creating a mock using EasyMock involves calling the createMock method on the EasyMock class. The following example creates a mock object for LdapTemplate:
LdapTemplate ldapTemplate = EasyMock.createMock(LdapTemplate. class);
Each newly created mock object starts in the recording mode. In this mode you record the expected behavior or expectation of the mock. For example, you can tell the mock that if this method gets called, return this value. For example, the following code adds a new expectation to the LdapTemplate mock:
EasyMock.expect(ldapTemplate.bind(isA(DirContextOperations. class)));
In this code you are instructing the mock that a bind method will be invoked and an instance of DirContextOperations will be passed in as its parameter.
Once all the expectations are recorded, the mock needs to be able to replay these expectations. This is done by invoking the replay method on EasyMock and passing in the mock objects that needs to be replayed as parameters.
EasyMock.replay(ldapTemplate);
The mock object can now be used in test cases. Once the code under test completes its execution, you can verify if all the expectations on the mock are met. This is done by invoking the verify method on EasyMock.
EasyMock.verify(ldapTemplate);
Mocking can be especially useful for verifying context row mappers used in the search methods. As you have seen before, a row mapper implementation converts an LDAP context/entry into a Java domain object. Here is the method signature in the ContextMapper interface that performs the conversion:
public Object mapFromContext(Object ctx)
The ctx parameter in this method will typically be an instance of the DirContextOperations implementation. So, in order to unit test ContextMapper implementations, you need to pass in a mock DirContextOperations instance to the mapFromContext method. The mock DirContextOperations should return dummy but valid data so that the ContextMapper implementation can create a domain object from it. Listing 4-13 shows the code to mock and populate a DirContextOperations instance. The mockContextOperations loops through the passed-in dummy attribute data and adds expectations for single- and multi-valued attributes.
public static DirContextOperations mockContextOperations(Map<String, Object>
attributes) {

   DirContextOperations contextOperations = createMock(DirContextOperations.
   class);
      for(Entry<String, Object> entry : attributes.entrySet()){
         if(entry.getValue() instanceof String){
            expect(contextOperations.getStringAttribute(eq(entry.
            getKey()))).andReturn((String)entry.getValue());
            expectLastCall().anyTimes();
         }
         else if(entry.getValue() instanceof String[]){
            expect(contextOperations.
            getStringAttributes(eq(entry.getKey()))).andReturn((String[])
            entry.getValue());
            expectLastCall().anyTimes();
         }
      }
   return contextOperations;
}
With this code in place, Listing 4-14 shows the code that uses the mockContextOperations method for mock testing context row mapper.
public class ContextMapperExample {

   @Test
   public void testConextMapper() {
      Map<String, Object> attributes = new HashMap<String, Object>();
      attributes.put("uid", "employee1");
      attributes.put("givenName", "John"); attributes.put("surname", "Doe");
      attributes.put("telephoneNumber", new String[]
      {"8011001000","8011001001"});

      DirContextOperations contextOperations = LdapMockUtils.mockContextOperations(attributes);
      replay(contextOperations);

     //Now we can use the context operations to test a mapper
     EmployeeContextMapper mapper = new EmployeeContextMapper();
     Employee employee = (Employee)mapper.mapFromContext(contextOperations);
     verify(contextOperations);

     // test the employee object
     assertEquals(employee.getUid(), "employee1");
     assertEquals(employee.getFirstName(), "John");
   }
}
Test Data Generation
For testing purposes, you often need to generate initial test data. OpenDJ provides a great command-line utility called make- ldif that makes generating test LDAP data a breeze. Please refer to Chapter 3 for instructions on installing OpenDJ. The command-line tools for Windows OS are located in the bat folder under the OpenDJ installation.
The make-ldif tool requires a template for creating test data. You will use the patron.template file shown in Listing 4-15 for generating patron entries.
define suffix=dc=inflinx,dc=com
define maildomain=inflinx.com
define numusers=101

branch: [suffix]

branch: ou=patrons,[suffix]
subordinateTemplate: person:[numusers]

template: person
rdnAttr: uid
objectClass: top
objectClass: person
objectClass: organizationalPerson
objectClass: inetOrgPerson
givenName: <first>
sn: <last>
cn: {givenName} {sn}
initials: {givenName:1}<random:chars:ABCDEFGHIJKLMNOPQRSTUVWXYZ:1>{sn:1}
employeeNumber: <sequential:0>
uid: patron<sequential:0>
mail: {uid}@[maildomain]
userPassword: password
telephoneNumber: <random:telephone>
homePhone: <random:telephone>
mobile: <random:telephone>
street: <random:numeric:5> <file:streets> Street
l: <file:cities>
st: <file:states>
postalCode: <random:numeric:5>
postalAddress: {cn}${street}${l}, {st} {postalCode}
This is a simple modification to the example.template file that comes out of the box with the installation. The example.template is located in <OpenDJ_Install>configMakeLDIF folder. The uid has been modified to use the prefix “patron” instead of “user”. Also, the numUsers value has been changed to 101. This indicates the number of test users you would like the script to generate. To generate the test data, run the following command in a command line:
C: practicalldapopendjat>make-ldif --ldifFile
c: practicalldap	estdatapatrons.ldif --templateFile
c: practicalldap	emplatespatron.template --randomSeed 1
- The --ldifFile option is used to specify the target file location. Here you are storing it under the name patrons.ldif in the testdata directory
- The --templateFile is used to specify the template file to be used.
- The --randomSeed is an integer that needs to be used to seed the random number generator used during data generation.
Upon successful creation, you will see a screen similar to Figure 4-1. In addition to the 101 test entries, the script creates two additional base entries.
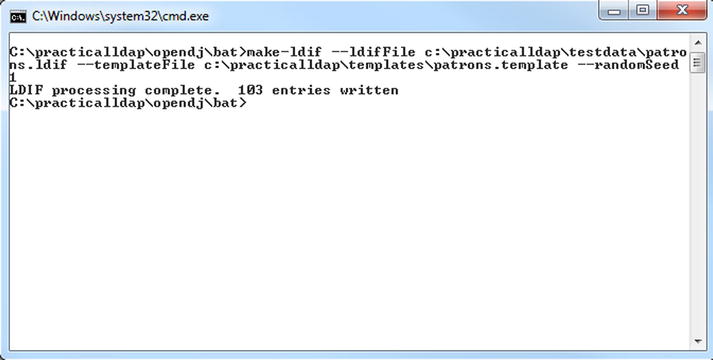
Figure 4-1. Make LDIF command result
Summary
In this chapter, you took a deep dive into testing LDAP code. You started with an overview of testing concepts. Then you spent time setting up ApacheDS for embedded testing. Although embedded testing simplifies things, there are times where you want to test code, minimizing the need for external infrastructure dependencies. You can address those situations using mock testing. Finally, you used OpenDJ tools to generate test data.
In the next chapter, you will look at creating Data Access Objects (DAOs) that interact with LDAP using object factories.