In this section:
Editing Basics
Changing Your View
Editing Your Way
Navigating Through the Document
Converting Old Documents
Reading a Document
Moving and Copying Text
Replacing Text
Inserting Building Blocks
Correcting Your Spelling and Grammar
Correcting Text Automatically
Researching a Subject
Translating Your Text
Once you’ve added content to your Word document, you need to know how to correct and fine-tune what you’ve created, whether your document is a letter, a report, a book chapter, a postcard, or something else entirely. Microsoft Word 2010 makes it easy for you to edit in the way that suits you best by enabling you to be flexible in the way you select and work with the text in your document. You can use the mouse or the keyboard to select text, make corrections, and navigate through your document.
Some of the most common editing practices include correcting words and phrases, checking spelling, reviewing your grammar, and updating or revising text. You may also need to translate words, phrases, or entire documents (something Word 2010 is particularly good at); insert special characters; or add, edit, and arrange the page numbers on the page.
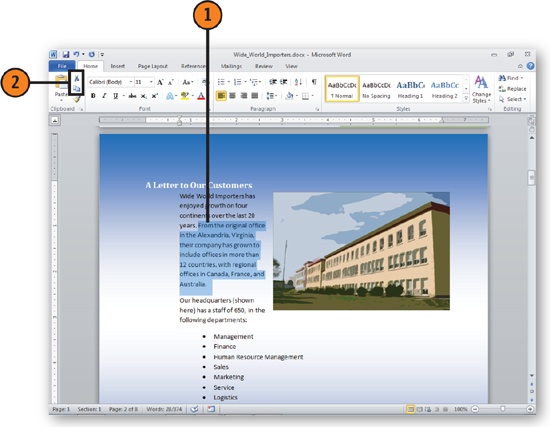
Some of the editing you do will be very simple; you’ll simply need to click and press the Delete key or retype information you’ve already added. In other situations, you may need to replace whole paragraphs, sections, or pages of content. You can use both the mouse and the keyboard to select the text you want to edit.
Click at the beginning of the text that you want to select.
Drag the mouse over the text to select it, and then release the mouse button.
Press the Delete key. The selected text is deleted.
Select some text that you want to replace with new typing.
Type the new text. The selected text is automatically deleted and replaced by the new typing.
Click Save.


Tip
If you prefer to type over text without selecting it, you can use Overtype mode to replace text as you type. To turn Overtype mode on, click the File tab and click Options. Click Advanced and select the Use The Insert Key To Control Overtype Mode check box. Click OK, and then press the Insert key to turn on Overtype mode; press Insert again to turn off overtyping.
Tip
If you accidentally delete some text, immediately click the Undo button on the Quick Access Toolbar to restore the deleted text. You can also press Ctrl+Z to undo the action.
See Also
Editing Your Way for more information about different ways to select text.
Press Alt to display KeyTips for each tab and tool on the ribbon. After you press the key, additional KeyTips appear for the tools on the tab you selected.
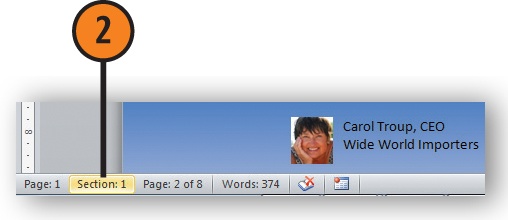
Press F6 to select an item on the status bar, and use the arrow keys to move from item to item.
Use the shortcut keys in the following table to complete various editing tasks.

Tip
If you decide you don’t want to execute an action after you’ve pressed the Alt key, press the Esc key to return to your work.
See Also
Getting Help for information about using Word Help.
Action | Keyboard Shortcut |
|---|---|
Copy and delete (cut) selected content | Ctrl+X |
Copy selected content | Ctrl+C |
Paste content | Ctrl+V |
Hide or minimize ribbon | Ctrl+F1 |
Apply/remove bold formatting | Ctrl+B |
Apply/remove italic formatting | Ctrl+I |
Apply/remove underline formatting | Ctrl+U |
Align paragraph left | Ctrl+L |
Align paragraph center | Ctrl+E |
Align paragraph right | Ctrl+R |
Add/remove space before paragraph | Ctrl+0 (zero) |
Apply double-line spacing | Ctrl+2 |
Apply single-line spacing | Ctrl+1 |
Apply Normal style | Ctrl+Shift+N |
Apply Heading 1 style | Alt+Shift+1 |
Apply Heading 2 style | Alt+Shift+2 |
Apply Heading 3 style | Alt+Shift+3 |
Change case | Shift+F3 |
Undo last action | Ctrl+Z |
Redo last action | Ctrl+Y |
Open shortcut menu | Shift+F10 |
Check spelling | F7 |
Save document | Ctrl+S |
Save As | F12 |
Print (show Print dialog box) | Ctrl+P |
Open Help | F1 |
As you learned in the last chapter, Word 2010 offers a number of different views that enable you to get a fresh perspective on the document you’re creating. Depending on what you want to do—produce a print document, create a Web page, design the outline of a long report—the different views help you get your work done efficiently and effectively. The view controls are located in the bottom-right corner of the Word window, and you can switch from view to view easily by simply clicking the icon of the view you want to use. You can also use the tools in the View tab to set and fine-tune the display in the various Word views.
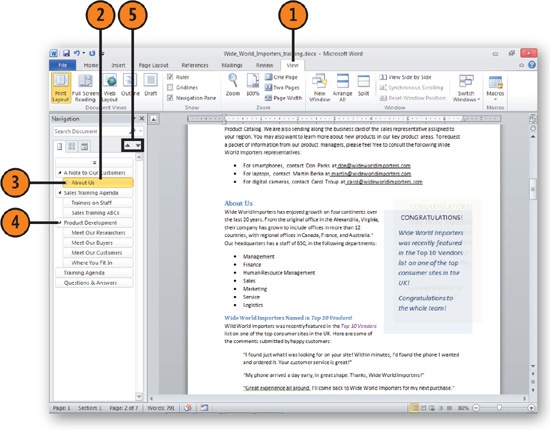
In any view other than Full Screen Reading view, click the View tab.
Choose the view you want to use.
Click to display the Ruler, Gridlines, and the Navigation Pane.
Click to set the display size of the page.
Click to arrange the way open windows are displayed.
Click to minimize the ribbon to get the maximum amount of room on the screen. Click a second time to return the ribbon to full display, or double-click a tab.

Tip
You can also change the magnification by dragging the Zoom Control slider at the bottom-right of the window or by clicking the plus or minus signs next to the Zoom Control slider. You can also change the magnification by holding down the Ctrl key and turning the wheel on your mouse.
Tip
Print Layout, Web Layout, and Draft views all offer similar tools in the ribbon, enabling you to control whether rulers and gridlines are displayed, how much you want the page to be magnified in the view, and how the windows are arranged. Full Screen Reading view and Outline view offer different tools that enable you to customize those particular views.
Word 2010 offers you a variety of ways to do most things. You might, for example, click a button, choose a list item, press a keyboard shortcut, select an item in a gallery, or click the mouse to accomplish the same result. Why are there so many choices? Well, one reason is that we all work differently. Given several choices, we usually do some experimenting, find the way that works best for us, and then use that method. Another reason is that different techniques work best in different situations.
Selecting text and then moving or copying it are a few of those procedures that offer different routes to the same end, and because choosing the best method can make a difference in how well your document goes together, this section offers a few tips about what to use when.
Try these common methods of selecting text to see which work best for you. Of course, there are other ways to select text, and, depending on whether and how you’ve customized Word, some selection methods might work a bit differently from those described here.
The process of moving or copying contents uses different tools, depending on what you want to do. When you use the F2 key or the Shift+F2 shortcut key, the selected material is stored in Word’s short-term memory, where it’s remembered only until you paste it into another location or do something else in Word.
See Also
For information about customizing Word, see the section Chapter 10.
The Cut and Copy tools in the Clipboard group of the Home tab enable you to store the selected material on the Office Clipboard, from where you can retrieve the information once or numerous times. The Office Clipboard stores up to 24 items, which you can retrieve one at a time or all at once.
Overwhelmed yet? There are still more ways to accomplish these same tasks! If you want to explore the full range of different ways to do these tasks, take a stroll through Word’s Help and try out some of the other methods. The following table gives you an overview of the various ways you can perform simple text selection and editing tasks in Word 2010.

Tip
If you don’t want to click the Copy tool in the Clipboard group of the Home tab, right-click the selected text and choose Copy, or press Ctrl+C.
See Also
For more information about using the Office Clipboard, see Moving and Copying Text.
Use this Method | |
|---|---|
Characters in a word | Drag the mouse over the characters. |
A word | Double-click the word. |
Several words | Drag the mouse over the words. |
A sentence | Hold down the Ctrl key and click anywhere in the sentence. |
A line of text | Move the pointer to the far left of the window and click when you see a right-pointing arrow. |
A paragraph | Move the pointer to the far left of the window and double-click when you see a right-pointing arrow. |
A long passage | Click at the beginning of the passage, and then hold down the Shift key and click at the end of the passage. |
Noncontiguous blocks of text | Drag the mouse to select the first block. Hold down the Ctrl key and drag the mouse to select the second block. |
A vertical block of text | Click at the top-left corner of the text block. Hold down the Alt key and drag the mouse over the text block. |
The entire document | Press Ctrl+A. |
To Do This | Use this Method After You’ve Selected the Text |
|---|---|
Move a short distance | Drag the selection to the new location. |
Copy a short distance | Hold down the Ctrl key, drag the selection to the new location and release the Ctrl key. |
Move a long distance or to a different document or program | Click the Cut button, click at the new location, and click the Paste button. OR press Ctrl+X, click at the new location, and press Ctrl+V. |
Copy a long distance or to a different document or program | Click the Copy button, click at the new location, and click the Paste button. OR press Ctrl+C, click at the new location, and press Ctrl+V. |
Copy several items and insert all at one place | Click the Copy button, select the next item, click the Copy button again, and repeat to copy up to 24 items. OR hold down the Ctrl key, select multiple items, and then click the Copy button. Click at the new location, and then click the Paste All button on the Clipboard. |
Move a long or short distance | Press the F2 key, click at the new location, and press Enter. |
Copy a long or short distance | Press Shift+F2, click at the new location, and press Enter. |
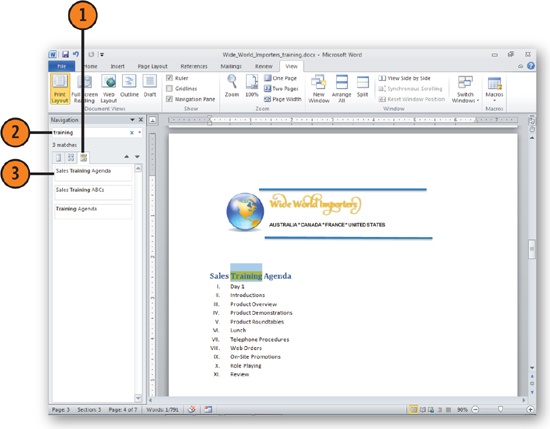
The new Navigation Pane in Word 2010 replaces the Document Map feature in previous versions, enabling you to easily search for specific text items, move through your document by clicking headings, or even see thumbnail images of the pages you’re creating. This makes it easy to find what you need quickly as you review and edit the content in your document.

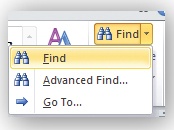
If you want to work with the Find And Replace dialog box, simply press Ctrl+H to display it. Then you can click the tab you want (Find, Replace, or Go To) in order to carry out the particular editing operation you need to complete.
If you want to add special features to the text you’re searching for—perhaps you want to ignore punctuation or find words that sound like the ones you’re searching for—you can click the More button in the Find And Replace dialog box to set additional options.
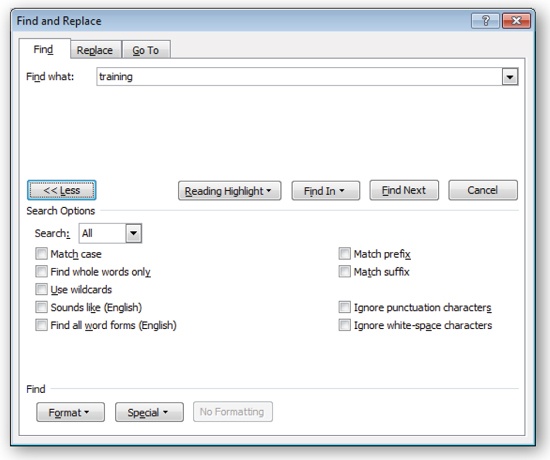
“Wildcard” characters are used to represent other characters. The most commonly used wildcards are ? and *. The ? wildcard represents any single character, and the * wildcard represents any number of characters. For a complete list of wildcards, select the Use Wildcards check box, and click the Special button.
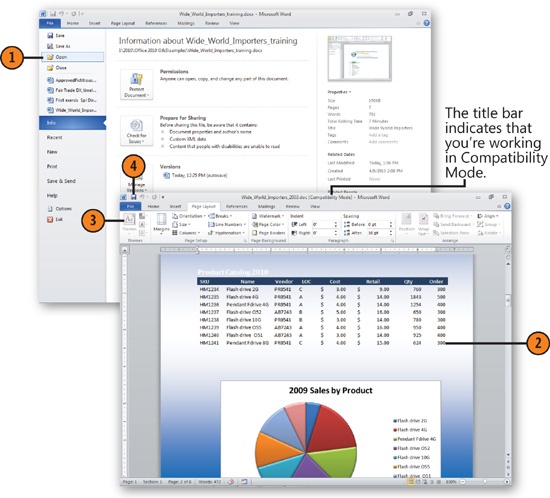
Not every document you create will be a new document, of course. You might begin with last year’s draft of the home show tour map and then modify it to fit this year’s tour. When you open a document that was created in a version of Word prior to 2007, Word 2010 displays the document in Compatibility Mode. The upside is that your document will be compatible with files created in a pre-2007 version of Word. The downside is that many of the great new features—such as text effects and artistic elements—won’t be available while you’re working in that older format. You can convert the older document to take advantage of the new features and also point your oldermodel Word friends to a compatibility tool available online that will enable them to seamlessly read the documents you send—until they decide to upgrade for themselves.
Click the File tab and click Open to display the Open dialog box, and double-click the file to open it.
Work on the document as you normally would.
If you encounter a grayed (unavailable) feature such as Themes, simply ignore that feature because you can’t use it.
Click the Save button to save the file in its original format.
Try This!
If you are working in a Word 2010 document and wonder which of the features you’ve used won’t be available to friends and family working with an earlier version of Word, run the Compatibility Checker to find out. Click the File tab and in the Info tab, click Check For Issues. Click Check Compatibility, and the Microsoft Word Compatibility Checker displays all the features that will be impacted and enables you to choose the version of Word you want to use to compare.
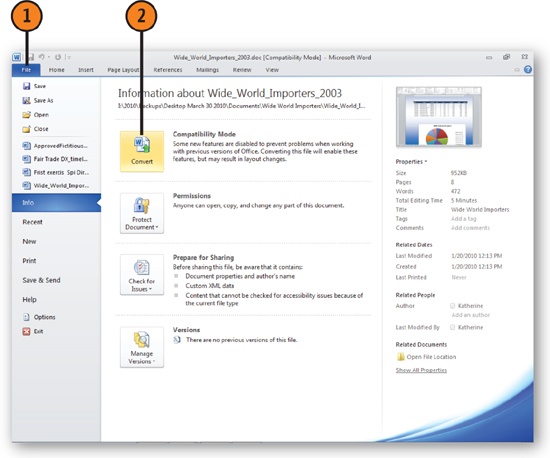
With your Word 97–2003 format document open, click the File tab.
In the Info tab, click Convert.
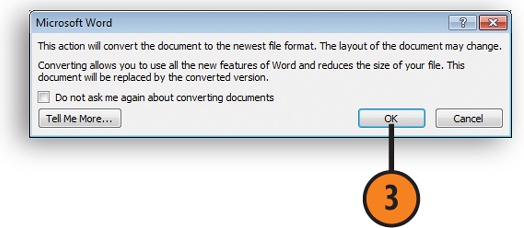
If you see a dialog box asking you whether you want to convert, click OK. The original file won’t be overwritten because its file extension is different from that of the updated file.
Work on your document using all the features in Word.
Caution
If you upgrade the file format of the document, the file won’t be usable by people who have earlier versions of Word unless they’ve installed the Office Compatibility pack, which enables them to read and save this type of file.
Tip
If you need to send an upgraded file to someone who has an earlier version of Word but doesn’t have the Office Compatibility pack, point to the arrow at the right of the Save As command on the Office menu, and choose Word 97–2003 Document from the gallery that appears. You might lose some advanced features in that version of the document, but at least other people will be able to read it.
Tip
Some features work differently in Compatibility Mode than they do in Word 2010 format. For example, equations are inserted as pictures, and SmartArt graphics are limited to the diagrams used in earlier versions of Word. These modifications are necessary so that you can open the file in your earlier version of Word.
In some cases, you just need to read through a document so that you can prepare for an upcoming meeting, learn about a new topic, or provide feedback to someone who has requested it. You can use Word’s Full Screen Reading View to read the document in a view that is optimized to help you navigate easily while you read. You can also add comments, highlight words and phrases, and change the view to suit your style.
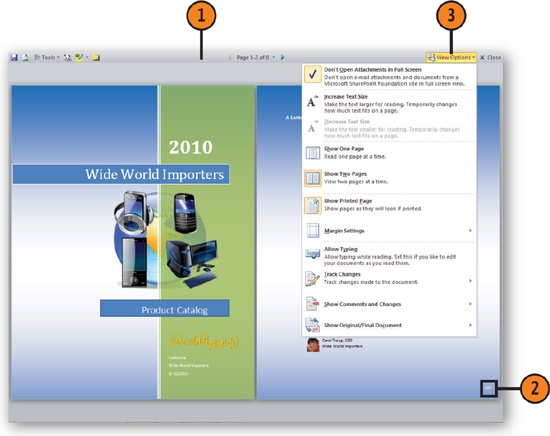
Click the View tab and click Full Screen Reading.
Click the arrow at the bottom-left corner of the page to move to the previous page or pair of pages, or click the right arrow to move to the next page or pair of pages.
Open the View Options menu, and choose
Increase Text Size or Decrease Text Size to change the size of the screen text.
Show One Page or Show Two Pages to view a single page or a pair of pages.
Show Printed Page to view the page as it will look when printed, and Margin Settings to specify whether the margins should be shown correctly or shrunk so that the text can be shown in a larger size.
Allow Typing to edit the text as you read it, and Track Changes to mark all changes.
Show Comments And Changes to display all comments and marked changes, and to indicate which types of changes came from which reviewers.
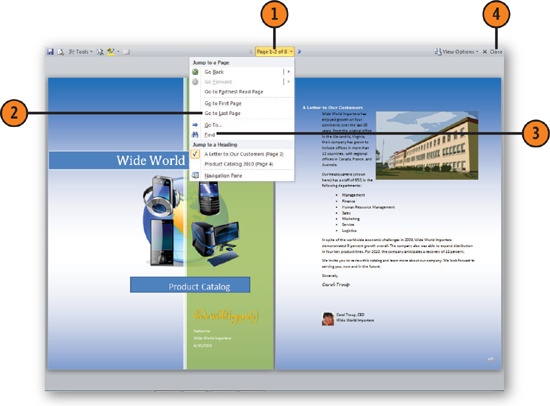
Click your choice to move to a specific page, location, or heading, or to display the Navigation Pane.
Click Find to display the Search tab of the Navigation Pane so that you can search for specific words or phrases.
When you’ve finished, press the Esc key or click the Close button to exit Full Screen Reading view.
Tip
You can also use the choices in the Tools menu to highlight text, translate words and phrases, and look up more information about the topic.
See Also
Working with Revision Marks for information about adding comments or tracking changes.
Word uses the Clipboard to temporarily store text and other content that you want to move or copy to another part of your document, to another document in the same program, or to a document in another program. You simply place your content on the Clipboard and then, when you’re ready, you retrieve it by pasting it into its new location. Word uses two different Clipboards: the Windows Clipboard, which stores only the item most recently cut or copied; and the Office Clipboard, which can store as many as 24 different items, including the most recently cut or copied item, but which works only with Office programs. Word 2010 includes a dramatically improved feature called Paste with Live Preview that gives you choices about the way you paste information you’ve cut or copied.
Select the text you want to cut or copy.
Do either of the following:
Click the Cut button in the Clipboard group of the Home tab (or press Ctrl+X) to delete the selected text and store it on the Clipboard.
Click the Copy button (or press Ctrl+C) to leave the selected text in your document and place a copy on the Clipboard.
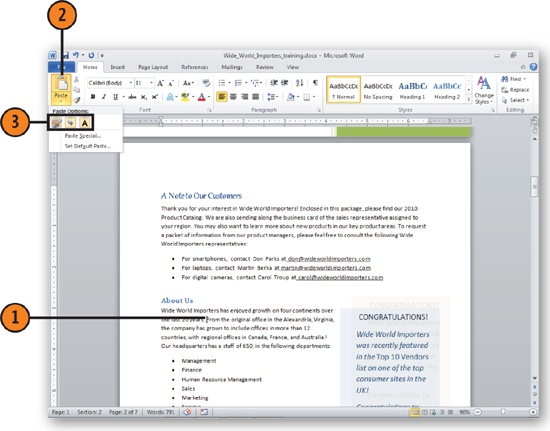
Click the Paste button (or press Ctrl+V).
Point to the Paste option you want to use to preview it in your document. You may see the following choices:
Keep Source Formatting preserves the format of the original copied text.
Merge Formatting matches the format of the text surrounding the pasted text.
Keep Text Only places only the text at the cursor position.
If you want to change the format of the pasted text, click the Paste Options button that appears and choose Match Destination Formatting from the menu.

Click each item you want to paste into the document and choose Paste.
To paste all the items you copied into one location, click Paste All.
Click Clear All when you no longer need any of the copied items and want to empty the Clipboard to collect and store new items.

Tip
You can change the way the Clipboard appears and behaves by clicking the Options button and choosing the settings you want.

See Also
Editing Your Way for information about the many different ways to copy and move text.
Earlier in this section you saw the Find And Replace dialog box, an old standby for finding and changing words and phrases in your document. When you need to replace text in several places in your document, you can let Word do it for you to save time and trouble. It’s a great way to use Word’s speed and power to make quick work of those tedious document-wide changes.
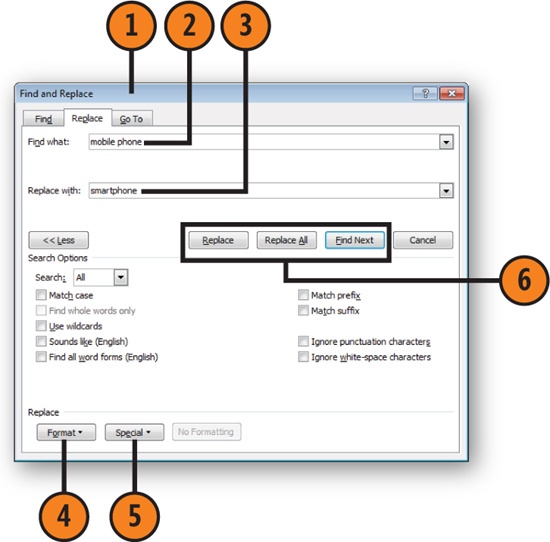
On the Home tab, click the Replace tool in the Editing group (or press Ctrl+H) to display the Find And Replace dialog box with the Replace tab selected. Click the More button to show the full dialog box.
Type the text you want to find.
Type the replacement text.
To narrow the search, click Format and specify the formatting of the text you’re searching for.
To replace nontext items, click Special and specify any element that’s associated with the text.
Click one of the following:
Replace to replace the found text and find the next instance of the search text.
Replace All to replace all instances of the search text with the replacement text.
Find Next to find the next instance of the search text without replacing it.
Click Close when you’ve finished (the Cancel button changes to Close after you’ve conducted a search).
If you type the same word or phrase repeatedly, you can save yourself a lot of time (especially if you use long technical terms or difficult names) by saving that word or phrase as a building block that is available in your Quick Parts gallery. You assign the Quick Part a short name—a nickname of sorts, with at least four letters; then when you type the nickname, the Quick Part is inserted into your document. And the Quick Parts feature isn’t limited to text; the information can be anything you can put into a document: pictures, tables, whole new pages, even fields. Word comes already equipped with numerous Quick Parts entries for some of the most common types of information you may want to add to your document.
In your document, select the content you want to use to create a building block. You might choose your mission statement, for example, or a quote you use on all your correspondence.
On the Insert tab, click the Quick Parts tool in the Text group, and choose Save Selection To Quick Part Gallery (or press Alt+F3) to display the Create New Building Block dialog box.
Accept the suggested name or type a new name for the entry.
Select Quick Parts if it isn’t already displayed in the Gallery list.
Select a category for the entry, or choose Create New Category to create and select an additional category.
Specify where you want to save the entry: in the current template, the global Normal template, or the global Building Blocks collection.
Specify the way you want the material to be inserted.
Click OK.

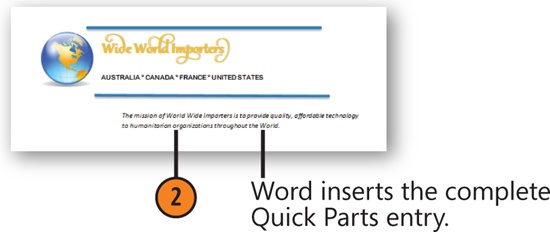
Place the insertion point where you want the content to be inserted, type the name you assigned to the Quick Part you created, and press the F3 key to insert the content.
Check your document to verify that Word inserted the correct information.

Tip
If you frequently use the Quick Parts gallery to insert content, open the gallery, right-click it, and choose to add the gallery to the Quick Access Toolbar. That way, you’ll be able to access the gallery while you’re working on any command tab in Word.
Try This!
Type sund and press Enter to insert the AutoText “Sunday.” This is just one example from Word’s long list of built-in Quick Parts entries that frequently show up as AutoComplete entries.
Tip
The building block you added will also be available in the Quick Parts gallery, so you can add it to your document by clicking in the document, choosing Quick Parts, and clicking the building block in the gallery. You can also right-click the item in the gallery to choose where you want the item to be placed.
Your document may look and read great, but if there are misspellings sprinkled here and there, your readers are going to miss how great your document really is. Clean up any stray mistakes by using Word’s Spelling and Grammar checker. Word 2010 points out any misspelled or unrecognized words and can even help you check the spelling of translated words and phrases. The Grammar checker helps you make sure that your text is readable and clear.
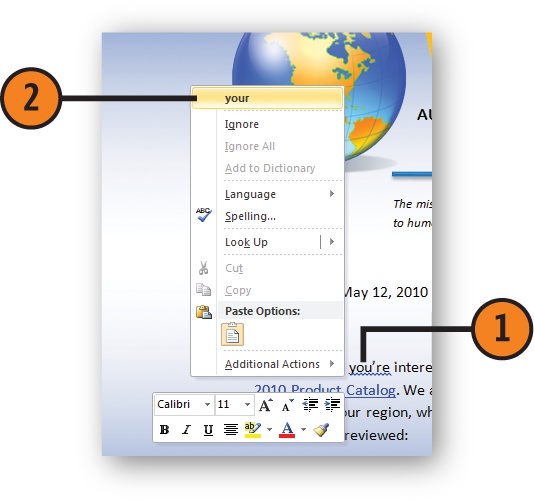
Right-click a red squiggle to see one or more suggestions for correcting the error.
Click the suggestion you want to use.
If you believe that what you have isn’t an error but is something that isn’t recognized by Word, click Ignore or Ignore All to tell Word to ignore the word throughout this document, or click Add To Dictionary to have Word ignore the word throughout all your documents.

See Also
Correcting Text Automatically for information about having Word automatically correct the spelling of words you frequently misspell and Customizing Your Spelling Dictionaries for information about adding and modifying the dictionaries that are used in the spelling check.
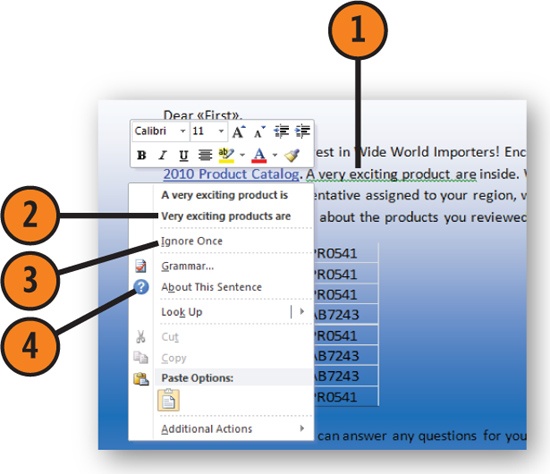
Right-click a green squiggle.
If the shortcut menu suggests alternative phrasing, click to use the alternative. If only a description of the problem is shown, click in the document and edit the text as suggested.
If you’re sure your grammar is correct, click Ignore Once.
If you want to know why the text was marked, click About This Sentence for an explanation of the grammar rules involved.
So do you have a mental block when it comes to the spelling of certain words? Is it hard to remember “i before e except after c”? Word offers the AutoCorrect feature just for you. You can teach Word about your common misspellings and AutoCorrect will watch for the words and correct them for you.
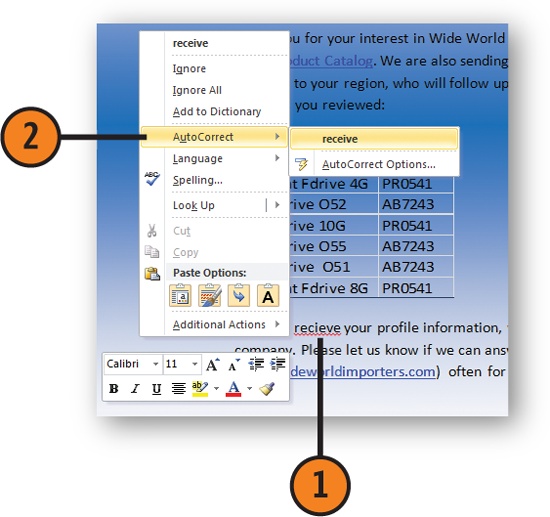
Right-click one of your own common misspellings.
Point to AutoCorrect on the shortcut menu and choose the correct spelling from the list of suggestions that appears.
Check your document and observe that the correct spelling has replaced your misspelling. Continue composing your document. Note that if the same misspelling occurs again, Word corrects it for you.
Click the File tab and click Options. In the Word Options dialog box, click Proofing.
Click the AutoCorrect Options button.
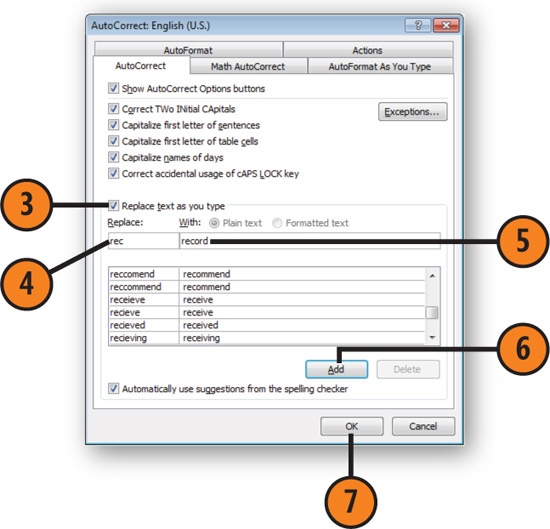
Make sure the Replace Text As You Type check box is checked in the AutoCorrect tab.
Enter the abbreviated or incorrect text that you’ll type.
Type the text that you want to replace the text you typed.
Click Add.
Add other entries if desired. Click OK when you’ve finished.

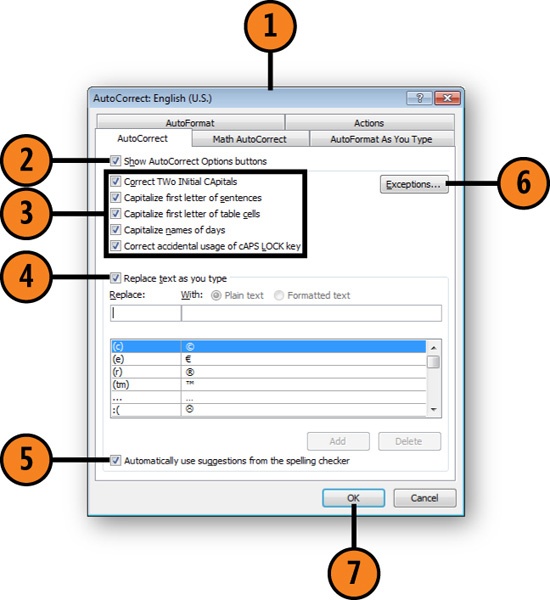
Click the File tab and click Options; click Proofing and click the AutoCorrect Options button.
On the AutoCorrect tab, select this check box to have AutoCorrect changes marked with the AutoCorrect Options button in your document so that you can reverse the changes if you want.
Select or clear check boxes to specify the items you want Word to correct.
Select this check box to have Word replace any item in the list with its correction.
Select this check box to have a misspelling automatically replaced with a correction from the spelling dictionary, if the correction is clear.
Click Exceptions to specify when a word that would normally start with a capital letter is not to be capitalized (for example, after the apparent end of a sentence or after a specified word or abbreviation), when two capitalized letters in a row are not to be corrected, and any other exceptions you want to add.
Click OK.
Tip
AutoCorrect remembers when you don’t want it to change items such as the capitalization of the first letter in a sentence, or two initial capital letters. However, if you do want it to make these changes on a case-by-case basis, you have two choices. You can use the Backspace key to remove the correction and can then retype the text the way you want it (but for this to work, the Automatically Add Words To List check box must be selected in the AutoCorrect Exceptions dialog box), or you can click the AutoCorrect Options button for the correction and use the menu to prevent Word from making these corrections.
When you’re working on your document and suddenly go blank, wouldn’t it be great to be able to look up information that would help you get going again? Maybe a peek at a thesaurus will help. Or an interesting definition of a word will spark some new ideas. Word can help you expand your understanding when you use the built-in research features to find out more about the words you’re using as you write about your chosen topic.
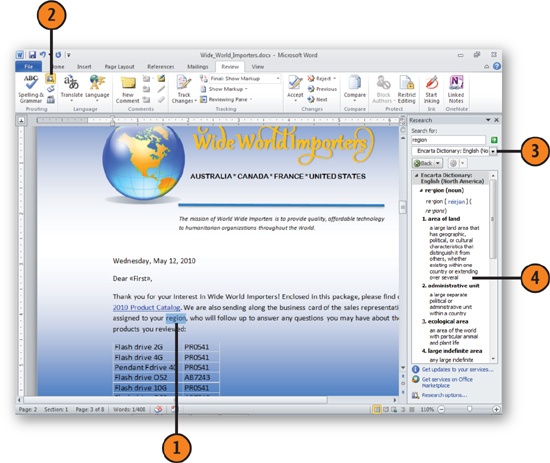
Click in a word (or select a group of words) that you want information about.
On the Review tab, click the Research tool in the Proofing group.
Select the resource or the types of resources you want to use.
Review the results.
If you want to look up something more, type the word or words, and press Enter.
Tip
You can fine-tune the types of results Word displays in the Research task pane by clicking Research Options at the bottom of the pane. In the Research Options dialog box, click the services you want to include in your search; then click OK to save your changes.
Today it’s not unusual to be trading files with friends from other countries and including in your document phrases, places, and sayings that are common in other cultures. Word 2010 includes improved language tools that help you translate words or phrases as you go. The Mini Translator pops up over your document to provide quick translations within easy reach. And you can set your language preferences in proofing tools so that you can be sure you’re using the phrases correctly no matter which language you’re using.
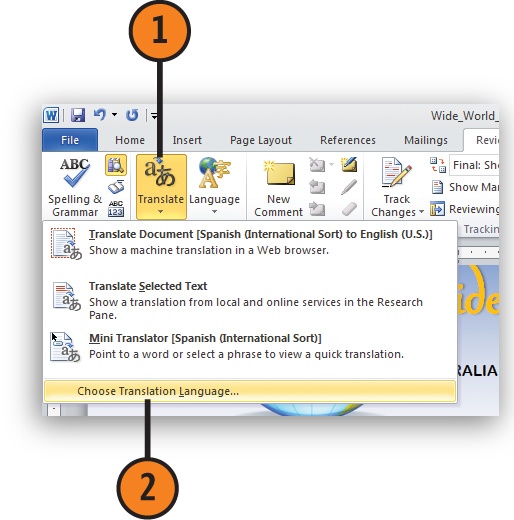
On the Review tab, click Translate in the Language group.
Click Choose Translation Language.
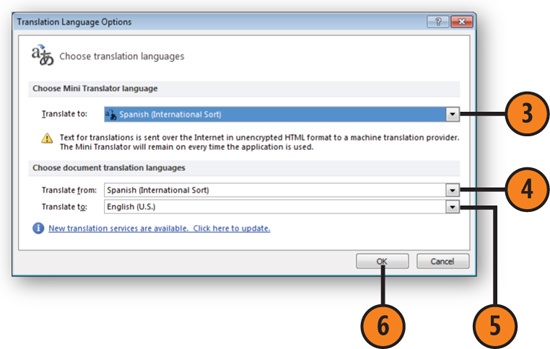
In the Translation Language Options dialog box, click the Translate To arrow. This is the setting that controls what you see in the Mini Translator.
Select the language from which you want to translate.
Choose the language you want to translate to.
Click OK.
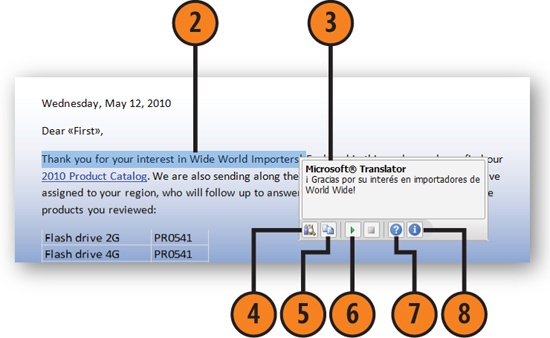
On the Review tab, click Translate in the Language group and click Mini Translator.
Select the text in your document you’d like to translate.
Hover the mouse pointer over the text, and the Mini Translator appears.
Click Expand to open the Translation page of the Research task pane so that you can find out more about the translation.
Click Copy to copy the translated text for pasting in another location.
Click Play to hear the translation pronounced.
Click Help to get more information about translation features.
Click Update Services to download translation updates to your version of Word.