
Chapter 2. Quick Start
In this chapter you will launch right into using the Spark Photon or Core. If you are new to programming and this kind of technology, then just work through the instructions here and do not worry too much if there are things that you don’t understand; these will all be explained in much more detail later in the book.
Signing Up
One of the things that you get when you buy a Spark device is access to Spark’s Cloud Service. You will need to register to gain access to this. Registering with the cloud service is essential as it allows you to manage your Photons and Cores over the Internet, including programming them remotely.
The cloud service is also what a Photon/Core uses to communicate with other Photons, Cores and browser applications.
Your first step should therefore be to sign up at www.spark.io. Click on the LAUNCH button to begin the sign-up process. Don’t worry, this is strictly just to use your Photon over the Internet; you will not be bombarded with spam.
Once you are all signed up, you will find yourself in the Web IDE ready to start writing programs. Before you can do that, you need to connect your Photon to the Internet.
Connecting to WiFi
Although it is possible to program a Photon or Core over its USB connection (see Chapter 9), it makes more sense to program an Internet device like this over the Internet using the Web IDE. To do that, the Photon or Core needs to be connected to the Internet over WiFi. To be able to connect using WiFi, it needs to know the SSID (network name) and passphrase of your home network.
WiFi Networks with Login Screens
Connecting to WiFi in a home environment with direct access to the Internet is no problem for the Photon or Core. Even a WiFi hotspot setup using your cellphone should work.
If, however, you are trying to use a Photon or Core at, say, a hotel or public network where after joining the WiFi network you have to fill in a form or use a web-based login screen, then you probably won’t be able to connect.
As you may have noticed, the Core and Photon have no keyboard or display, so you need a way of telling them these details.
Connecting a Core
If you have a Photon, rather than a Core, then you need to skip ahead to the next section.
To help you get your Core connected, Spark has produced a smartphone app available for Android and iPhone. The Spark mobile app, also known as the Tinker App in the Core documentation, goes by the name “Spark Core” in the App Store and Play Store. The app actually does more than allow you to connect your Core to the Internet; it also allows you to control the Core, turning pins on and off, etc. If you do not have a suitable smartphone, then all is not lost; you can configure both the Core and Photon using the USB cable (see Chapter 9).
When you plug in a brand-new Core, it should blink dark blue, indicating that it is “listening” for a WiFi network to connect to. Unless it is in this state, you will not be able to connect it to your wireless network. You can put your device back into this state either by clearing credentials (hold Setup until it blinks blue very rapidly), or by doing a factory reset on it as described in Chapter 9.
You will need an Android or iOS (iPhone/iPad) device to use the Tinker app to connect your device, and the phone or tablet must be connected to the WiFi network that you want to join the Core to.
When you first start the Tinker app you will be prompted to log into your Spark account (Figure 2-1). Sign in using the same email and password that you gave when you signed up to Spark.
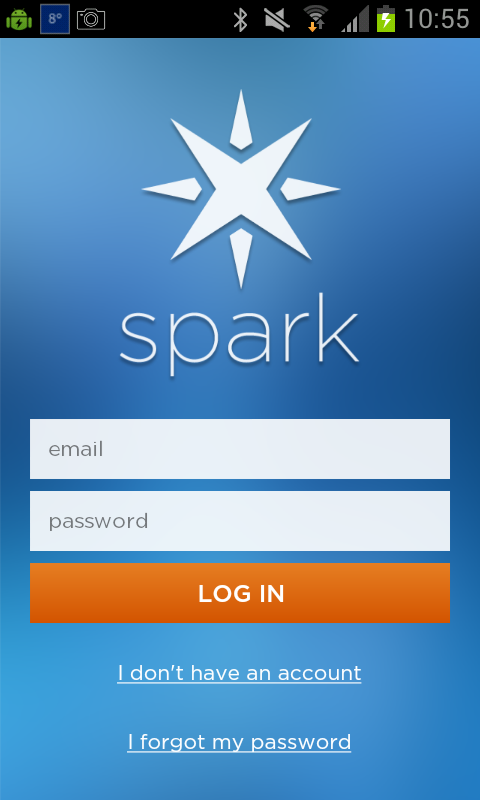
Figure 2-1. Logging into your Spark account
After you are logged in, you will be prompted to enter your WiFi password. The SSID (wireless network name) will be pre-filled as your device is already connected to that wireless network (Figure 2-2).

Figure 2-2. Entering your WiFi password
The app should then discover your Core and prompt you to supply a name for your Core (Figure 2-3). At this point the Core will be “shouting rainbows at you” as it says in the dialog.

Figure 2-3. Naming your device
The Core should then reset, and when its finished the LED should be gently breathing in cyan and ready to start using.
Connecting a Photon
Connecting a Photon works in much the same as connecting a Core, but behind the scenes the Photon will be briefly hosting its own WiFi network. The mobile app connects to this network and securely provides the credentials to the device. The Photon needs a different mobile app (the Photon App) to setup your Photon.
The steps that will take place in order to get the network name and password onto a Photon are:
- Connect your phone to the Photon’s temporary WiFi Network (Soft Access Point)
- Select the network whose details you want to pass to the Photon
- Let the Photon connect to your network and then register itself on the Spark web service
After logging in, the app will remind you to power up your Photon (Figure 2-4).

Figure 2-4. Prepare your Photon
The next step involves temporarily connecting your phone to the Soft Access Point being hosted by the Photon. This means you will need to use your iOS or Android device’s settings to change network. The Photon App will prompt you with the name of the network that you should connect to (Figure 2-5).
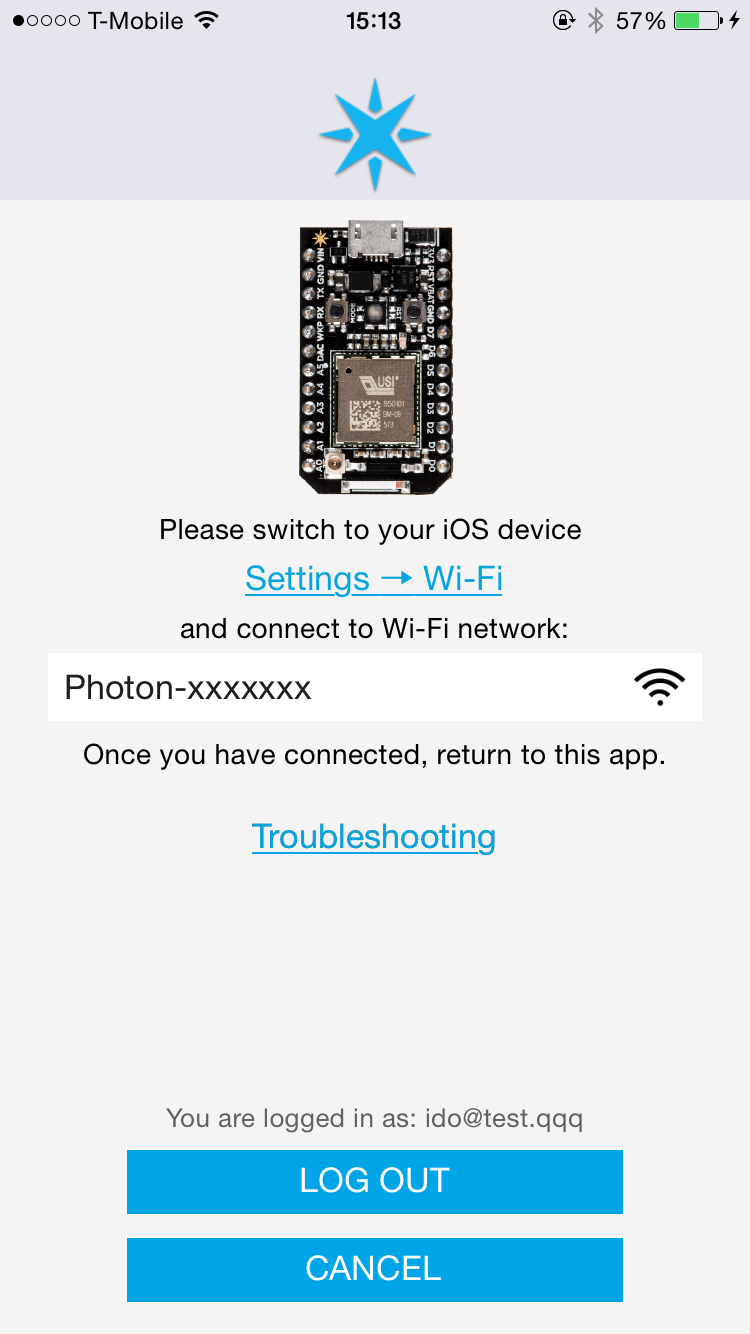
Figure 2-5. Finding the temporary network name
Figure 2-6 shows the settings screen for an iPhone with the Photon’s Soft Access Point (Photon-F1FC) selected.

Figure 2-6. Connecting your phone to your Photon’s Soft Access Point
When you have done this, you will be returned to the Photon App, where you now have to select your home WiFi network from the list (Figure 2-7).
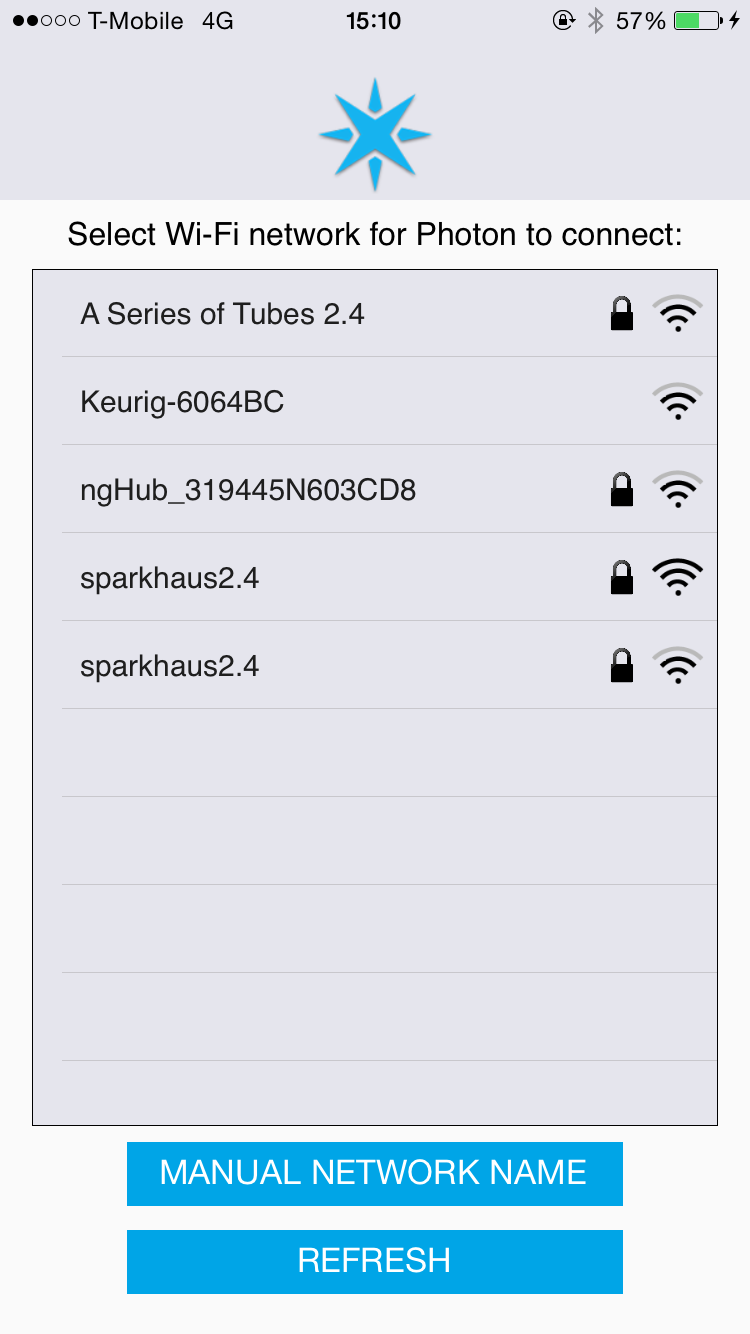
Figure 2-7. Selecting your network for the Photon to connect to
You will then be asked to enter the credentials so that the Photon can join the network (Figure 2-8).

Figure 2-8. Entering credentials
Finally, the Photon will connect itself to the Spark Cloud Service (Figure 2-9).

Figure 2-9. A Photon connecting and registering
Controlling Pins with the Tinker App
Before trying out our first program, we can use the smartphone Tinker app to control the Photon or Core. This is the same smartphone app that you used to configure your Photon/Core, but having configured the device, you can use the same app to interact with it.
In this case, you will use it to turn the built-in blue LED attached to pin D7 on and off.
The first step is to launch the app on your Android phone or iPhone. Log in to Spark if you are prompted, and you should find yourself at the main control screen.
Before you can turn pin D7 on and off, you first have to tell the Photon/Core that pin D7 is to be used as a digital output; so tap and hold the screen next to D7, and the menu shown in Figure 2-4 should appear.

Figure 2-10. Controlling D7 with the Tinker App
Select the option digitalWrite. Now, if you tap on the D7 pin on the screen, the blue LED next to pin 7 will toggle on and off.
Project 1. Blink the Tiny Blue LED
Programmers have a tradition that the first program that they write in any language should be called “Hello World." This usually involves just getting the program to display the words “Hello World." Clearly the Photon/Core doesn’t have anywhere to display those words, so we will have to think of something else as our easiest possible program.
Arduino and other similar boards have adopted the task of blinking an LED as the most basic type of thing that you might want to do with a board like the Photon, so let’s start with that.
Log in to Spark.io by clicking on the LAUNCH button, and you should find yourself at the Web IDE page. At the bottom left of the screen, you will find a section called Example Apps. Click on the option BLINK AN LED, and the program shown in Figure 2-11 will load into the IDE’s editor.

Figure 2-11. The Web IDE with the blink program loaded
Do not worry about how this program works, all will be explained in the next chapter. For now we just want to see that LED blink, so click on the icon in the top left of the IDE that looks like a lightning bolt. This is the “Flash” button which will flash the blink program onto your Photon.
You should see a message appear in the status area at the bottom of the screen that says: Flash successful! Please wait a moment while your Photon is updated...
Occasionally, the flashing will appear to hang and nothing happens. Eventually, the IDE will time-out and you can try again. It may help to reset the Photon/Core by clicking on the Photon’s reset button.
At this point, the RGB LED on the device should start blinking away in purple, indicating that the Photon/Core is being updated. After the device has received the program, it will reset itself and the RGB LED will blink green while it reconnects to your WiFi. It should resume breathing cyan when it connects to the Cloud. Once the Photon/Core restarts, the tiny blue LED next to pin 7 will flash on and off every two seconds.
Occasionally, connection problems occur and the flashing process fails. If this happens, just try again.
You will meet this program in the next chapter, where all will be explained; but before that, in Project 2 below, you will learn how to create a new program and type in the code for it.
Project 2. Control the Photon’s LED
Like the tiny blue LED attached to pin D7 of the Photon or Core, you can also control the RGB LED that the Photon uses to indicate its status. In this mini-project, you will type a short program into the Web IDE that will make the RGB LED light up red, then change to green, and then, after a further two seconds, turn blue, and so on.
The first step is to click on the CREATE NEW APP button on the left hand side of the Web IDE. This will start a new app as shown in Figure 2-2.

Figure 2-12. Creating a new app
As you can see in Figure 2-12, you are being prompted for a name for the app. This needs to be unique, and whatever you type here as a name will be converted into uppercase letters. If you want to separate the words of the app name, you can use the underscore (_) character. Let’s call the app “RGB_LED.”
When you create a new project, the Web IDE will automatically create a blank template into which you can write your code. At the moment, the program for the app looks like this:
voidsetup(){}voidloop(){}
Change this text so that it appears as below:
voidsetup(){RGB.control(true);}voidloop(){RGB.color(255,0,0);delay(2000);RGB.color(0,255,0);delay(2000);RGB.color(0,0,255);delay(2000);}
All the text that you are going to add into the template needs to be tabbed in one tab space, so on each new line, press the Tab key once before typing the line of code. Notice that each line of code must end in a semi-colon.
When you have typed in all of the code, save the app by clicking on the Save icon (which looks like a folder), and then hit the flash button (lightning bolt) to program the Photon.
It does not matter whether the Photon is plugged into the breadboard or not. However, keeping your Photon on the breadboard will protect its pins against getting bent or accidentally shorting together if they touch something metal.
Once the Photon/Core has finished flashing purple and has restarted, you should see the RGB LED cycle through red, green and blue.
Summary
Congratulations, you have made your Photon or Core do something!
In the next chapter you will revisit both the apps that you have run on your core to understand a bit more about how they work and how to go about writing your own apps.