
Lesson 1
Getting Started with Go
Go is an open source programming language developed and distributed by Google. In this lesson, we will walk through the steps of installing Go on a computer running Microsoft Windows 10 or later.
INSTALLING GO
There are several requirements for installing Go. First, you must have administrative rights on your computer. If you own the computer, you should have no problems. If you are using a work or school computer, contact your IT department if you run into permission problems during the installation process.
Alternatively, if you have an older version of Go that you would like to update, you might want to remove the existing version before installing the updated version.
You will also need a text or code editor to create Go programs. Go programs are written in plain text, so if you already have an editor you like, you can continue using it. If you have never used a code editor before or if you want to try a different one, you can use one of the following:
- Visual Studio Code
- (downloadable from
https://code.visualstudio.com) - Atom
- (downloadable from
https://atom.io)
You can also find additional editors that support Go by going to the “Editor plugins and IDEs” page on the Go site. The page is found at https://go.dev/doc/editors.html. You can also use a plain-text editor such as Notepad if you prefer; however, an editor that supports Go, such as Visual Studio Code or Atom, will provide tools to help you with errors in your code.
Downloading the Installation Files
The first step is to download the most current version of the installation files. You can find the files on Go's Downloads page at https://go.dev/dl. The instructions shown in Figure 1.1 are for version 1.17.2 for Windows, but you will likely see a more recent version on the page.
Click the link for your operating system in the Featured Downloads section of the page. This will download the necessary installation file or package for your operating system.
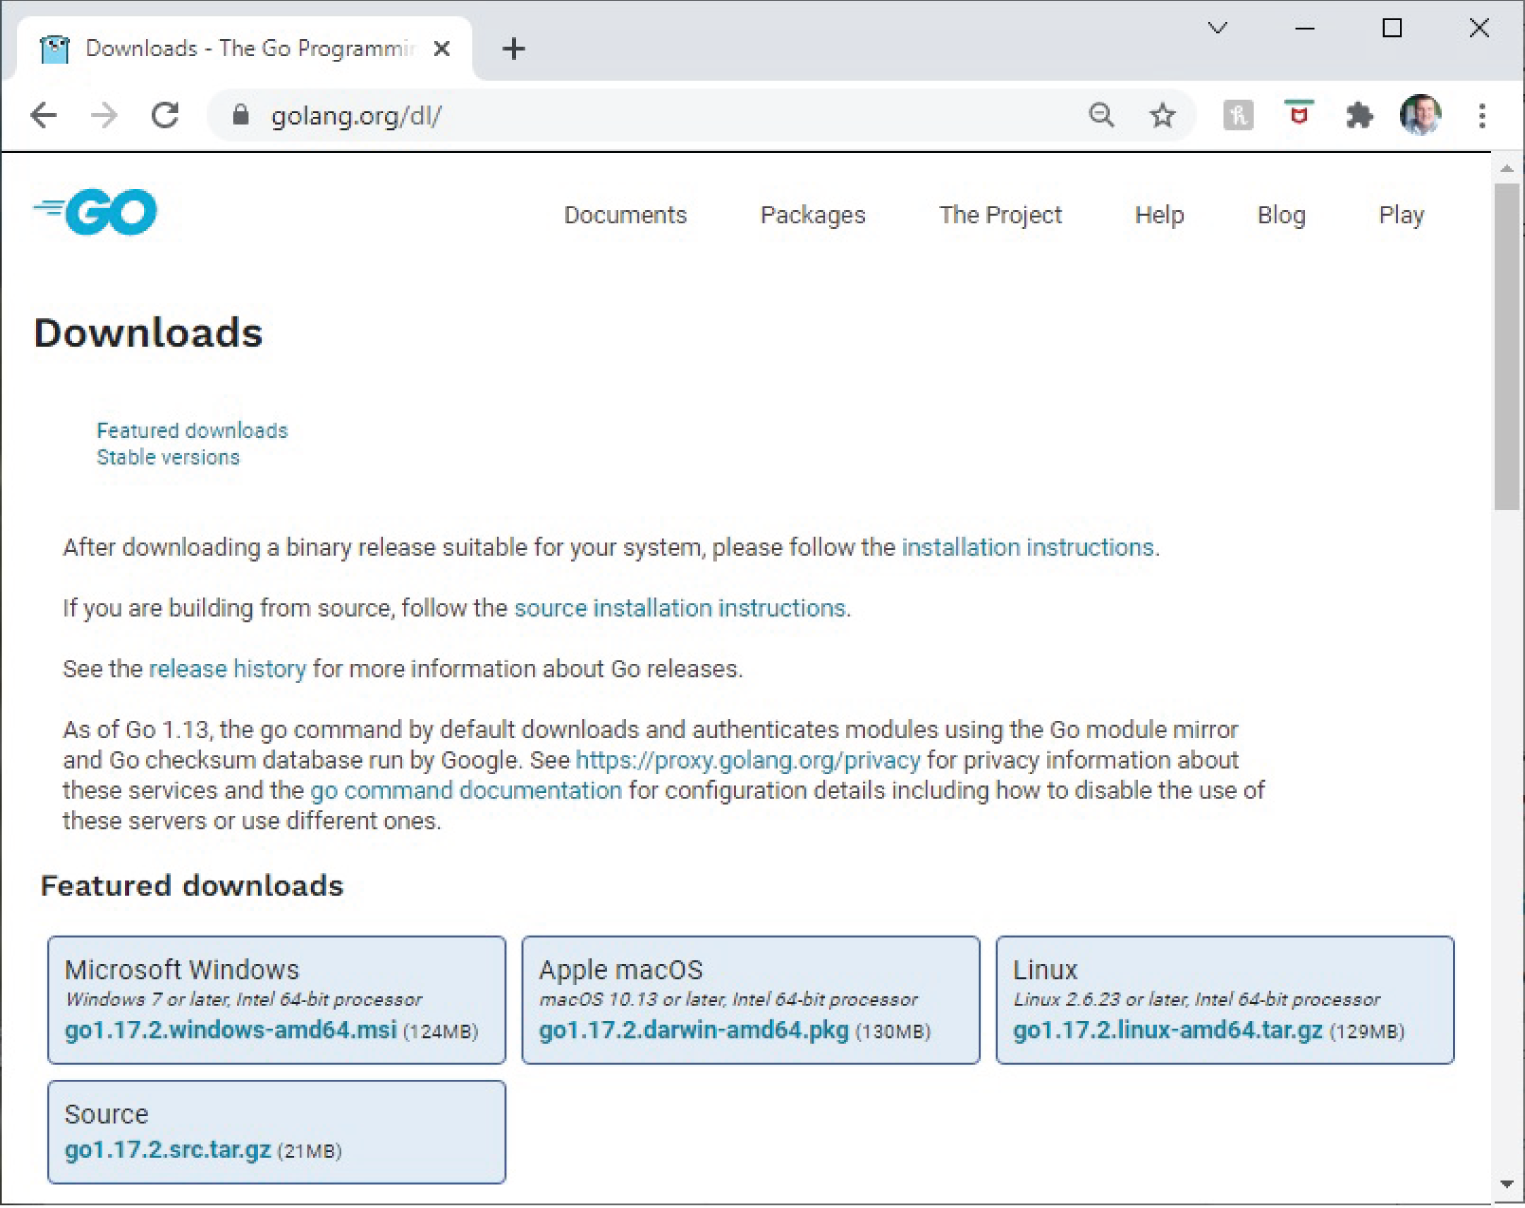
Figure 1.1: The Go Downloads page
Starting the Installation of Go
Once you have downloaded the installation file, open it from your computer. In Windows, you can open it by simply clicking the filename. This will start the Setup Wizard, as shown in Figure 1.2.
Click Next to begin the installation. The next screen displays the End-User License Agreement, as shown in Figure 1.3.
Go is distributed under an open source license. This means that you can modify and/or redistribute the code if you wish, but you must include the same copyright notice in any package you distribute.
You should read through the licensing agreement and then select the check box to accept it. Click Next to continue the installation. The next screen, shown in Figure 1.4, asks you to specify the destination folder where Go will be installed.
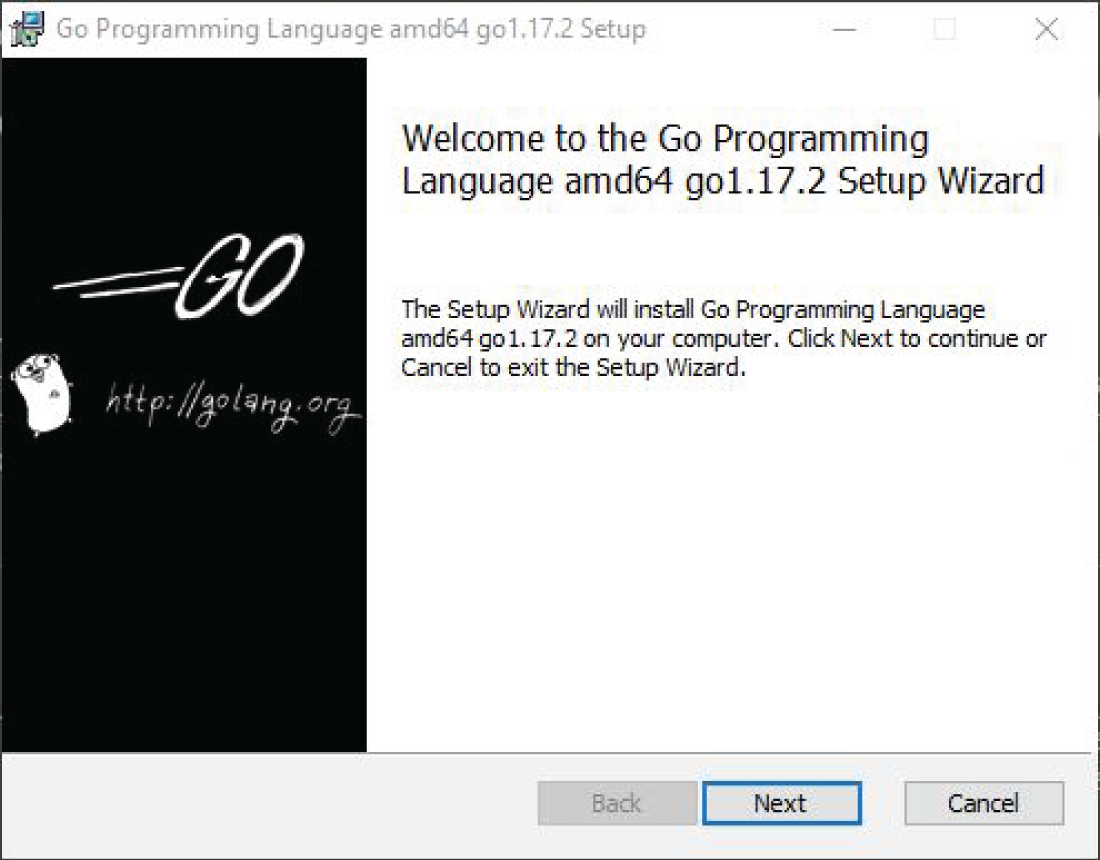
Figure 1.2: The Go Setup Wizard
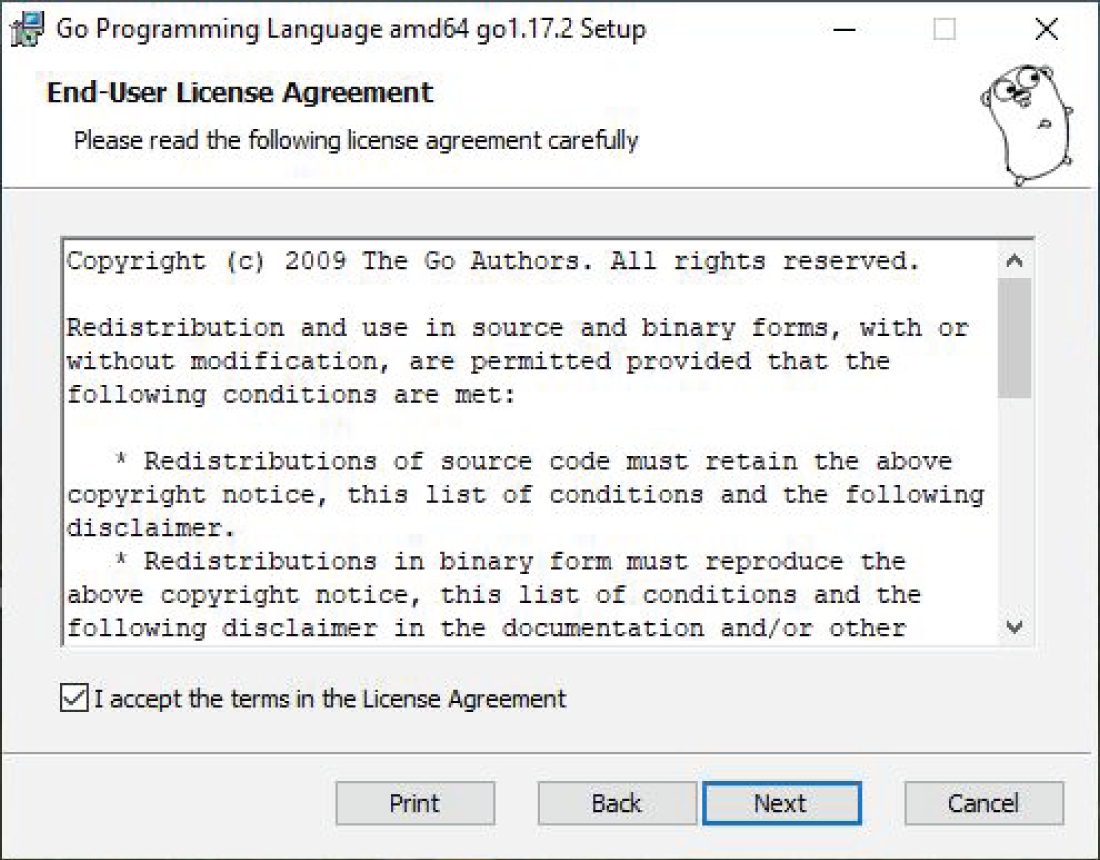
Figure 1.3: The Go End-User License Agreement
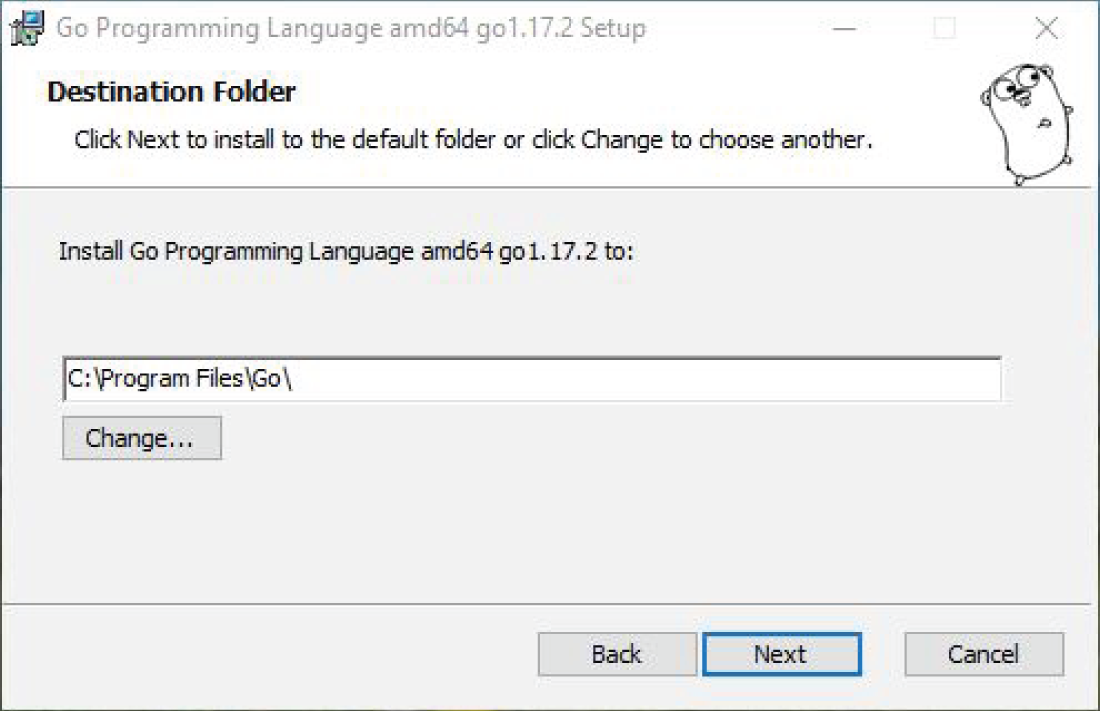
Figure 1.4: Specifying the folder where Go will be installed
You can either accept the default location or set a new location by entering the path to a folder or by clicking on Change to select a new location to install Go. Once you've entered the destination folder, click Next again. On the next screen, click the Install button to start the installation. Note that you might be prompted by Windows asking if you give permission to install the application. If so, you will need to indicate that it is okay.
When the installation is complete, you will see a confirmation message when the installation is complete, similar to what is shown in Figure 1.5. You can click the Finish button to close the wizard.
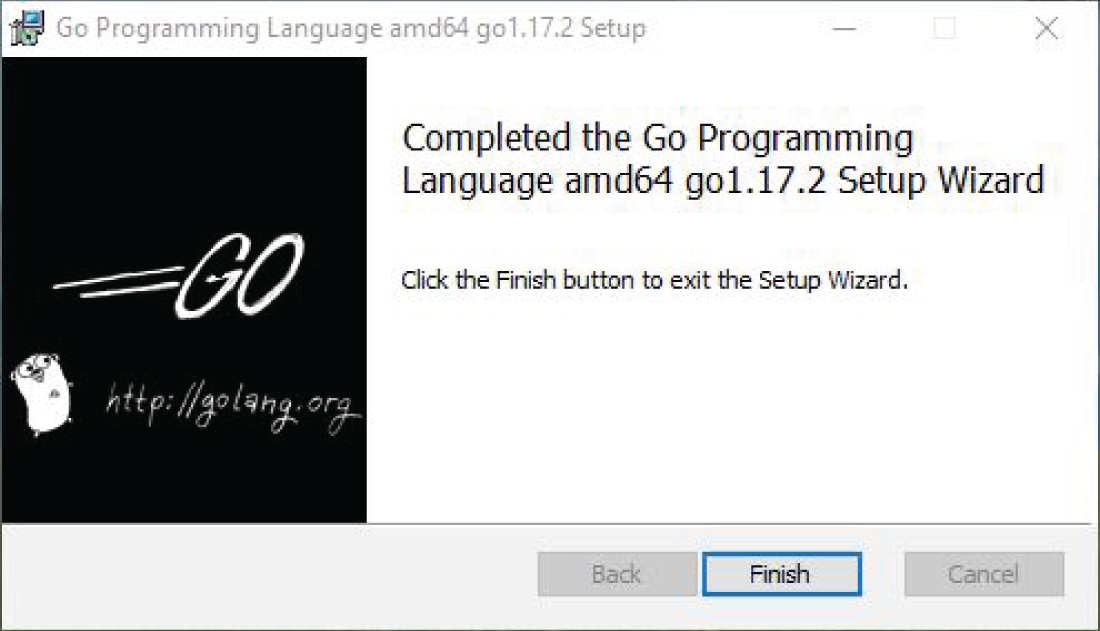
Figure 1.5: Confirmation that Go is installed
TESTING THE INSTALLATION
After completing the installation, you should test to make sure Go works. To do this in Windows, start by opening a command-line window. Click the Start Menu and type cmd in the search box. You can then open the command prompt from the search results, as shown in Figure 1.6.
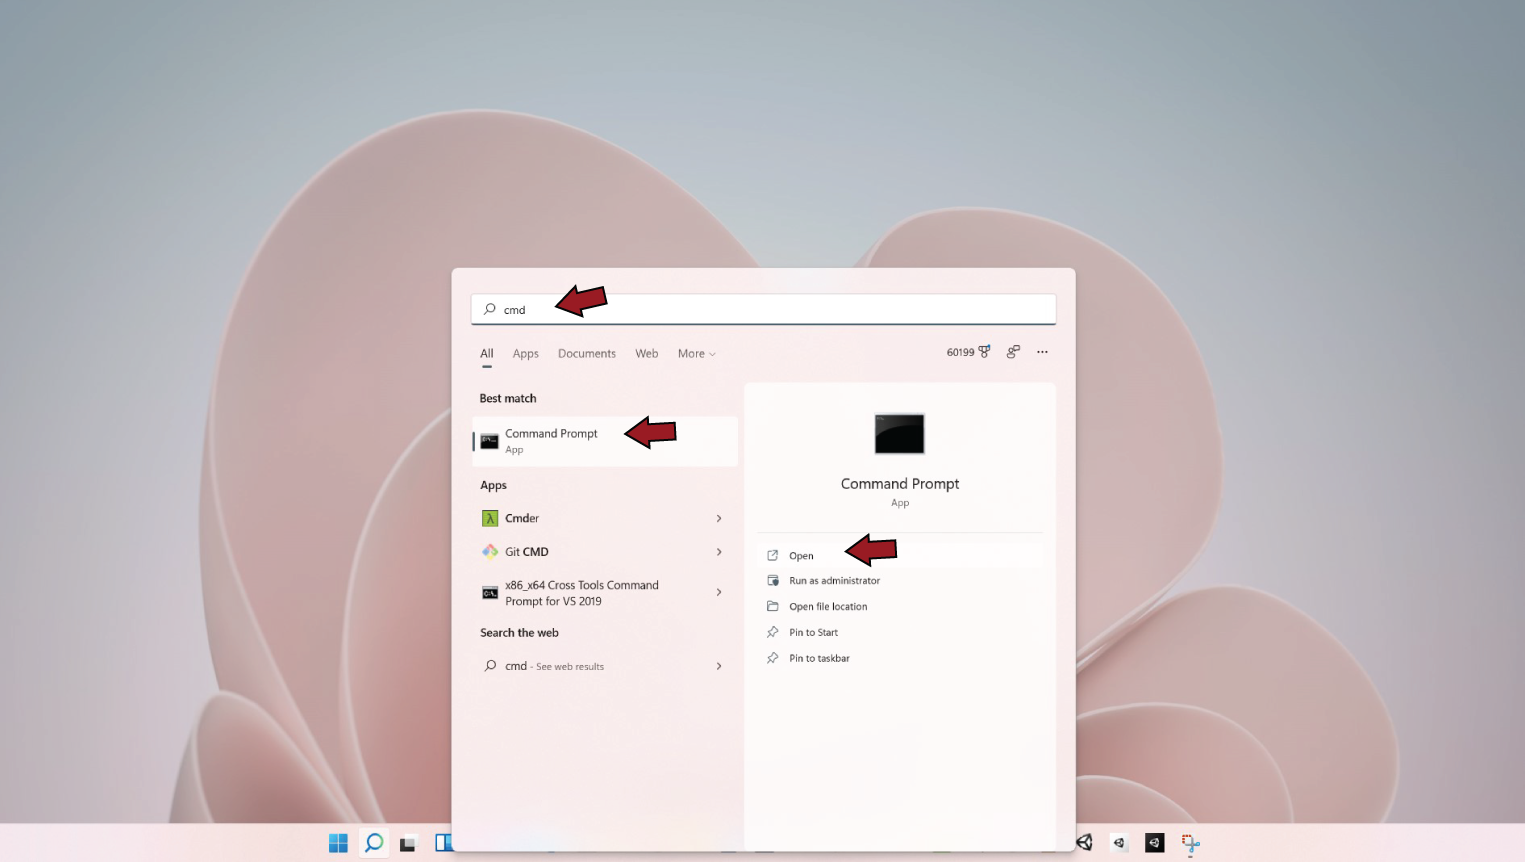
Figure 1.6: Running the command prompt (Microsoft Windows 11)
The command prompt will open in a new window similar to Figure 1.7. You should see a prompt that ends in your username.

Figure 1.7: The command prompt
At the prompt, type the following command and press Enter:
go version
This command checks that Go is installed on your computer and displays the version number if it is. You should see a version that matches the one you just installed. Figure 1.8 shows version go1.17.2 installed.
If you get an error message instead of a version number, repeat the installation instructions and try again.
The default installation shown here used the MSI file. If entering the code snippet displayed the version number, then you should be ready to continue creating your first program, Hello World!.
If you downloaded a zip file instead of an MSI file, you will need to manually set up Windows environment variables before using Go. You can either delete the files created from the zip file and reinstall using the MSI file (which sets up the variables during the installation) or use the instructions provided in Go's Download and install page at https://go.dev/doc/install.

Figure 1.8: Displaying your Go version
CREATING A HELLO, WORLD! PROGRAM
With Go installed on your machine, you are ready to write and run your first Go program, Hello, World!. Using your preferred text or code editor (such as Atom or Visual Studio Code), create a file named gotest.go and save it to a known location, such as your Documents folder. In the example presented in Listing 1.1, the file is saved in DocumentsGoLang. If you choose a different location, you will need to modify the instructions for compiling and running the program.
Make sure that the file has the filename extension .go. Most text or code editors will allow you to specify your own extension. Verify that the Save As box is set to All Files (or something similar) rather than a specific extension, such as .txt.
Add the code shown in Listing 1.1 to your new file.
At this time, you are not expected to understand all the code presented in Listing 1.1; however, it is worth taking a closer look. You start by creating a main package to serve as the starting point for your program. You follow this by using the import statement to import Go's formatting package fmt. The fmt package contains code that allows text to be printed to the screen.
You create a main() function in the third line of code, and you print the phrase “Hello, world!” by using Println from the fmt package you included. You don't need to understand how this works right now—just know that fmt.Println("") will print whatever is between the double quotes to the screen.
After entering the listing, make sure you save the file. You should leave the file open in your text editor in case you have problems running it. The compiler will read only the saved content in the file.
Compiling and Running the Program
The next step is to compile the file. Compiling is the process of converting human-readable code into machine-readable code. Use the cd command to navigate to the folder where gotest.go is saved:
cd DocumentsGoLang
For our example, we created the file in a subfolder, GoLang, of the Documents folder, so we will change to that folder. If you saved your file in a different folder, then you should navigate to that folder. Figure 1.9 shows the cd command being used in the command prompt window to change to the DocumentsGoLang folder. If you executed the command correctly, you will see the folder name at the end of the prompt.
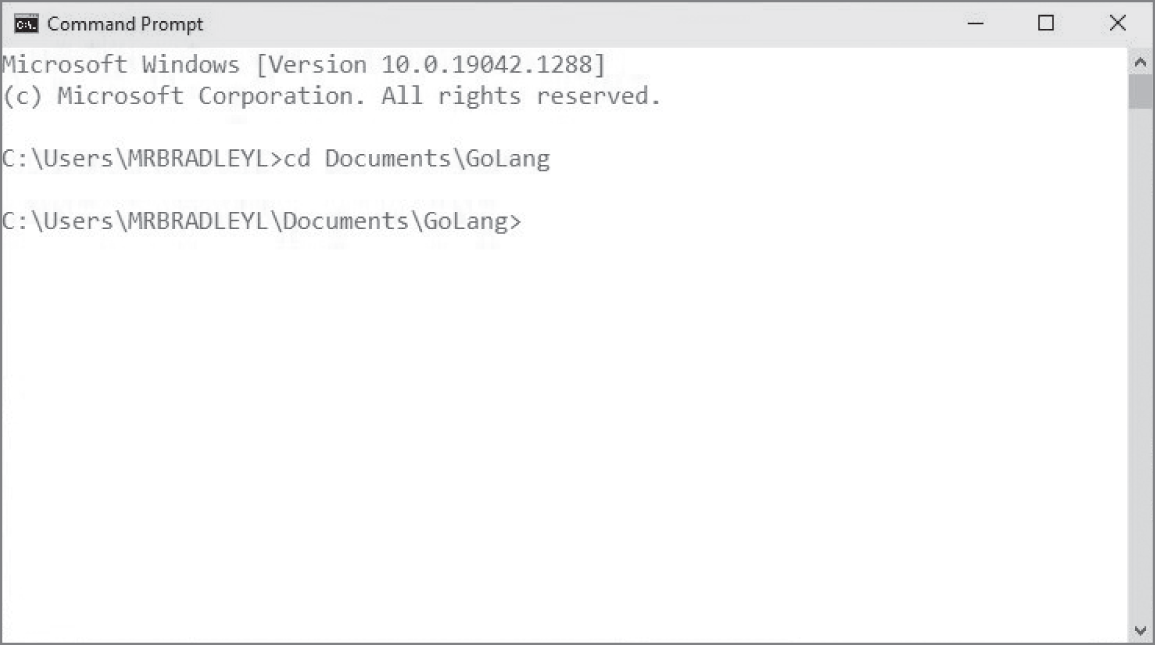
Figure 1.9: Using the cd command to change folders
Compile the program using the following command:
go build gotest.go
Simply enter this command at the command prompt and press Enter. The go build command will compile the file that is included, in this case, gotest.go. It may take a few moments to complete the compile, so as long as you don't see an error message, just wait. Eventually, the prompt will return, as shown in Figure 1.10.
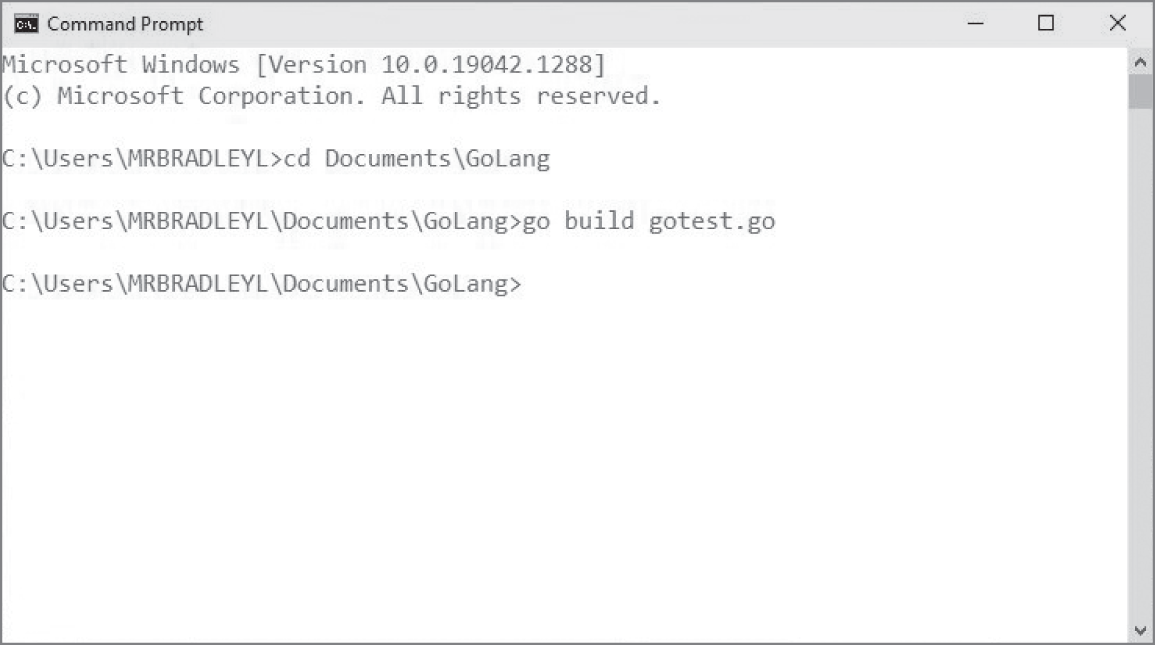
Figure 1.10: Compiling a Go program
While you don't see anything on the screen, if you list the files in the directory, you should now see that an executable file with an .exe extension called gotest.exe exists.
You can now run the program by entering the program name on the command line and pressing Enter:
gotest
If the program was written and compiled correctly, you will see “Hello, World!” displayed, as shown in Figure 1.11.
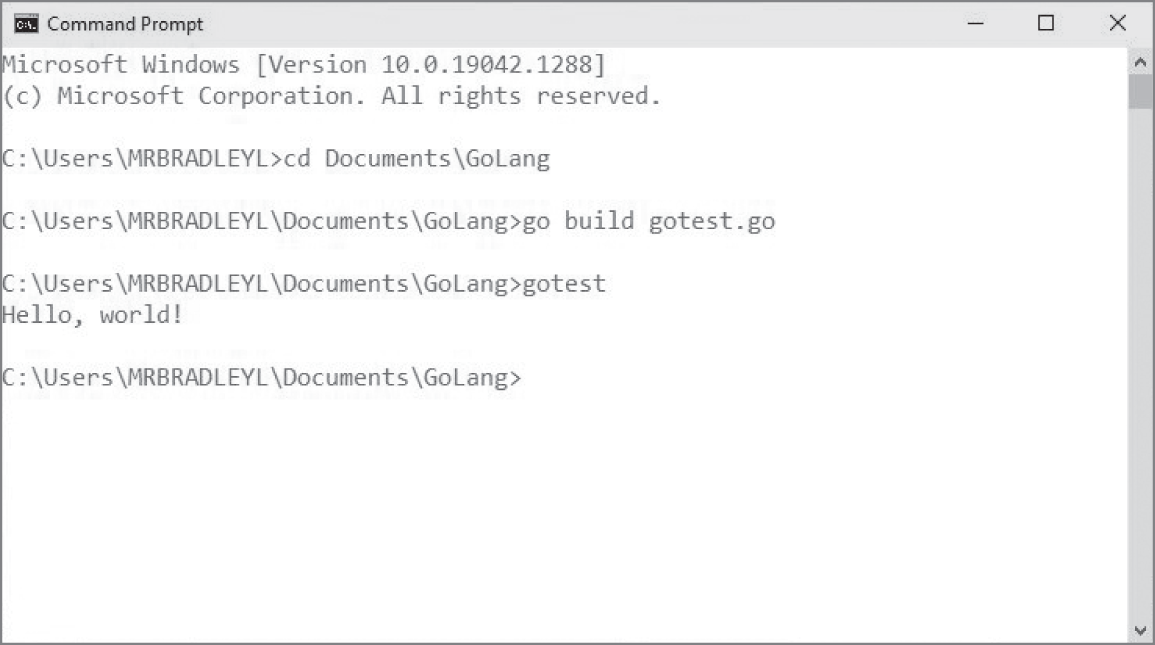
Figure 1.11: The output of the Hello, World! program
Alternate Run Option
The previous steps create and run a separate executable file using your program. The EXE file is useful if you want to share or run the program on a different computer. It is not necessary to create the EXE file if you simply want to test a program and don't plan to use the program somewhere else.
Another option is to compile and run the program in a single step, using this command:
go run program_name.go
You can try this using the same Hello, World! program. Verify that you are still in the correct directory in the command-line window (the directory where the gotest.go file is located) and run the command
go run gotest.go
You should see the following output immediately, without having to run a separate command to execute the program. This is the same output you saw before:
Hello, world!
Troubleshooting Hello, World!
If you had problems with this activity, you may have made one of the common mistakes many people make. Consider the following questions:
- Did you navigate to the correct folder in the command prompt?
- If you are not using the correct folder, you will see a message like the following when you run the
go buildcommand:C:UsersStudent NameDocuments>go build gotest.gocan't load package: package gotest.go: cannot find package "gotest.go" in any of:c:gosrcgotest.go (from $GOROOT)C:UsersStudent Namegosrcgotest.go (from $GOPATH)Make sure you know where the
gotest.gofile is located on your computer and navigate to that location using thecdcommand before compiling and running the program. - Did you enter the program from Listing 1.1 without any typos or misspellings?
- Most typing errors will be identified when you compile the program. If you see an error after running the
go buildcommand, read the error carefully to see where the problem is. As an example, consider the following error:gotest.go:3:8: cannot find package "fnt" in any of:c:gosrcfnt (from $GOROOT)C:UsersStudent Namegosrcfnt (from $GOPATH)In this example,
fmtwas misspelled asfntin the 8th character on line 3 (3:8).After correcting the error(s), save the file and try compiling it again.
Did you enter the commands on the command prompt line correctly?
- Make sure you typed
go buildwithout any spelling mistakes. Also make sure you included the.goextension on your program filename.
Formatting Your Go Code
When you entered the code from Listing 1.1, you should have followed the format that was presented, including the spacing and the indentation of the code. Whether you indent with three spaces, four spaces, or a tab will not matter when it comes time to run your program; however, in most job environments there will be posted standards.
By providing consistency in how you format your listings, it makes it easier to go from one listing to the next. Additionally, in organizations with multiple programmers, consistent formatting helps make the code easier to read and maintain.
Unlike many programming languages, Go has tried to reduce the controversy over formatting issues. Debates on whether to use three or four spaces, or to use a tab instead, can all be eliminated by using an included formatting option. You can do the formatting using the go fmt command as follows:
go fmt mycode.go
This will remove or fix minor formatting concerns in mycode.go. Listing 1.2 presents the same “Hello, World!” listing you saw earlier; however, the formatting has been poorly done. Enter this listing and name it gotest2.go.
With the listing created and named gotest2.go, enter the following at the command line:
go fmt gotest2.go
You will see the name of the program displayed when Go has finished running. If you then open gotest2.go in an editor, you will see that the file has been updated with clean formatting:
package mainimport "fmt"func main() {fmt.Println("Hello, world!")}
MULTIPLE VERSIONS OF GO
Technically, you can have multiple Go versions installed on a single system. This is not only possible, but often very desirable, such as when you want to test specific code with multiple versions of the compiler. For example, you might want to make sure your open source package works with the latest compiler still being developed, but that it also works on the most recent stable version. It is beyond the scope of this book to cover installing multiple versions. You can, however, find instructions for doing this at https://go.dev/doc/manage-install.
ONLINE EDITOR FOR GO: THE GO PLAYGROUND
If you want to be “job ready” with Go, then we recommend you install a copy on your machine. You do, however, have the option to use Go without installing Go tools locally, as shown in this lesson. When you simply want to test a piece of Go code quickly, then you might find it easier to jump online and use the Go Playground.
The Go Playground can be found at https://go.dev/play. This online tool is shown in Figure 1.12. As you can see, it is primarily an open screen with line numbers down the left and a few buttons on the upper right.
You can enter a listing in the main box, next to the line numbers. In Figure 1.13, the “Hello, World!” code from Listing 1.1 has been entered but with a mistake. Additionally, after entering the code, the Format button on the upper right was clicked to format the code (similar to using the go fmt command shown earlier).
With the code entered into the Go Playground, the Run button can be clicked to run the listing. This results in the output shown in the lower part of the window.
You can also see in Figure 1.13 that the “Hello, World!” program does have an error on line 6. You can see this in the error message at the bottom of the screen as well as from the highlighted line number 6. The Go Playground makes it easy to locate the right line number to make a fix. In this case, the closing double quote is missing.

Figure 1.12: The Go Playground
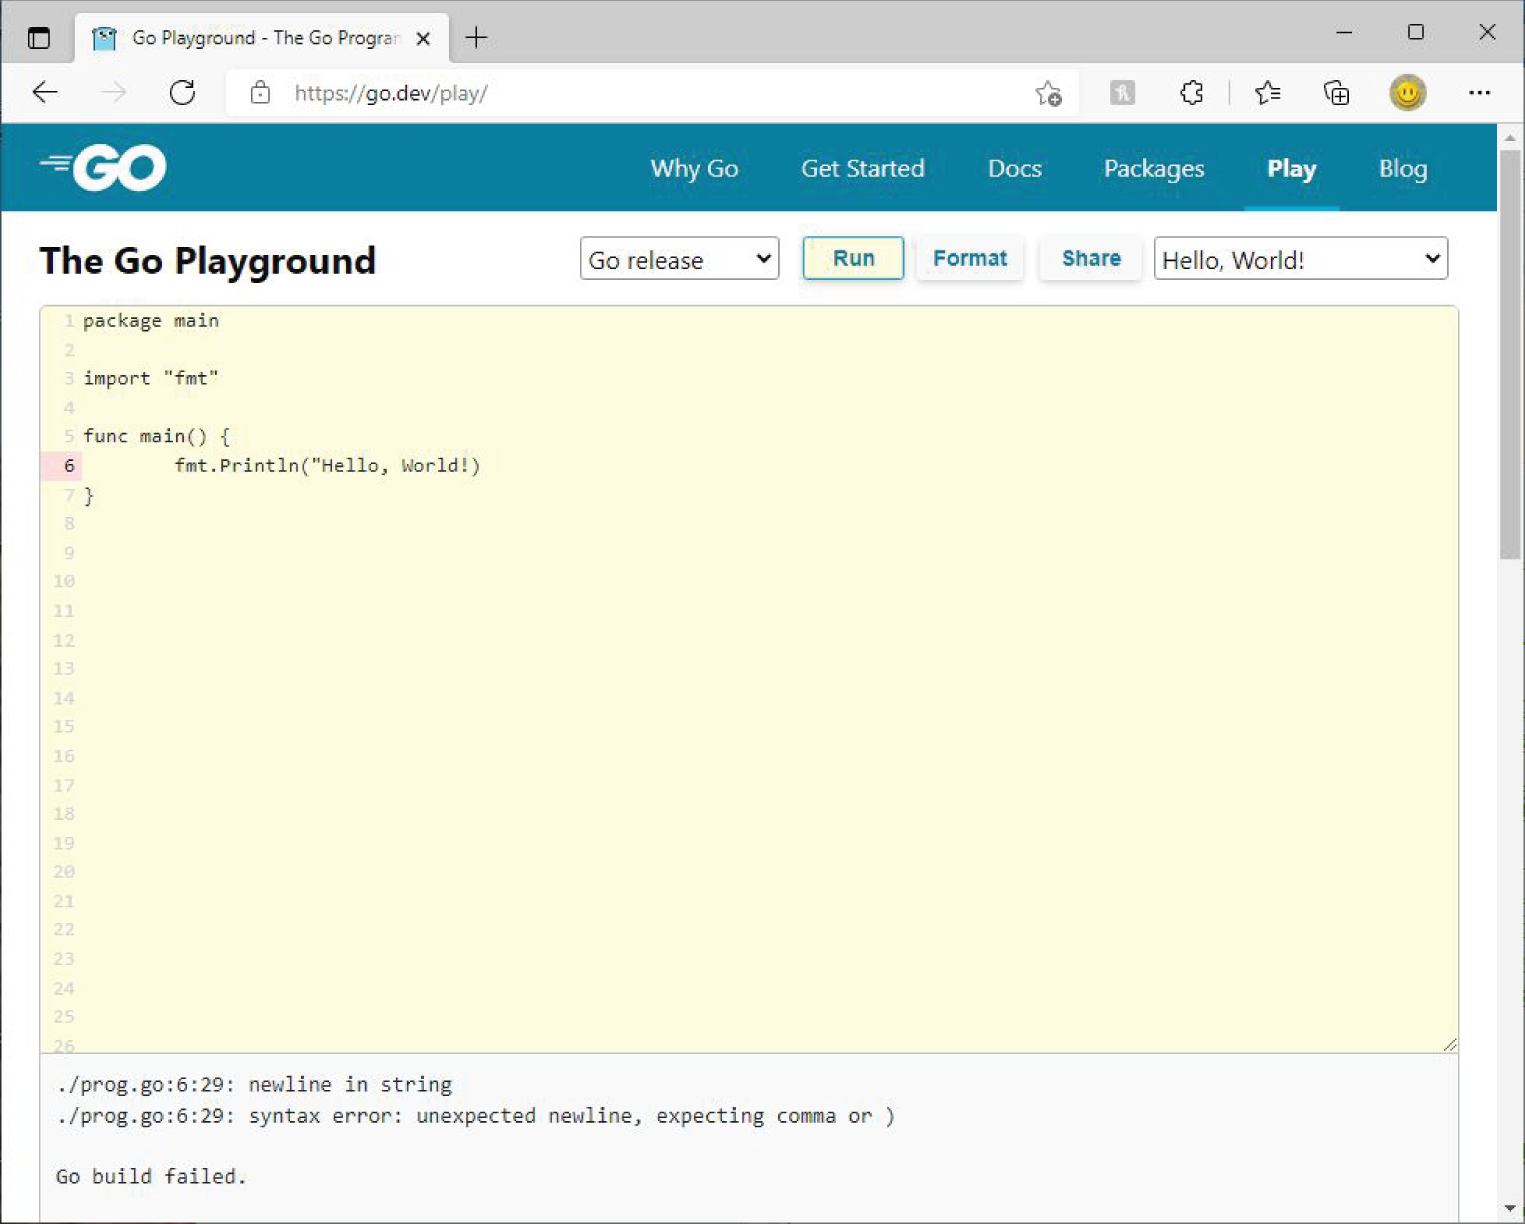
Figure 1.13: Hello World in the Go Playground
SUMMARY
In this lesson, the focus was on installing Go and confirming that it is ready to be used. When you are able to run the Hello, World! program successfully, you are ready to start coding with Go!
The following are a few useful online resources related to Go:
https://go.dev: The official home page for Gohttps://github.com/golang/go: A GitHub-based learning wiki that includes many videos and exercises to help developers learn Go
EXERCISES
The best way to learn is by doing something rather than just by reading about it. If you've not already done so, enter, compile, and run the program presented in this lesson. To further help confirm your understanding of this process, you should complete the following exercises on your own. The exercises for this lesson are:
- Exercise 1.1: Counting Fun
- Exercise 1.2: Counting More Fun
Exercise 1.1: Counting Fun
Just as you did with Listing 1.1 in this lesson, enter the code presented in Listing 1.3 in your editor and save it as countingfun.go. Don't worry about the details of how the code works. Rather, focus on entering the code as presented in the listing.
After entering the code in your editor and saving it, use the go run command to run the program:
go run countingfun.go
If you entered the code correctly, you should see the following output:
ctr: 0ctr: 1ctr: 2ctr: 3ctr: 4ctr: 5ctr: 6ctr: 7ctr: 8ctr: 9
If you get an error, try the troubleshooting tips that we presented earlier in this lesson to determine what went wrong.
Exercise 1.2: Counting More Fun
Enter the code from Listing 1.4 and save it with the name morecodingfun.go.
Can you find the changes? Compile and run the program to see the changes in action. When you run the code this time, the output should look like this:
ctr: 0ctr: 2ctr: 4ctr: 6ctr: 8ctr: 10ctr: 12ctr: 14ctr: 16ctr: 18
You can continue to play with the numbers and the text in quotes to see what your changes do. Again, if you have trouble understanding what the code is doing, don't worry; we'll cover that in the rest of the lessons in this book.