Cloud Foundry uses CloudAMQP (see the RabbitMQ on CloudAMQP recipe) as a RabbitMQ service. In the previous recipes we have introduced the two cloud services. Now we will show how to use RabbitMQ on Cloud Foundry.
You can find the source at Chapter11/Recipe03/.
For a quick startup, we have copied the source code from the recipe RabbitMQ on CloudAMQP and added the RabbitMQ configuration.
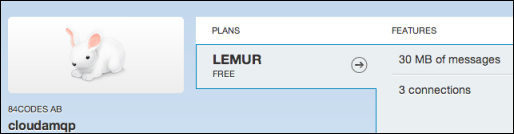
- Log in to the Cloud Foundry system and open the section SERVICES IN DEVELOPMENT, then add a new CloudAMQP service. Finally, choose the free instance as shown in the following screenshot:
- Call the CloudAMQP service
amqp1. - Open the
POM.xmlMaven file and add the Spring AMQP reference as shown in the following code:<dependency> <groupId>org.springframework.amqp</groupId> <artifactId>spring-rabbit</artifactId> <version>1.2.0.RELEASE</version> </dependency>
- Also add the
Jacksonlibrary (http://jackson.codehaus.org/):<dependency> <groupId>org.codehaus.jackson</groupId> <artifactId>jackson-mapper-asl</artifactId> <version>1.9.2</version> </dependency>
- Open the
servlet-context.xmlfile; then add RabbitMQ and a Cloud Foundry schema:xmlns:rabbit="http://www.springframework.org/schema/rabbit" xmlns:cloud="http://schema.cloudfoundry.org/spring"
- Also, add the following RabbitMQ and Cloud Foundry schema locations:
- Add the RabbitMQ configuration to the
servlet-context.xmlfile:<cloud:rabbit-connection-factory service-name="amqp1" id="connectionFactory" /> <rabbit:template id="rabbitTemplate" connection-factory="connectionFactory" /> <rabbit:admin connection-factory="connectionFactory"/>
- Add the queue name as shown in the following code:
<rabbit:queue name="myorders_11"durable="true"/>
- Create an HTTP handler that is able to manage the HTTP requests with the
/restURI. The handler is a Java class with@Controllerand@RequestMappingSpring annotations:@Controller @RequestMapping("rest") public classBooksController{…} - Add two methods to the
BooksControllerclass. The first one is for getting the book list:@ResponseBody public Collection<Book>getBooks(){… }The second one is for managing the book purchase workflow:
public @ResponseBody String buybook(@PathVariable("bookid") intbookid){.... } - See http://static.springsource.org/spring/docs/3.2.x/spring-framework-reference/html/mvc.html#mvc-introduction for more details about Spring MVC and spring controller.
- The server is ready. Now, on the client side, add two JavaScript methods, the first one,
$.getJSON('/rest/books', function(data)..), to get the book list and the second one to execute the callbuyBook:$.ajax({ type: "GET", url: "rest/buybook/"+bookid, error: function(xhr, status, error) { $("#labelinfo").text("Error request: " +error); }, success: function(xhr, status, error) { $("#labelinfo").text(xhr); } }); - The application is ready. Now, deploy the application on the cloud using the
cftool (as we have seen in the recipe First application on Cloud Foundry), and bind the CloudAMQP service (steps 1 and 2) to the application as shown in the following screenshot: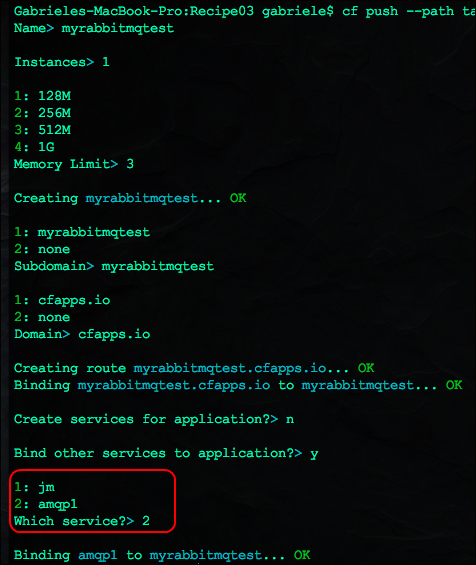
- Execute the consumer from the RabbitMQ on CloudAMQP recipe using the CloudAMQP-RabbitMQ URL created by the service
amqp1(step 2).
In this example, we have created a minimal real-use case using Spring Framework. We have simulated a book store, where the user buys a book, the server stores the request into the cloud database, and then sends a message with book details to myorders_11 queue. An external consumer gets the message and redirects the order to the company store. Let's see this in detail.
First of all, we create a RabbitMQ instance called amqp1 (step 1). Cloud Foundry uses CloudAMQP as a RabbitMQ cloud service (you can see the recipe RabbitMQ on CloudAMQP) and the amqp1 service is accessible outside via the cloud.
Also, in this example we use Spring with Maven, and in order to use the RabbitMQ instance, we need to add the Spring AMQP package to the Maven POM.xml file(step 3).
We have used Jackson to create a REST application (http://en.wikipedia.org/wiki/Representational_state_transfer).
Tip
The book's REST URL is http://myrabbitmqtest.cfapps.io/rest/books
With steps 5 and 6, we define the schema and the schema location for Cloud Foundry and RabbitMQ. We can configure the connection factory with these two schemas.
Tip
If you have more than one CloudAMQP service, you must set the service name; in our case it is amqp1. (See http://docs.cloudfoundry.com/docs/using/services/spring-service-bindings.html#rabbitmq for more details)
In the same file, we can define the queue name using:
<rabbit:queue name="myorders_11" durable="true"/>
The configuration is terminated, and in the server, we implement two methods (steps 9 and 10): getbooks and buybook.
The first one gets the list of books as a JSON string (/rest/books) and the second one gets a book ID from the client and sends a message to the myorders_11 queue:
public @ResponseBody String buybook(@PathVariable("bookid") intbookid)
...
Book bbook = myBooks.get(bookid);
String message = mapper.writeValueAsString(bbook);
amqpTemplate.convertAndSend("myorders_11",message);
The amqpTemplate variable is a Spring
@Autowired annotation that uses the RabbitMQ parameters defined to the file servlet-context.xml(steps 5 and 7).
See http://static.springsource.org/spring/docs/3.2.x/spring-framework-reference/html/beans.html#beans-autowired-annotation for more information about @Autowired annotations.
From the client side, executing one JavaScript request for the books and another for buying the book is sufficient (step 11).
The website is now ready to be deployed; we just need to follow the steps from the recipe First application on Cloud Foundry and link our RabbitMQ instance to the application (step 11).
After deploying the application, you can finally see the website online, and when you execute a consumer from your local machine, you will see the book orders as shown in the following screenshot:

As a consumer, you can use the one from the RabbitMQ on CloudAMQP recipe. You just need to change the CloudAMQP parameters in the amqp1 service and it's done! We have just created a frontend site that sends book orders to our local machine/machines in real time.
You can use the web interface to check the application's health and the cf tool to checkthe logs:
cf logs application_name(for example,myrabbitmqtest) to see the logscf tail application_nameto see the log tailcf crashlogs application_nameto retrieve the crash logs
There are other ways to deploy and manage the application on Cloud Foundry, for example, by using the Cloud Foundry Eclipse plugin (http://marketplace.eclipse.org/content/cloud-foundry-integration-eclipse). After logging into Cloud Foundry, you can easily access the features.
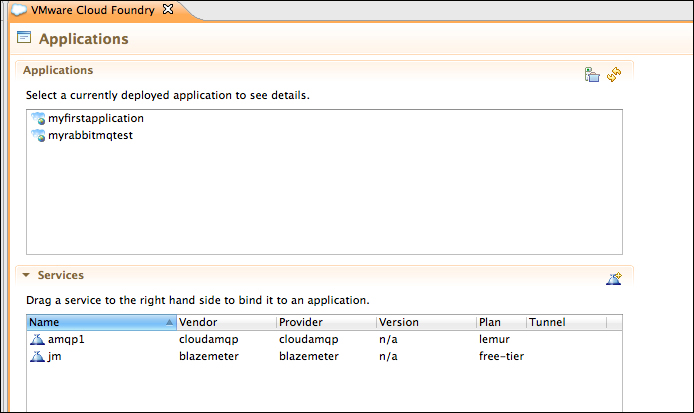
You can check your application and services, and directly add your services in the Applications window, as shown in the following screenshot:
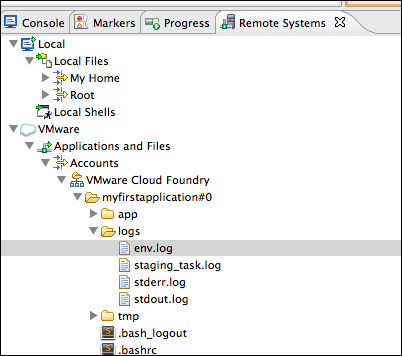
It is also possible to check the application logs on the Remote Server eclipse view, as shown in the following screenshot: