
8
Bitcoin Clients and APIs
This chapter introduces Bitcoin client installation, and a basic overview of various APIs and tools that are available for developing Bitcoin applications and interacting with the Bitcoin blockchain. We will examine how to set up a Bitcoin node and test networks. Also, we will introduce various commands and tools that are used to perform important functions in Bitcoin systems. The chapter will be made up of the following main topics:
- Bitcoin client installation
- Experimenting further with bitcoin-cli
- Bitcoin programming
Let's begin by running through the Bitcoin client installation process.
Bitcoin client installation
The Bitcoin core client can be installed from https://bitcoin.org/en/download. This is available for different architectures and platforms, ranging from x86 Windows to ARM Linux, as shown in the following screenshot:
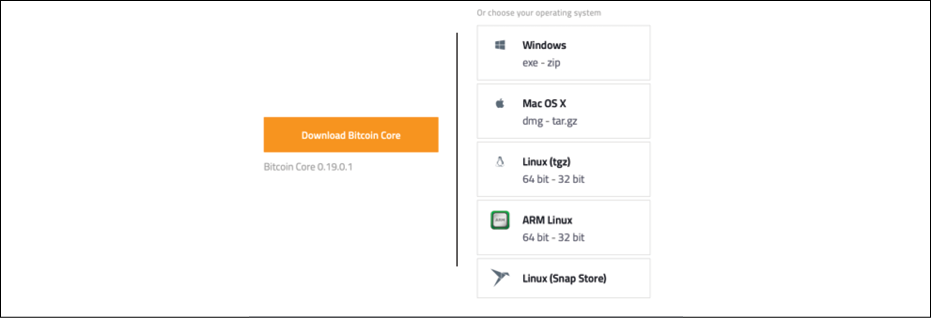
Figure 8.1: Download Bitcoin Core
We will discuss a number of topics relating to Bitcoin's installation and setup. We'll begin by discussing different Bitcoin clients available and their associated tools, which enable you to run and manage the Bitcoin client and interact with the Bitcoin blockchain.
Types of clients and tools
There are different types of Bitcoin core clients and relevant tools. A Bitcoin client is a piece of software that is responsible for generating private/public key pairs and facilitates Bitcoin payments using the Bitcoin blockchain. In addition, a client can implement full synchronization function with a blockchain or choose to only implement basic wallet functionality or simple payment verification. A client can also provide other useful functions such as network monitoring, secure storage of keys, and user-friendly interfaces for interaction with the Bitcoin blockchain. Next, we'll discuss some of the core elements of the Bitcoin Core client and associated tools.
bitcoind
This is the core client software that runs as a daemon (as a service), and it provides the JSON-RPC interface.
bitcoin-cli
This is the command-line feature-rich tool for interacting with the Bitcoin daemon; the daemon then interacts with the blockchain and performs various functions. bitcoin-cli only calls JSON-RPC functions and does not perform any actions on its own on the blockchain.
bitcoin-qt
This is the Bitcoin Core client GUI. When the wallet software starts up, first, it verifies the blocks on the disk, and then starts up and shows the following GUI:

Figure 8.2: Bitcoin Core QT client, just after installation on macOS, showing that blockchain is not in sync
The verification process is not specific to the bitcoin-qt client; it is performed by the bitcoind client as well.
There are also other clients available such as btcd, which is a full node Bitcoin client written in Golang. It is available at https://github.com/btcsuite/btcd.
Setting up a Bitcoin node
In this section, we will explore how we can set up a Bitcoin node in order to interact with the Bitcoin network, and to interact with a Bitcoin node using the command-line interface.
A sample run of the Bitcoin Core installation on the Ubuntu Xenial operating system is shown here; for other platforms, you can get details from www.bitcoin.org:

Figure 8.3: Bitcoin setup
We'll start by running the update command, which is as follows:
$ sudo apt-get update
For installation, users can use either of the following first two commands depending on the client required, or they can issue both commands at once, using the third line only:
$ sudo apt-get install bitcoind
$ sudo apt-get install bitcoin-qt
$ sudo apt-get install bitcoin-qt bitcoind
Reading package lists... Done
Building dependency tree
Reading state information... Done
.......
Having set up a Bitcoin node, the next step is to set up the Bitcoin source code, which we'll cover next.
Setting up the source code
The Bitcoin source code can be downloaded and compiled if users wish to participate in the Bitcoin code or for learning purposes. The git command can be used to download the Bitcoin source code:
$ sudo apt-get install git
$ mkdir bcsource
$ cd bcsource
$ git clone https://github.com/bitcoin/bitcoin.git
Cloning into 'bitcoin'...
remote: Counting objects: 78960, done.
remote: Compressing objects: 100% (3/3), done.
remote: Total 78960 (delta 0), reused 0 (delta 0), pack-reused 78957 Receiving objects: 100% (78960/78960), 72.53 MiB | 1.85 MiB/s, done. Resolving deltas: 100% (57908/57908), done.
Checking connectivity... done.
Change the directory to bitcoin:
$ cd bitcoin
After the preceding steps are completed, the code can be compiled:
$ ./autogen.sh
$ ./configure.sh
$ make
$ sudo make install
Note that the make command shown here may take around 30 minutes to complete, depending on the speed of your computer.
Setting up bitcoin.conf
The bitcoin.conf file is a configuration file that is used by the Bitcoin Core client to save configuration settings. All command-line options for the bitcoind client, with the exception of the -conf switch, can be set up in the configuration file, and when bitcoin-qt or bitcoind starts up, it will take the configuration information from that file.
In Linux systems, this is usually found in $HOME/.bitcoin/, but it can also be specified in the command line using the -conf=<file> switch to the bitcoind core client software.
A detailed example configuration is available at:
https://github.com/bitcoin/bitcoin/blob/master/share/examples/bitcoin.conf
Now that we have set up the Bitcoin client, let's see how to start up the Bitcoin client for use.
Starting up a node in the testnet
The Bitcoin node can be started in the testnet if you want to test the Bitcoin network and run some experiments. This is a faster network compared to the live network and has relaxed rules for mining and transactions.
The key differences between the mainnet and the testnet are shown here:
|
Component |
Mainnet |
Testnet |
|
Listen port. |
TCP |
TCP |
|
RPC connection port. |
TCP |
TCP |
|
DNS Seeds are different for bootstrapping. |
Mainnet-specific |
Testnet-specific |
|
Different ADDRESSVERSION field in addresses to ensure testnet addresses do not work on Bitcoin's mainnet. |
0x00 |
0x6F |
|
Genesis block. |
Mainnet-specific |
Testnet-specific |
|
|
Enabled |
Disabled |
Various faucet services are also available for the Bitcoin test network. These services are used to get some test Bitcoin for testnet accounts. A list of faucets is available here at the Bitcoin wiki: https://en.bitcoin.it/wiki/Testnet#Faucets. The availability of test coins is very useful for experimentation on the testnet.
The command line to start up the Bitcoin testnet is as follows.
To run the Bitcoin daemon for the testnet:
$ bitcoind --testnet -daemon
To run the Bitcoin command line interface:
$ bitcoin-cli --testnet <command>
To allow the Bitcoin GUI to run in the testnet:
$ bitcoin-qt –testnet
A sample run is shown here:
- Start up the Bitcoin node in daemon (as a background process) mode on the testnet:
$ bitcoind --testnet -daemon Bitcoin server starting - Check the number of blocks and difficulty. Note that there is a long list of various commands that the Bitcoin client supports. This is just an example to show how the Bitcoin command-line interface works:
$ bitcoin-cli --testnet getmininginfo { "blocks": 566251, "difficulty": 400.6820950060902, "networkhashps": 572058533067.9225, "pooledtx": 0, "chain": "test", "warnings": "" } - A complete list of commands can be obtained by running the following command:
$ bitcoin-cli --testnet help
== Blockchain ==
getbestblockhash
getblock "blockhash" ( verbosity )
getblockchaininfo
getblockcount
getblockhash height
getblockheader "blockhash" ( verbose )
.
.
.
== Zmq ==
getzmqnotifications
Note that only the initial few lines of the output are shown here; the rest of the output is not shown. The preceding output shows various command-line options available in bitcoin-cli, the Bitcoin command-line interface. These commands can be used to query the blockchain, send transactions, and control the local node.
- We now can stop the Bitcoin daemon by using the command shown here:
$ bitcoin-cli --testnet stop
Bitcoin server stopping
With this, we have completed a basic introduction to the Bitcoin testnet. We will do some more experimentation with this shortly, but first, we will look at another mode in which the Bitcoin node can run and which is especially useful for testing purposes.
Starting up a node in regtest
Regtest mode (regression testing mode) can be used to create a local private blockchain for testing purposes. In this mode, the user can control block generation for experimentation and testing, and a number of blocks with no value can be generated.
The following commands can be used to start up a node in regtest mode:
- Start up the Bitcoin daemon in regtest mode:
$ bitcoind -regtest -daemon Bitcoin server starting - Check the balance:
$ bitcoin-cli -regtest getbalance 0.00000000 - Generate blocks and addresses:
$ bitcoin-cli -regtest generatetoaddress 200 $(bitcoin-cli -regtest getnewaddress)
[
  "366fce3c35031eaa3b085ae7d2631cb5b212bac7e3447bd8ffddb17ef97569c4",
  "7e5d8fe6969bb1c498389054fbbbdc783974562d73c247153909aa5b8dffd578",
  "5e17136ca3429aee54636e46e6b5a1b5f8c108b84465c73bb990fdcfe977d7bc",
.
.
.
"33361a74d2586259d69a724921ff7b931cc6c95bd52f09fc05a4b8905695384f"
]
The reason why we generated 200 blocks in the preceding command is because on a regtest, a block must have 100 confirmations before the associated reward can be utilized. Therefore, we must generate more than 100 blocks to get access to this reward. In this command, we have generated 200 blocks, which will generate 5,000 Bitcoin due to the miner reward of 50 Bitcoin.
- Now, we can get the balance by running the following command:
$ bitcoin-cli -regtest getbalance 5000.00000000 - Run a command, for example,
getmininginfo:$ bitcoin-cli -regtest getmininginfo { "blocks": 200, "currentblockweight": 4000, "currentblocktx": 0, "difficulty": 4.656542373906925e-10, "networkhashps": 12, "pooledtx": 0, "chain": "regtest", "warnings": "" } - We can also get information about the blockchain by using the following command:
$ bitcoin-cli -regtest getblockchaininfo
{
  "chain": "regtest",
  "blocks": 200,
  "headers": 200,
  "bestblockhash": "1cafd1e540b6772f4fe4ab561def0de69945f84e701e5fffa8426ea572d3769b",
  "difficulty": 4.656542373906925e-10,
  "mediantime": 1577225980,
  .
  .
  .
"warnings": ""
}
Note that the complete output is not shown here due to its long length, but it is enough to explain the concept.
- Stop the Bitcoin daemon:
$ bitcoin-cli -regtest stop
Bitcoin server stopping
If you want to delete the previous regtest node and start a new one, simply delete the directory named regtest under your computer's $HOME directory. On a Mac (macOS), it is located at /$HOME/Library/Application Support/Bitcoin.
After deleting the regtest directory, run the command shown in the first step again in this section to create a new regtest environment.
In this section, we covered how to start up a Bitcoin node in test and development (regtest) modes and how to interact with the Bitcoin blockchain using the bitcoin-cli, the command-line tool for the Bitcoin client. Next, we will experiment further with some Bitcoin commands and interfaces.
Experimenting further with bitcoin-cli
As we've seen so far, bitcoin-cli is a powerful and feature-rich command-line interface available with the Bitcoin Core client and can be used to perform various functions using the RPC interface provided by the Bitcoin Core client.
We will now see how to send Bitcoin to an address using the command line. For this, we will use the Bitcoin command-line interface on the Bitcoin regtest:
- Generate a new address using the following command:
$ bitcoin-cli -regtest getnewaddress 2NC31WFFRwRkwd3S4TpyjN5GGDY7E63GSVd - Send 20 BTC to the newly generated address:
$ bitcoin-cli -regtest sendtoaddress 2NC31WFFRwRkwd3S4TpyjN5GGDY7E63GSVd 20.00The output of this command will show the transaction ID, which is:
a83ff460a32f29387d531f19e7092a5dcf6ce52d20931227447c0b9b7a5f2980 - We can now generate a few more blocks to get some confirmation for this:
$ bitcoin-cli -regtest generatetoaddress 7 $(bitcoin-cli -regtest getnewaddress) - We can also query the transaction information by using the following command:
$ bitcoin-cli -regtest gettransaction a83ff460a32f29387d531f19e7092a5dcf6ce52d20931227447c0b9b7a5f2980This will show an output similar to the one shown here. Note that we use the same transaction ID hash output that was generated in step 2 previously:

Figure 8.4: gettransaction output
We will now see an example of how to use the Bitcoin JSON-RPC interface. Note that we are using the Bitcoin mainnet for this example.
At a minimum, in order to use the JSON-RPC interface, we need to configure the RPC username and password in the bitcoin.conf file. We can easily do that. A sample configuration that will be used in this example is shown here:
$ cat bitcoin.conf
rpcuser=test1
rpcpassword=testpassword
Now, we will query the 100th block of the Bitcoin blockchain with hash 000000007bc154e0fa7ea32218a72fe2c1bb9f86cf8c9ebf9a715ed27fdb229a.
So far, we've used bitcoin-cli on regtest. However, we can use bitcoin-cli on any Bitcoin network, for example, the testnet or the mainnet. We simply use the bitcoin-cli command without specifying any network to query the mainnet blockchain. Next, we will show a quick example of querying the Bitcoin mainnet blockchain. The Bitcoin client provides three methods for interacting with the blockchain, as listed here:
- Bitcoin command-line interface (CLI) – bitcoin-cli
- JSON-RPC Interface
- HTTP REST Interface
First, we'll see an example of bitcoin-cli querying the blockchain using the getblock method. We will then see how the same getblock method can be invoked using the JSON-RPC interface and the HTTP REST interface.
Using the Bitcoin command-line tool – bitcoin-cli
We can use the bitcoin-cli for this purpose of using the Bitcoin command-line tool, as shown here:
$ bitcoin-cli getblock "000000007bc154e0fa7ea32218a72fe2c1bb9f86cf8c9ebf9a715ed27fdb229a"
The output of the preceding command is shown here:
{
  "hash": "000000007bc154e0fa7ea32218a72fe2c1bb9f86cf8c9ebf9a715ed27fdb229a",
  "confirmations": 232839,
  "strippedsize": 215,
  "size": 215,
  "weight": 860,
  "height": 100,
  "version": 1,
  "versionHex": "00000001",
  "merkleroot": "2d05f0c9c3e1c226e63b5fac240137687544cf631cd616fd34fd188fc9020866",
  "tx": [
    "2d05f0c9c3e1c226e63b5fac240137687544cf631cd616fd34fd188fc9020866"
  ],
  "time": 1231660825,
  "mediantime": 1231656204,
  "nonce": 1573057331,
  "bits": "1d00ffff",
  "difficulty": 1,
  "chainwork": "0000000000000000000000000000000000000000000000000000006500650065",
  "nTx": 1,
  "previousblockhash": "00000000cd9b12643e6854cb25939b39cd7a1ad0af31a9bd8b2efe67854b1995",
  "nextblockhash": "00000000b69bd8e4dc60580117617a466d5c76ada85fb7b87e9baea01f9d9984"
}
As an alternative to bitcoin-cli, we can query the blockchain using the JSON-RPC interface provided by the Bitcoin client as well. We'll show an example of that next.
Using the JSON RPC interface
Now, we will run the same command but using the JSON-RPC. We can use the curl command-line tool to interact with the JSON-RPC API, as shown here:
$ curl --user test1 --data-binary '{"jsonrpc": "1.0", "id":"curltest", "method": "getblock", "params": ["000000007bc154e0fa7ea32218a72fe2c1bb9f86cf8c9ebf9a715ed27fdb229a"] }' -H 'content-type: text/plain;' http://127.0.0.1:8332/
This will ask for the required password. Enter the password that has been set in the bitcoin.conf file:
Enter host password for user 'test1':
If the password is correct, after executing the command, the result shown here will be displayed in JSON format:
{"result":{"hash":"000000007bc154e0fa7ea32218a72fe2c1bb9f86cf8c9ebf9a715ed27fdb229a","confirmations":236138,"strippedsize":215,"size":215,"weight":860,"height":100,"version":1,"versionHex":"00000001","merkleroot":"2d05f0c9c3e1c226e63b5fac240137687544cf631cd616fd34fd188fc9020866","tx":["2d05f0c9c3e1c226e63b5fac240137687544cf631cd616fd34fd188fc9020866"],"time":1231660825,"mediantime":1231656204,"nonce":1573057331,"bits":"1d00ffff","difficulty":1,"chainwork":"0000000000000000000000000000000000000000000000000000006500650065","nTx":1,"previousblockhash":"00000000cd9b12643e6854cb25939b39cd7a1ad0af31a9bd8b2efe67854b1995","nextblockhash":"00000000b69bd8e4dc60580117617a466d5c76ada85fb7b87e9baea01f9d9984"},"error":null,"id":"curltest"}
curl is an excellent command-line tool that is used to transfer data using URLs. It is commonly used for interacting with REST APIs using HTTP. More information about curl is available at https://curl.haxx.se.
Starting from Bitcoin Core client 0.10.0, the HTTP REST interface is also available. By default, this runs on the same TCP port (8332) as the JSON-RPC interface and requires no authentication. It is enabled either in the bitcoin.conf file by adding the rest=1 option or on the bitcoind command-line via the -rest flag.
An example run will be shown next, which queries the same block that we queried in the previous command, but now using the HTTP REST interface.
Using the HTTP REST interface
We can use curl again for this purpose, as shown here:
$ curl http://localhost:8332/rest/block/000000007bc154e0fa7ea32218a72fe2c1bb9f86cf8c9ebf9a715ed27fdb229a.json
The output of the preceding command is shown here:
{"hash":"000000007bc154e0fa7ea32218a72fe2c1bb9f86cf8c9ebf9a715ed27fdb229a","confirmations":247383,"strippedsize":215,"size":215,"weight":860,"height":100,"version":1,"versionHex":"00000001","merkleroot":"2d05f0c9c3e1c226e63b5fac240 137687544cf631cd616fd34fd188fc9020866","tx":[{"txid":"2d05f0c9c3e1c226e63b5 fac240137687544cf631cd616fd34fd188fc9020866","hash":"2d05f0c9c3e1c226e63b5 fac240137687544cf631cd616fd34fd188fc9020866","version":1,"size":134,"vsize":134,"weight":536,"locktime":0,"vin":[{"coinbase":"04ffff001d014d","sequence":4294967295}],"vout":[{"value":50.00000000,"n":0,"scriptPubKey":{"asm":"04e 70a02f5af48a1989bf630d92523c9d14c45c75f7d1b998e962bff6ff9995fc5bdb44f1793b37 495d80324acba7c8f537caaf8432b8d47987313060cc82d8a93 OP_CHECKSIG","hex":"4104e70 a02f5af48a1989bf630d92523c9d14c45c75f7d1b998e962bff6ff9995fc5bdb44f1793b37495d80 324acba7c8f537caaf8432b8d47987313060cc82d8a93ac","reqSigs":1,"type":"pubkey","addresses":["13A1W4jLPP75pzvn2qJ5KyyqG3qPSpb9jM"]}}],"hex":"01000000010000000 000000000000000000000000000000000000000000000000000000000ffffffff0704ffff001d014dffffffff 0100f2052a01000000434104e70a02f5af48a1989bf630d92523c9d14c45c75f7d1b998e962bff6ff 9995fc5bdb44f1793b37495d80324acba7c8f537caaf8432b8d47987313060cc82d8a93ac00000 000"}],"time":1231660825,"mediantime":1231656204,"nonce":1573057331,"bits":"1d00ffff","difficulty":1,"chainwork":"0000000000000000000000000000000000000000 000000000000006500650065","nTx":1,"previousblockhash":"00000000cd9b12643e6854cb25939b39cd7a1ad0af31a9bd8b2efe67854b1995","nextblockhash":"00000000b69bd8e4dc60580117617a466d5c76ada85fb7b87e9baea01f9d9984"}
With this, we have completed our basic introduction to the Bitcoin command-line tools and related interfaces. A complete introduction to all Bitcoin client RPC calls is not possible here. You are encouraged to check the comprehensive documentation of Bitcoin Core 0.19.0 RPC, which is available at https://bitcoincore.org/en/doc/0.19.0/rpc/.
Bitcoin programming
Bitcoin programming is a very rich field. The Bitcoin Core client exposes various JSON-RPC commands that can be used to construct raw transactions and perform other functions via custom scripts or programs. Also, the command-line tool bitcoin-cli is available, which makes use of the JSON-RPC interface and provides a rich toolset to work with Bitcoin.
These APIs are also available via many online service providers in the form of Bitcoin APIs, and they provide a simple HTTP REST interface. Bitcoin APIs, such as blockchain.info (https://blockchain.info/api), BitPay (https://bitpay.com/api), block.io (https://www.block.io), and many others, offer a myriad of options to develop Bitcoin-based solutions.
Various libraries are available for Bitcoin programming. A list is shown as follows. Those of you who are interested can explore the libraries further:
- Libbitcoin: Available at https://libbitcoin.dyne.org/ and provides powerful command-line utilities and clients.
- Pycoin: Available at https://github.com/richardkiss/pycoin, this is a library for Python.
- Bitcoinj: This library is available at https://bitcoinj.github.io/ and is implemented in Java.
There are many online Bitcoin APIs available; the most commonly used APIs are listed as follows:
As all APIs offer an almost similar type of functionality, it can get confusing to decide which one to use. It is also difficult to recommend which API is the best because all APIs are similarly feature-rich. One thing to keep in mind, however, is security. Therefore, whenever you evaluate an API for usage, in addition to assessing the offered features, also evaluate how secure the design of the API is.
Summary
This chapter started with an introduction to Bitcoin installation, followed by some discussion on source code setup and how to set up Bitcoin clients for various networks. After this, we examined various command-line options available in Bitcoin clients. Lastly, we saw which APIs are available for Bitcoin programming and the main points to keep in mind while evaluating APIs for usage. In the next chapter, we will introduce alternative electronic cash blockchain projects, that is, the digital currency projects other than Bitcoin, such as Litecoin and Namecoin. We will also discuss various ideas that led to the development of alternative coin projects.