Chapter 5: Creating NLP Search
In the previous chapters, you were introduced to Amazon Textract for extracting text from documents, and Amazon Comprehend to extract insights with no prior Machine Learning (ML) experience as a prerequisite. In the last chapter, we showed you how you can combine these features together to solve a real-world use case for document automation by giving an example of loan processing.
In this chapter, we will use the Amazon Textract and Amazon Comprehend services to show you how you can quickly set up an intelligent search solution with the integration of powerful elements, such as Amazon Elasticsearch, which is a managed service to set up search and log analytics, and Amazon Kendra, which is an intelligent managed search solution powered by ML for natural language search.
We will cover the following topics in this chapter:
- Going over search use cases and choices for search solutions
- Building a search solution for scanned images using Amazon Elasticsearch
- Setting up an enterprise search solution using Amazon Kendra
Technical requirements
For this chapter, you will need access to an AWS account. Before getting started we recommend that you create an AWS account by going through these steps here:
- Open https://portal.aws.amazon.com/billing/signup.
- Please go through and execute the steps provided on the web page to sign up.
- Log in to your AWS account when prompted in the sections.
The Python code and sample datasets for the Amazon Textract examples are provided on the book's GitHub repo at https://github.com/PacktPublishing/Natural-Language-Processing-with-AWS-AI-Services/tree/main/Chapter%2005.
Check out the following video to see the Code in Action at https://bit.ly/3nygP5S.
Creating NLP-powered smart search indexes
Every organization has lots of documents in the form of paper and in their archives too. The challenge is that these documents lie mostly in separate silos and not all in one place. So, for these organizations to make a business decision based on the hidden information in their siloed documents is extremely challenging. Some approaches these organizations take to make their documents searchable is putting the documents in a data lake. However, extracting meaningful information from these documents is another challenge as it would require a lot of NLP expertise, ML skills, and infrastructure to set that up. Even if you were able to extract insights from these documents, another challenge will then be setting up a scalable search solution.
In this section, we will address these challenges by using the AWS AI services we introduced in previous chapters and then talk about how they can be used to set up a centralized document store.
Once all the documents are in a centralized storage service such as Amazon S3, which is a scalable and durable object store similar to Dropbox, we can use Amazon Textract as covered in Chapter 2, Introducing Amazon Textract, to extract text from these documents, and use Amazon Comprehend as covered in Chapter 3, Introducing Amazon Comprehend, to extract NLP-based insights such as entities, keywords, sentiments, and more. Moreover, we can then quickly index the insights and the text and send it to Amazon Elasticsearch or Amazon Kendra to set up a smart search solution.
The following diagram shows the architecture we will cover in this section:
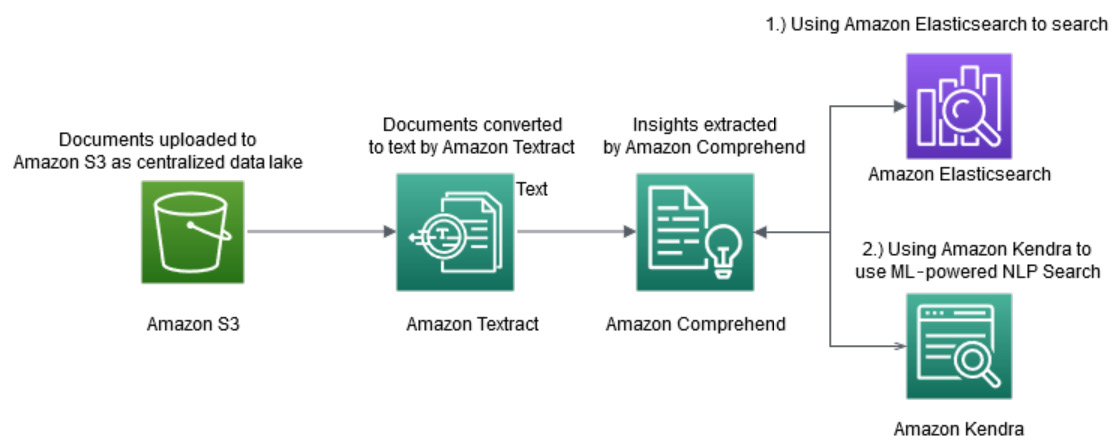
Figure 5.1 – Creating an NLP-powered search index
In Figure 5.1, you can see the two options we have to build a search index. The options are as follows:
- Using Amazon Elasticsearch to build a search on top of your document processing pipeline with Amazon Textract and Amazon Comprehend
- Using Amazon Kendra to build a serverless intelligent search on top of your existing document processing pipeline with Amazon Textract and Amazon Comprehend
If you are looking for a natural language-based search solution powered by ML where you can ask human-like questions rather than searching for keywords, you can choose Amazon Kendra for the search, as Amazon Kendra is an AWS AI service powered by ML. Amazon Kendra offers natural language search functionality and will provide you with NLP-based answers, meaning human-like contextual answers. For example, imagine you are setting up the search function on your IT support documents in Salesforce. Using Amazon Kendra you can ask direct questions such as "where is the IT desk located?" and Amazon Kendra will give you an exact response, such as "the sixth floor," whereas in Amazon Elasticsearch you can only perform keyword-based search.
Moreover, you can also integrate Amazon Kendra into Amazon Lex, which is a service to create chatbots. You can deploy a smart search chatbot on your website powered by Amazon Lex and Amazon Kendra. Also, Amazon Kendra comes with a lot of connectors to discover and index your data for search, including Amazon S3, OneDrive, Google Drive, Salesforce, relational databases such as RDS, and many more supported by third-party vendors.
You can set up a search on many different interesting use cases, for example, for financial analysts searching for financial events, as they have to scroll through tons of SEC filing reports and look for meaningful financial entities such as mergers and acquisitions. Using the proposed pipeline along with Amazon Comprehend Events can easily reduce the time and noise while scrolling through these documents and update their financial models in case of any financial events such as mergers or acquisitions.
For healthcare companies, they can use the set of services and options offered by Amazon Comprehend Medical to create a smart search for healthcare data, where a doctor can log in and search for relevant keywords or information from the centralized patient data in Amazon HealthLake. We will cover more on this use case in this chapter.
We all know finding jobs is extremely difficult. It's harder even for talent acquisition companies hunting for good candidates to search for relevant skills across thousands of resumes. You can use the proposed solution to set up a resume processing pipeline where you can upload the resumes of various candidates in Amazon S3 and search for relevant skills based on the jobs you are looking for.
In this section, we covered two options with which to set up smart search indexes. In the next section, we will show you how you can set up this architecture to create an NLP-powered search application where Human Resources (HR) admin users can quickly upload candidates' scanned resumes and other folks can log in and search for relevant skill sets based on open job positions.
Building a search solution for scanned images using Amazon Elasticsearch
In the previous chapters, we spoke about how you can use Amazon Lambda functions to create a serverless application. In this section, we will walk you through the following architecture to set up a scanned image-based search solution by calling the Amazon Textract and Amazon Comprehend APIs using an Amazon Lambda function. We are going to use Amazon Elasticsearch for this use case. However, you can also replace Amazon Elasticsearch with Amazon Kendra to create an ML-based search solution where you can use natural language to ask questions while searching.
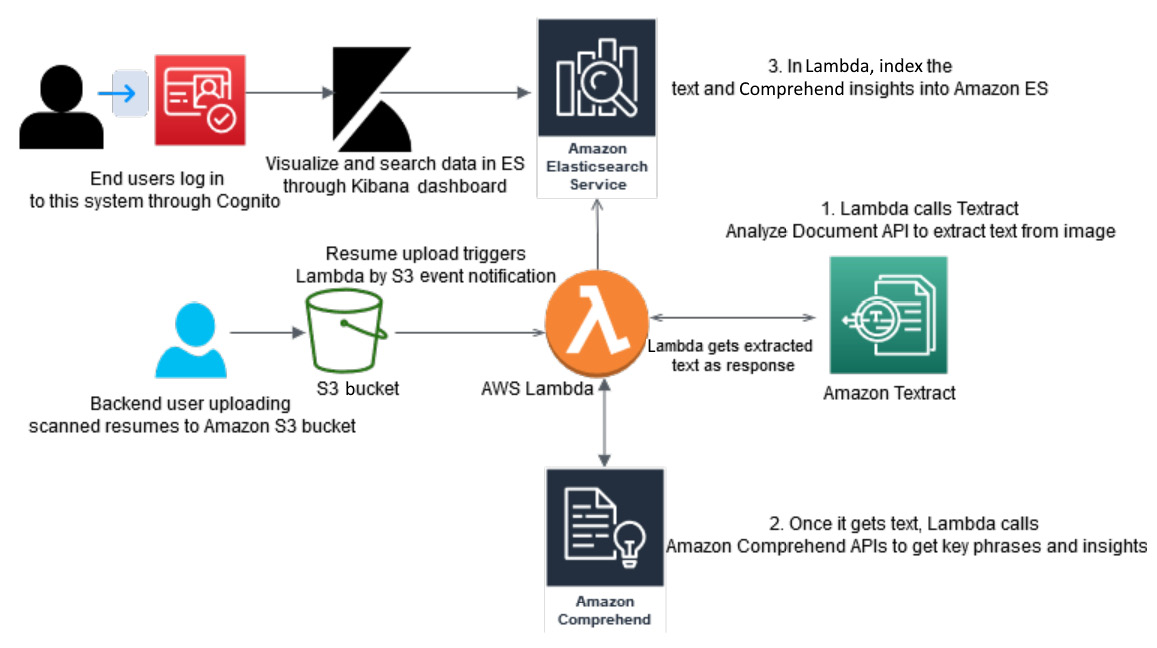
Figure 5.2 – Building NLP search using Amazon Elasticsearch
The AWS service used in the previous architecture is Amazon Cognito to set up the login for your backend users.
Amazon S3 is used for centralized storage. Amazon Lambda functions are used as serverless event triggers when the scanned resumes are uploaded to Amazon S3, and then we use both Amazon Textract and Amazon Comprehend to extract text and insights such as key phrases and entities. Then we index everything into Amazon Elasticsearch. Your end users can log in through Cognito, and will access Amazon Elasticsearch through a Kibana dashboard that comes integrated with Amazon Elasticsearch for visualization.
Prerequisites
We will use an AWS CloudFormation template to spin up the resources needed for this chapter. CloudFormation templates are scripts written in YAML or JSON format to spin up resources or Infrastructure as Code (IaC). AWS CloudFormation templates write IaC and set all the necessary permissions for you:
- Click https://forindexing.s3.eu-west-1.amazonaws.com/template-export-textract.yml to download and deploy an AWS CloudFormation template.
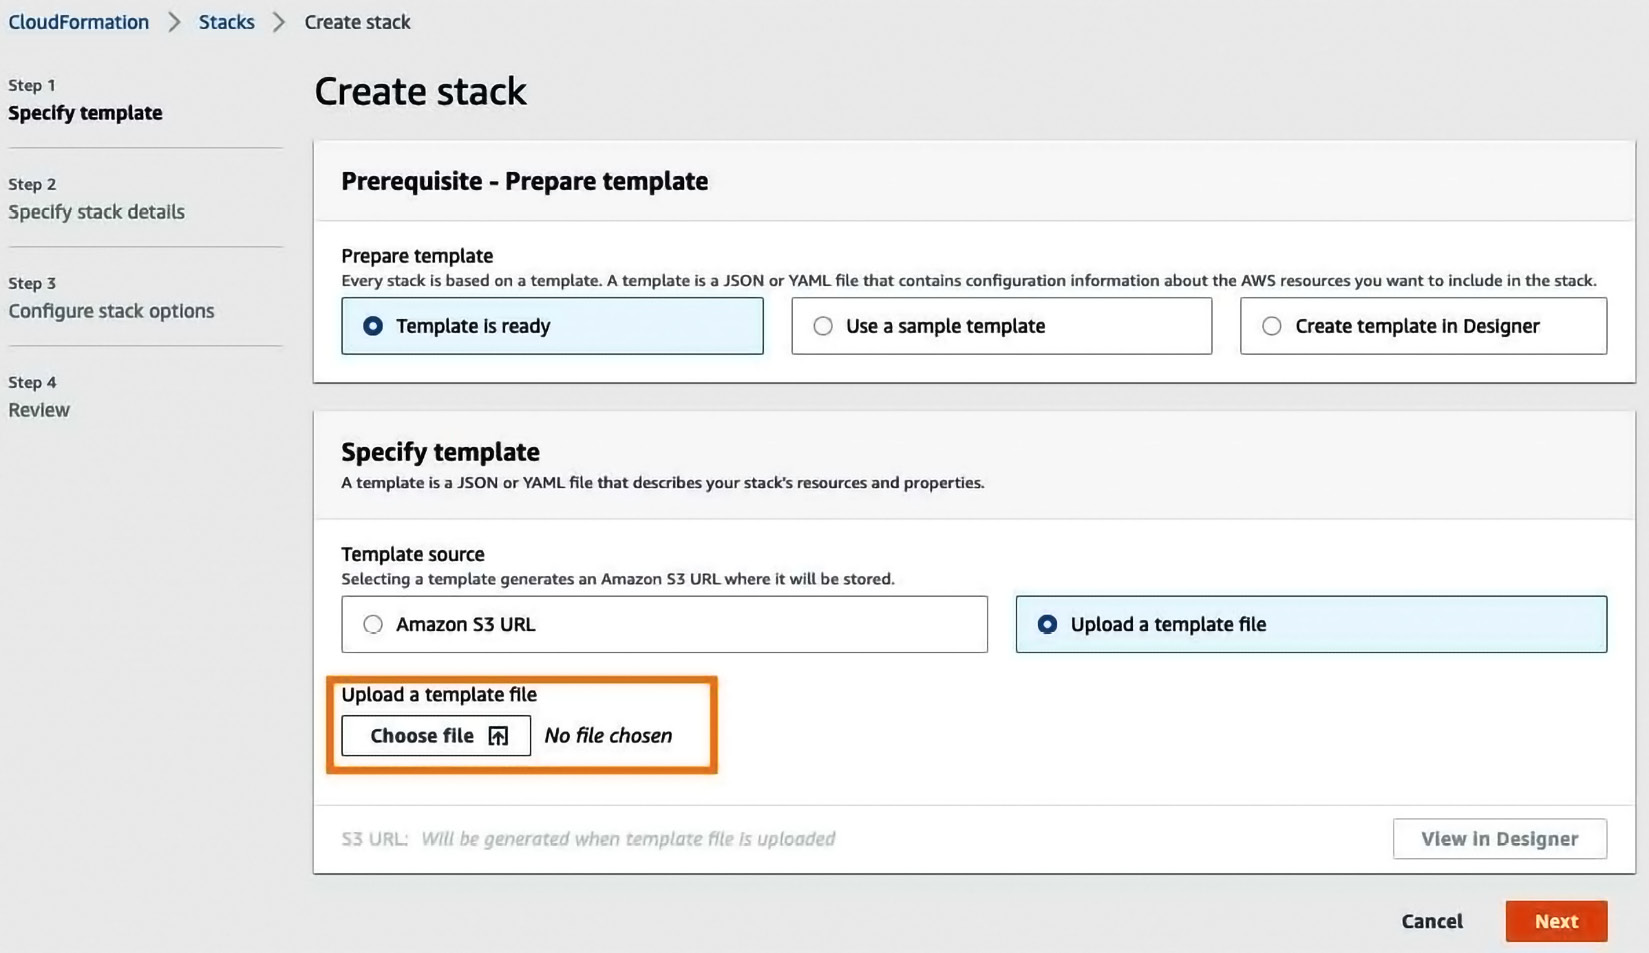
Figure 5.3 – CloudFormation template stack
- Scroll down to Parameters, enter your email address in the relevant field, and enter documentsearchapp for DOMAINNAME as shown in the following screenshot:
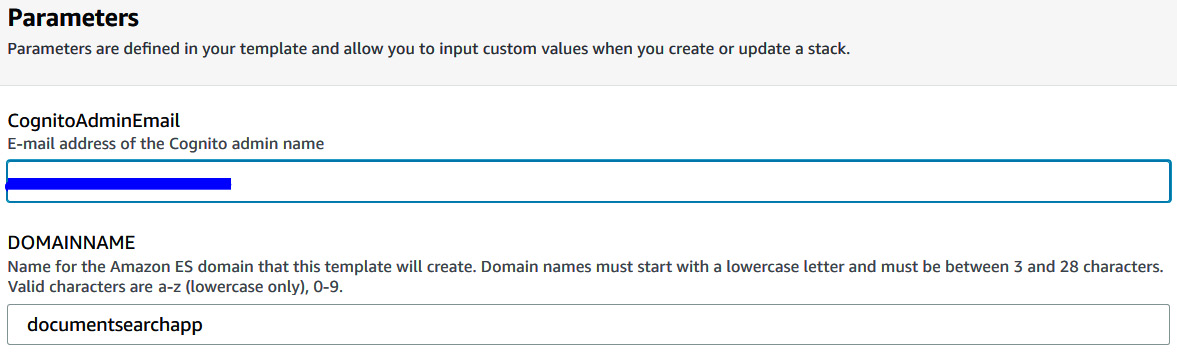
Figure 5.4 – Enter parameters
- Scroll down and check all three acknowledgments under Capabilities and transforms, then click Create stack.
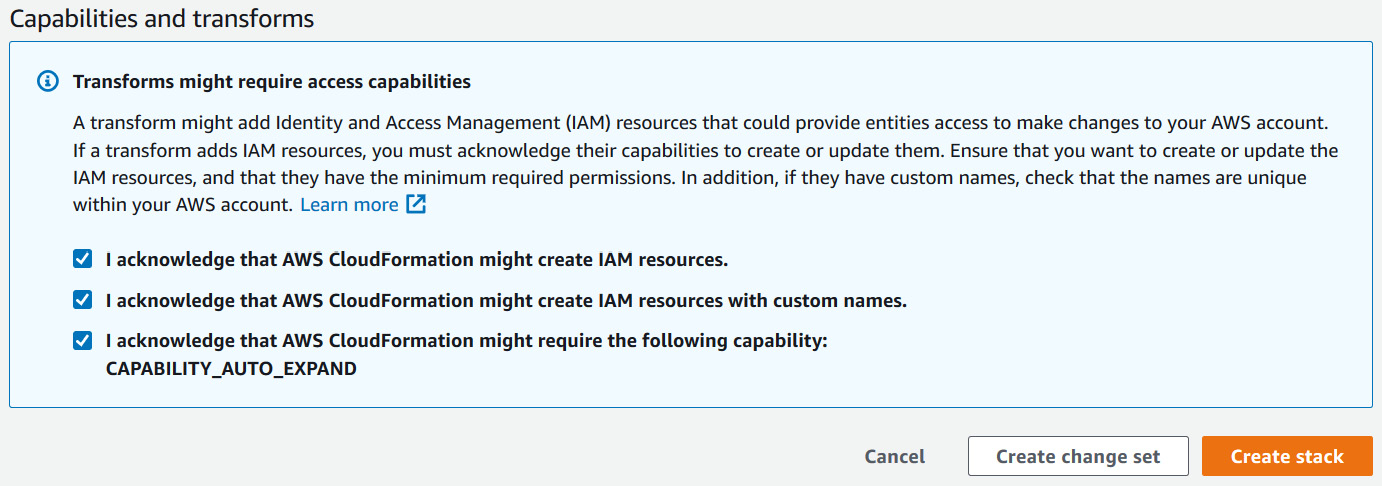
Figure 5.5 – The Capabilities and transforms section
- You will see your stack creation in progress. Wait till it's completed as shown in the following screenshot – you can refresh to see the changing status. It might take 20 minutes to deploy this stack so go grab a quick coffee:
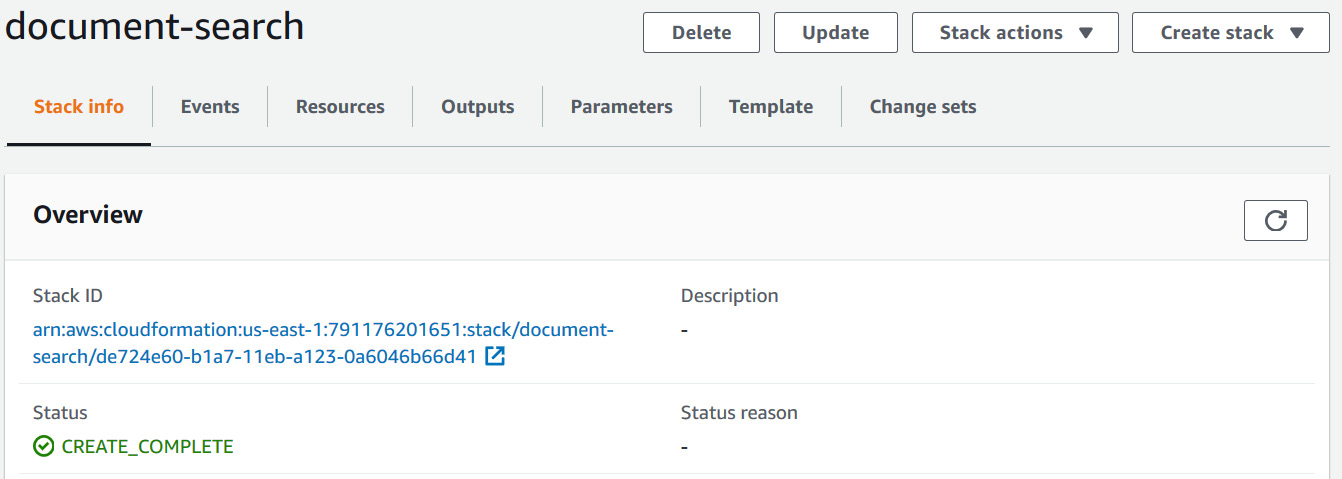
Figure 5.6 – CloudFormation resources creation complete
Note:
You will get an email with the login details to Cognito while your stack is being created. Make sure you check the same email you provided while creating this stack. An admin can add multiple users' email addresses through the Amazon Cognito console once it's deployed. Those emails can be sent to end users for logging in to the system once the resumes' data has been uploaded to Amazon S3.
- Go to the Outputs tab, and scroll down to the Outputs section.
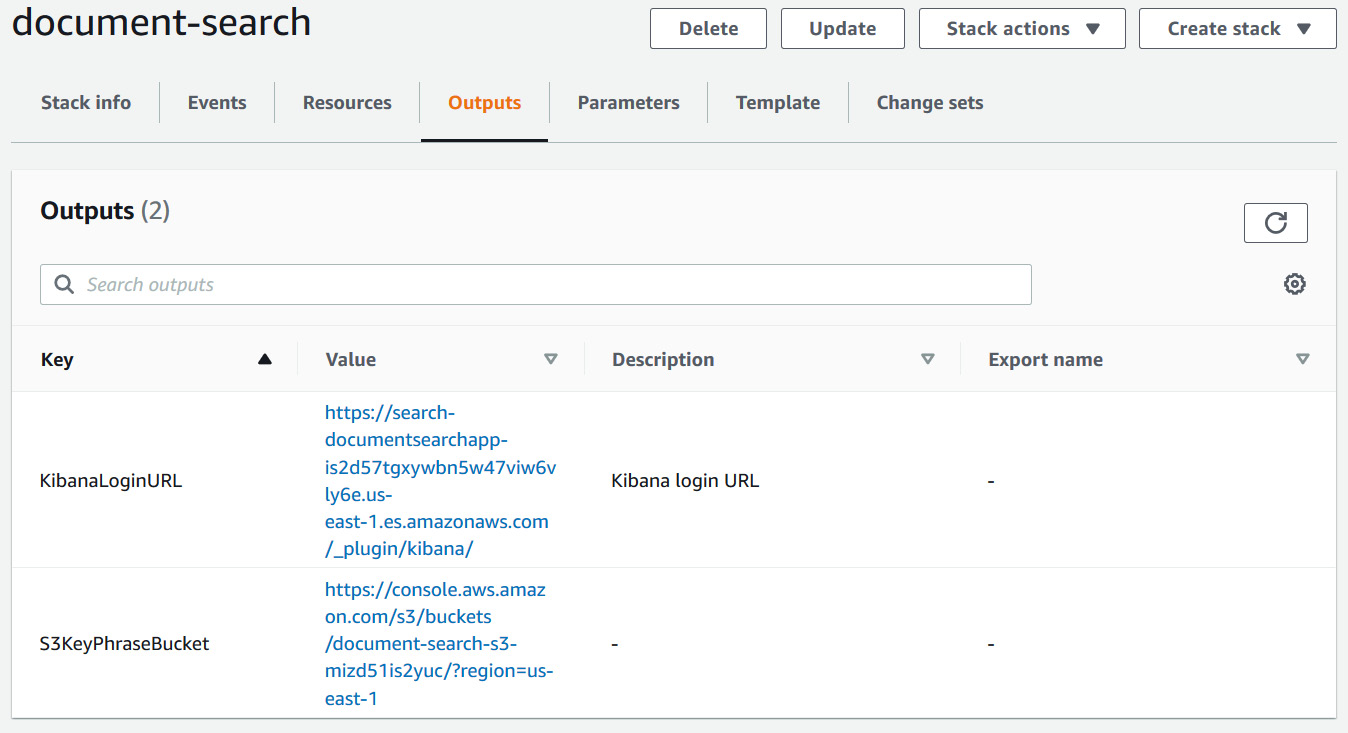
Figure 5.7 – CloudFormation outputs
- Copy the values for S3KeyPhraseBucket and KibanaLoginURL from the Value section. We are going to use these links for this section while walking through this app.
Now you have set up up the infrastructure, including an Amazon S3 bucket, Lambda functions, the Cognito login, Kibana, and the Amazon Elasticsearch cluster using CloudFormation. You have the output from CloudFormation for your S3 bucket and Kibana dashboard login URLs. In the next section, we will walk you through how you can upload scanned images to interact with this application as an admin user.
Uploading documents to Amazon S3
We'll start with the following steps for uploading documents to Amazon S3:
- Click on the S3 link copied from the CloudFormation template output in the previous section. Then download the sample resume at https://github.com/PacktPublishing/Natural-Language-Processing-with-AWS-AI-Services/blob/main/Chapter%2005/resume_sample.PNG, and upload it in S3 by clicking on the Upload button followed by Add files.
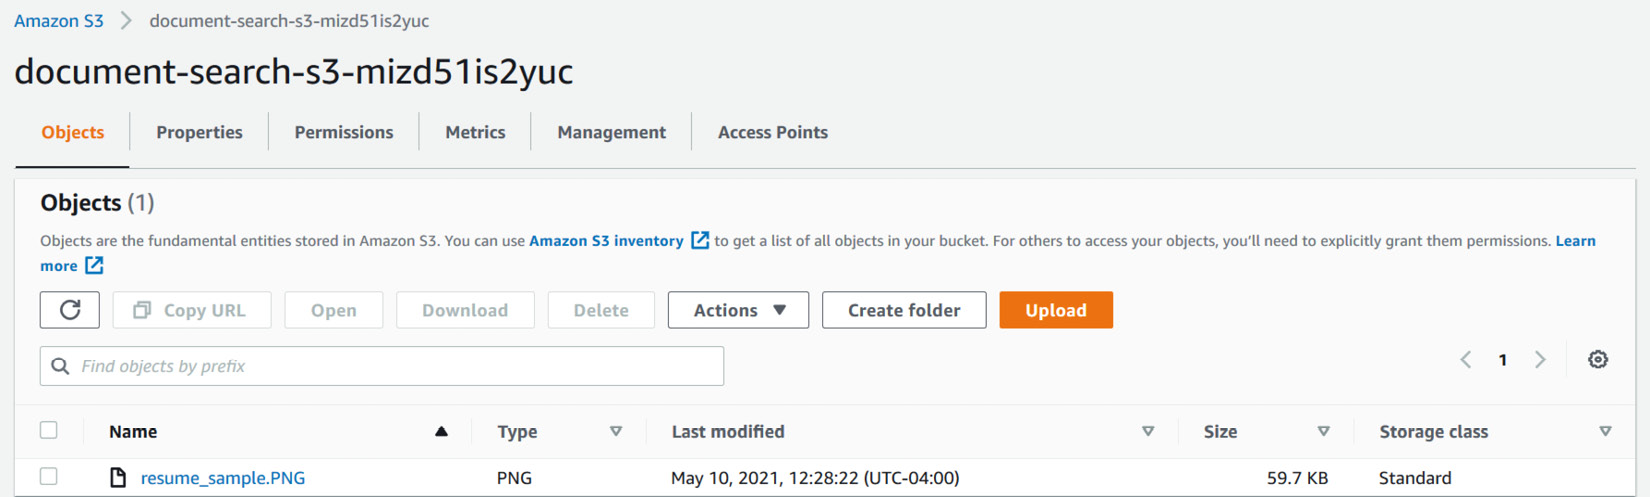
Figure 5.8 – Scanned image in Amazon S3
- This upload triggers an Amazon S3 event notification to the AWS Lambda function. To check that, go to the Properties tab and then scroll down to Event notifications as shown in the following screenshot:

Figure 5.9 – S3 event notifications to notify the AWS Lambda function
- Click on the Lambda function link shown under Destination. We will inspect this Lambda function in the next section.
We have uploaded the sample scanned resume to Amazon S3, and also showed you where you can find the S3 event notifications that trigger a Lambda function. In the next section, let's explore what is happening in the Lambda function.
Inspecting the AWS Lambda function
In this section, we will inspect the code blocks of AWS Lambda and the API calls made to Amazon Textract and Amazon Comprehend along with Amazon Elasticsearch.

Figure 5.10 – AWS Lambda function
The deployment code is too large for this function to show up in this AWS Lambda console. You can access the code through through the following GitHub repo instead, at https://github.com/PacktPublishing/Natural-Language-Processing-with-AWS-AI-Services/blob/main/Chapter%2005/lambda/index.py:
- First, we are getting the files through Amazon S3 events as shown in the following code block from the main Lambda handler. In Lambda, all code blocks are executed from this main handler. The handler method is invoked by Lambda for each function invocation and acts as an entry point. The code outside the handler contains functions that can be called from the main handler and some global variables:
def handler(event, context):
bucket = event['Records'][0]['s3']['bucket']['name']
key = unquote_plus(event['Records'][0]['s3']['object']['key'])
- The following code downloads the file from Amazon S3 to process it with Textract and Comprehend:
s3.Bucket(bucket).download_file(Key=key,Filename='/tmp/{}')
with open('/tmp/{}', 'rb') as document:
imageBytes = bytearray(document.read())
print("Object downloaded")
- After getting the objects or scanned resumes from S3 events and reading through a Lambda function, we will call the Amazon Textract AnalyzeDocument API, a real-time API to extract the text, using the following code:
response = textract.analyze_document(Document={'Bytes': imageBytes},FeatureTypes=["TABLES", "FORMS"])
document = Document(response)
- We will parse the response to extract the lines of text to be sent to Amazon Comprehend:
blocks=response['Blocks']
for block in blocks:
if block['BlockType'] == 'LINE':
text += block['Text']+" "
print(text)
- Once we have extracted text, we will call the Comprehend Keyphrase API by putting it in a list variable to be indexed later:
Note:
Comprehend sync APIs allow up to 5,000 characters as input so make sure your text is not more than 5,000 characters long.
keyphrase_response = comprehend.detect_key_phrases(Text=text, LanguageCode='en')
KeyPhraseList=keyphrase_response.get("KeyPhrases")
for s in KeyPhraseList:
textvalues.append(s.get("Text")
- Now we will extract entities using the Comprehend DetectEntities API and save it in a map data structure variable to be indexed later:
detect_entity= comprehend.detect_entities(Text=text, LanguageCode='en')
EntityList=detect_entity.get("Entities")
for s in EntityList:
textvalues_entity.update([(s.get("Type").strip(' '),s.get("Text").strip(' '))]
- Now we will create an Amazon S3 URL to be indexed:
s3url='https://s3.console.aws.amazon.com/s3/object/'+bucket+'/'+key+'?region='+region
- We have the text, keyphrases, and entities, as well as the S3 link of the uploaded document. Now we will index it all and upload it in Elasticsearch:
searchdata={'s3link':s3url,'KeyPhrases':textvalues,'Entity':textvalues_entity,'text':text, 'table':table, 'forms':forms}
print(searchdata)
print("connecting to ES")
es=connectES()
es.index(index="document", doc_type="_doc", body=searchdata)
Note:
In case the resumes have tables or forms, we have prepared to index them as well. Moreover, this solution can also be used for invoice search.
In this section, we walked you through how you can extract text and insights from the documents uploaded to Amazon S3. We also indexed the data into Amazon Elasticsearch. In the next section, we will walk you through how you can log in to Kibana using your admin login email setup while creating CloudFormation templates and visualize the data in the Kibana dashboard.
Searching for and discovering data in the Kibana console
In this section, we will cover how you can sign up to Kibana through Amazon Cognito by using the email you entered as the admin while deploying the resources through AWS CloudFormation. Then we will walk you through how you can set up your index in Kibana. We will cover how you can discover and search the data in the Kibana dashboard based on entity, keyword, and table filters from Amazon Comprehend. Lastly, you can download the searched resume link from Amazon S3.
We will cover walkthroughs including signing up to the Kibana console, making the index discoverable for the search functionality, and searching for insights in Kibana.
Signing up to the Kibana console
In these steps, we will walk you through how you can log in to Kibana using the CloudFormation-generated output link:
- Click on the Kibana login link you got from the CloudFormation output as shown in the following screenshot:
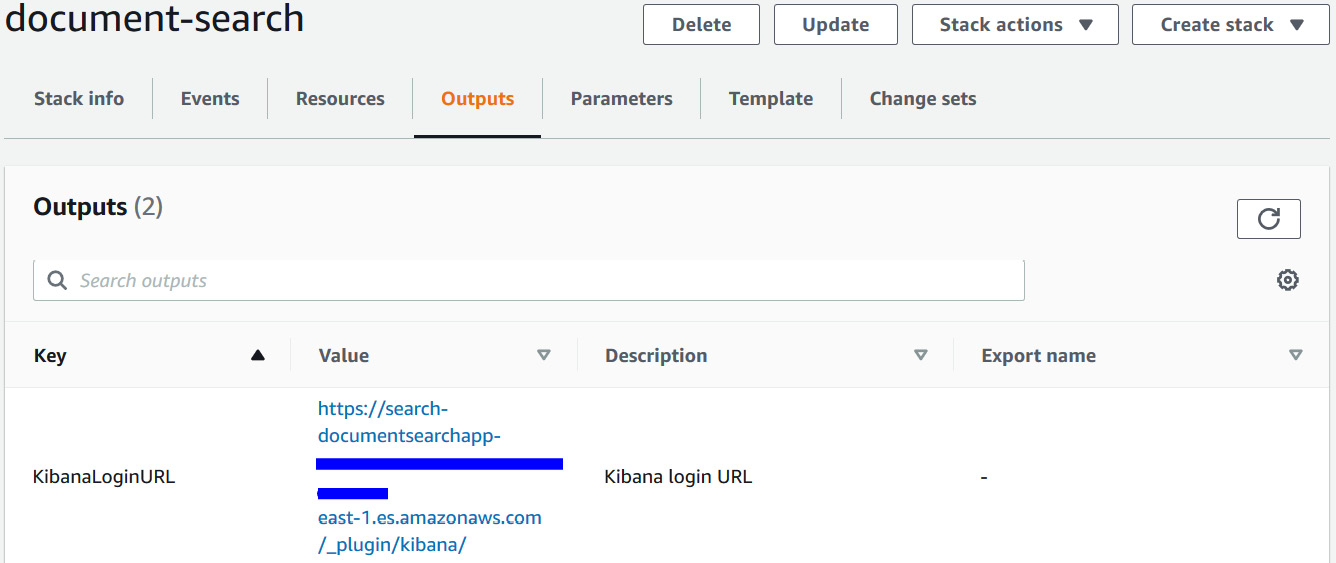
Figure 5.11 – CloudFormation output – Kibana URL
- This link will redirect you to this console:

Figure 5.12 – Kibana sign-in dialog
Note:
You can sign up additional end users using the Sign up button shown in the previous screenshot.
- You should have got an email with a username and temporary password – enter those details in the preceding dialog, and click on Sign in.
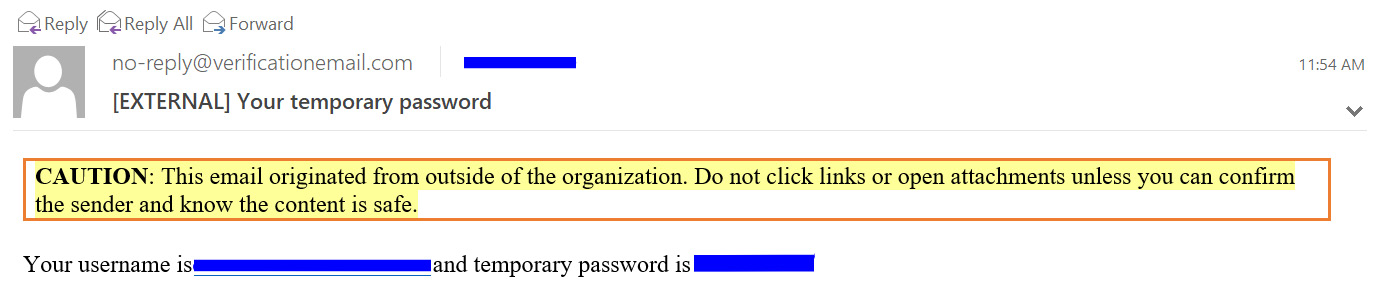
Figure 5.13 – Verification and password login email
- It will ask you to change your password the first time you sign in. After changing your password, you will be redirected to the Kibana console.
We have covered how to sign up for Kibana. In the next section, we will walk you through setting up the index in Kibana.
Making the index discoverable for the search functionality
In this section, we will walk you through setting up an index in Kibana for searching:
- Click on Discover when you reach the Kibana console and we will walk you through setting up your index in Kibana.
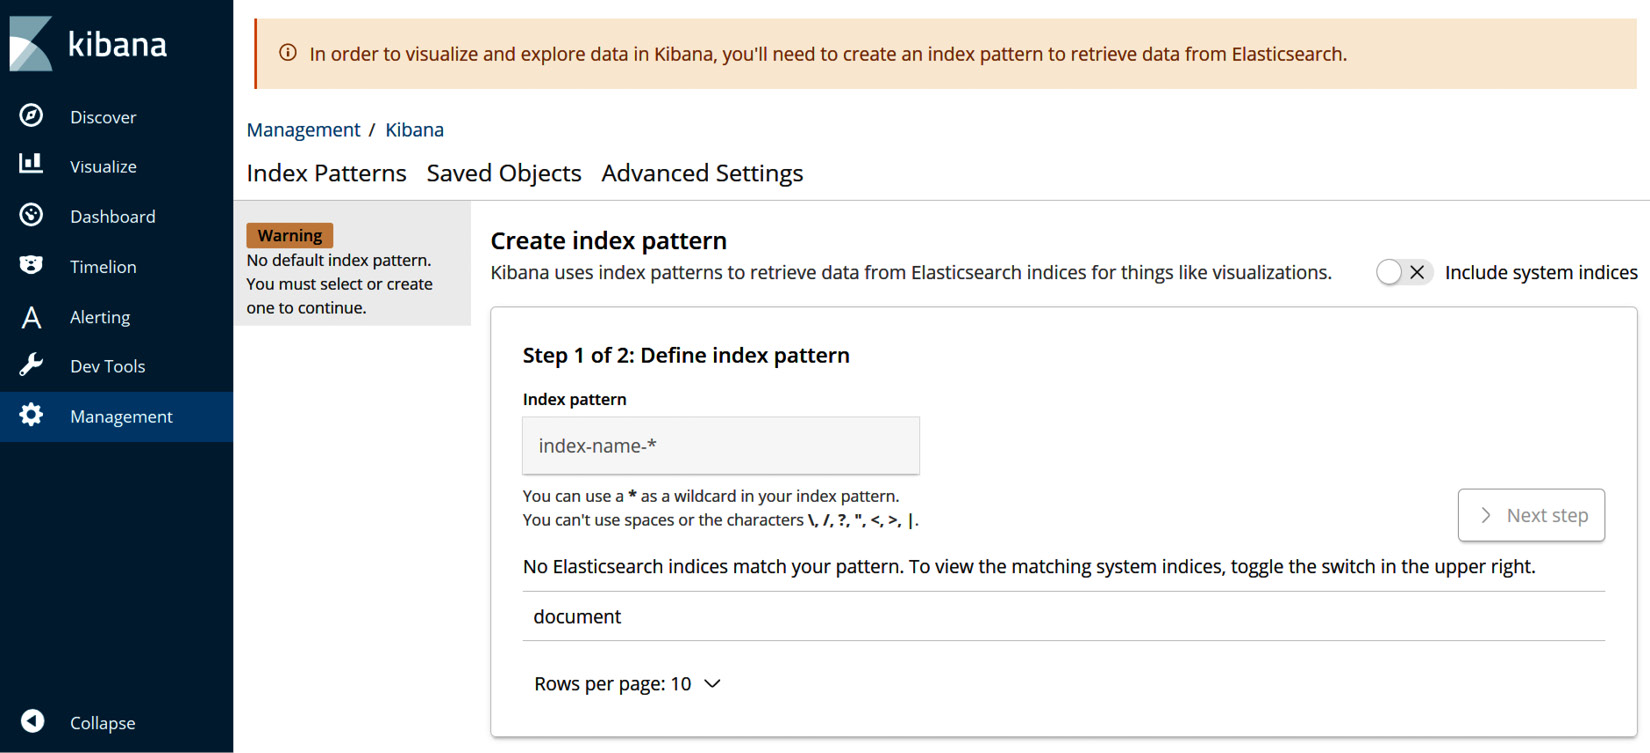
Figure 5.14 – Kibana Create index pattern page
- Enter document in the Index pattern field, as shown in the following screenshot, then click Next step:

Figure 5.15 – Define index pattern
- Click on Create index pattern. This will make your Elasticsearch index discoverable.

Figure 5.16 – Create index pattern
We have created an index. Now we will start searching for insights.
Searching for insights in Kibana
In this section, we will walk you through searching for insights in Kibana:
- Click on Discover and on the left-hand side you will find entities and key phrases that can be added to your search filters under Available Fields.
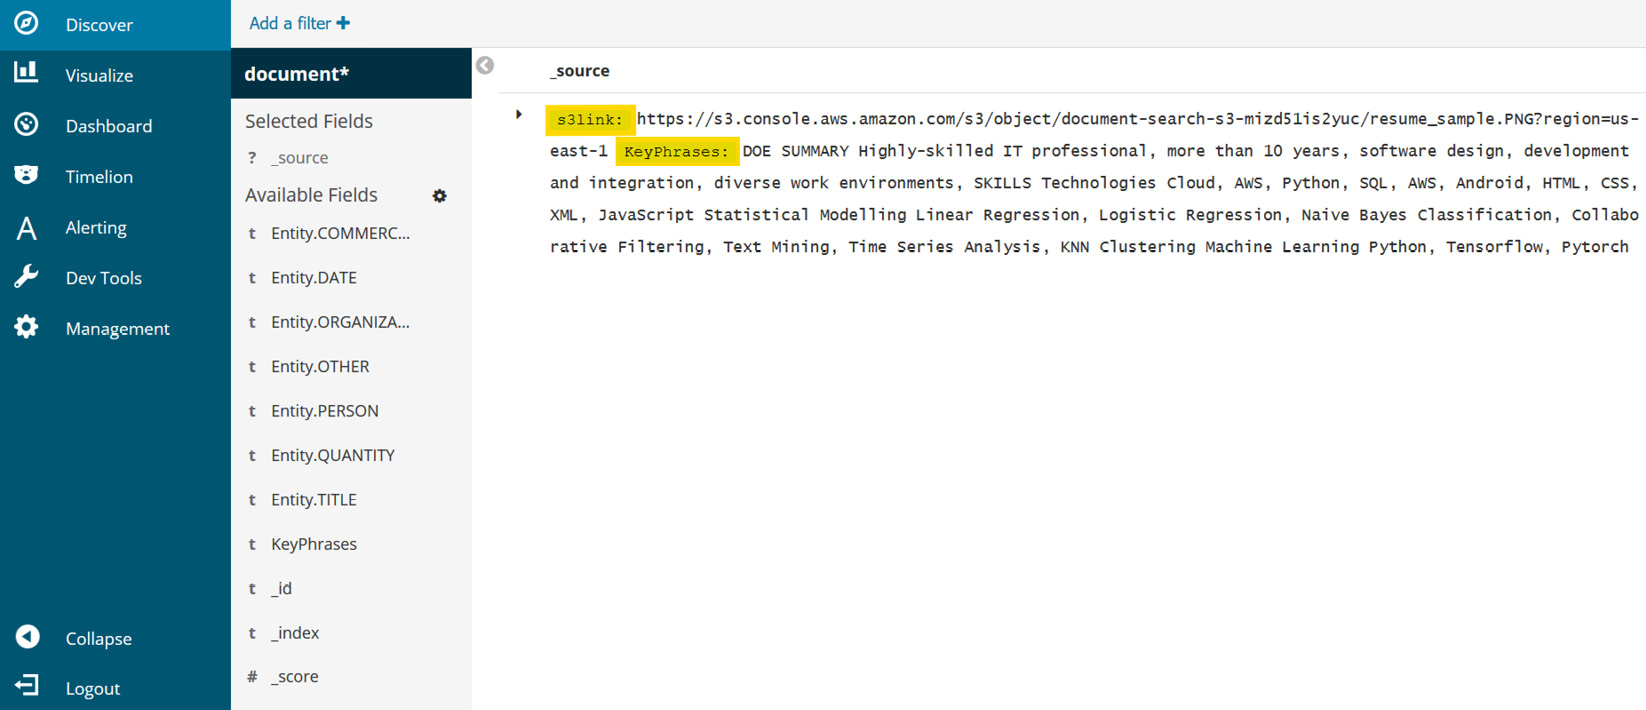
Figure 5.17 – Kibana's Discover dashboard (a)
Let's look at another output shown in the following screenshot:

Figure 5.18 – Kibana's Discover dashboard (b)
- Entity search: Let's search for a candidate by date and title by adding the available fields of Entity.TITLE and Entity.dATE for a quick search. You can click on Add a filter and these filters will get added as seen in the following screenshot. You can see that it found someone with the big data analytics title in July 2017:

Figure 5.19 – Adding an entity filter to selected fields
- Keyword search using the keyphrases and table: Add the KeyPhrases and table filters from available fields and you will get a table summary of all the skills you are looking for, along with keyphrases about the candidate.
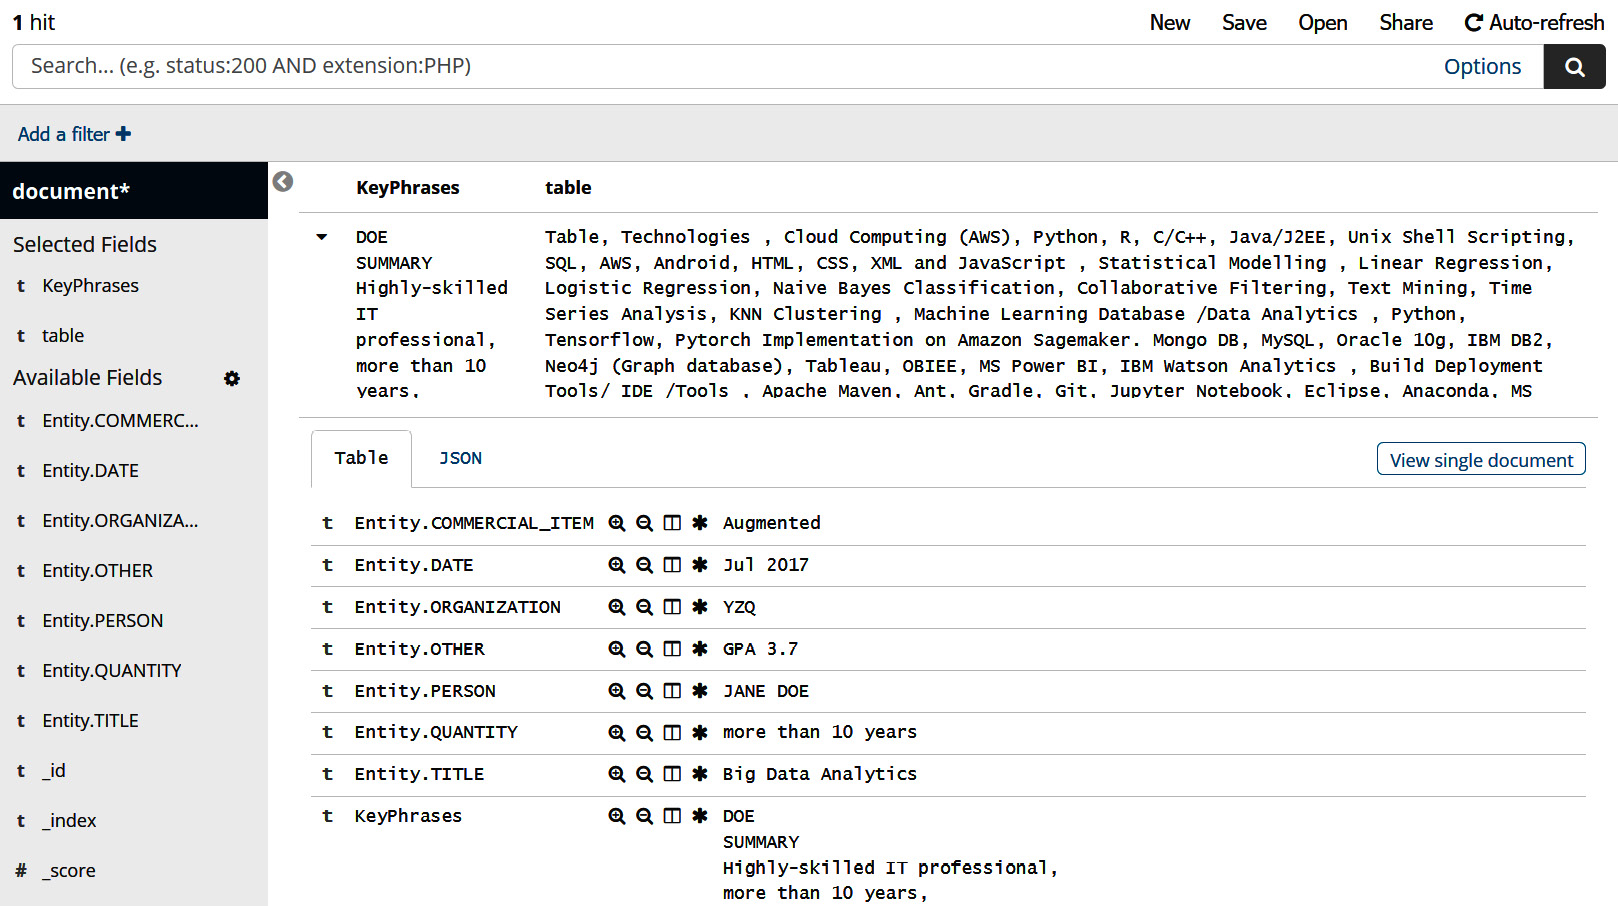
Figure 5.20 – Keyword and table fields search
- Doing a generic keyword search: Now I am looking for someone with both Amazon SageMaker and MySQL skills. Let's enter Amazon Sagemaker and MySQL in the search field and see whether we have a candidate resume matching our needs. We are able to find a candidate resume with both these skills as highlighted in the following screenshot:

Figure 5.21 – Keyword search with AND condition
- Downloading the resume of the candidate matched: We can download the resume of the matched candidate by adding an S3 link on selected fields as follows:
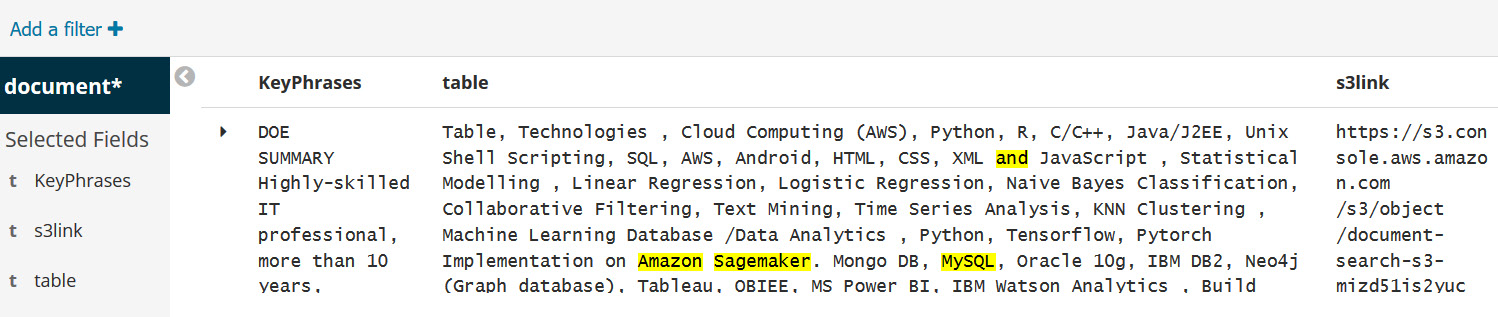
Figure 5.22 – S3 link to download the resume
In this section, we gave you an architecture overview of the search solution for scanned images where an admin user uploads the scanned documents in Amazon S3, and then showed how to sign up for the Kibana dashboard and search for keywords to gain meaningful insights from the scanned documents.
We walked you through the steps to set up the architecture using AWS CloudFormation template one-click deploy, and you can check the Further reading section to learn more about how to create these templates. We also showed how you can interact with this application by uploading some sample documents. We guided you on how to set up the Kibana dashboard and provide some sample queries to gain insights from the keywords and entities as filters.
In the next section, we will explore a Kendra-powered search solution. Let's get started exploring Amazon Kendra and what you can uncover by using it to power Textract and Comprehend in your document processing workflows.
Setting up an enterprise search solution using Amazon Kendra
In this section, we will cover how you can quickly create an end-to-end serverless document search application using Amazon Kendra.
In this section, we will cover the steps to get started.
Git cloning the notebook
We will walk through the steps to git clone the notebook and show code samples to set up the kendra based search architecture using simple boto3 APIs.
- In the SageMaker Jupyter notebook you set up in the previous chapters, Git clone https://github.com/PacktPublishing/Natural-Language-Processing-with-AWS-AI-Services/.
- Go to Chapter 05/Ch05-Kendra Search.ipynb and start running the notebook.
Note:
Please add Kendra IAM access to the SageMaker notebook IAM role so that you can call Kendra APIs through this notebook. In previous chapters, you already added IAM access to Amazon Comprehend and Textract APIs from the SageMaker notebook.
Creating an Amazon S3 bucket
We will show you how you can create a Amazon S3 bucket. We will use this bucket as a Kendra datasource and also to store extracted data from Amazon Textract.
- Create an Amazon S3 bucket by going to the Amazon S3 console at https://s3.console.aws.amazon.com/s3/home?region=us-east-1.
- Click on the Create bucket button and enter any bucket name as shown in the following screenshot:
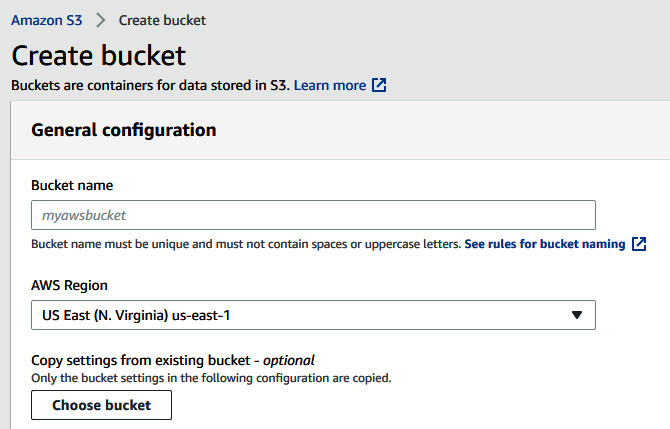
Figure 5.23 – Create an Amazon S3 bucket
- Scroll down and click on Create bucket.
- Copy the created bucket name, open Chapter 05/Ch05-Kendra Search.ipynb, and paste it in the following cell in place of '<your s3 bucket name>' to get started:
# Define IAM role
role = get_execution_role()
print("RoleArn: {}".format(role))
sess = sagemaker.Session()
s3BucketName = '<your s3 bucket name>'
prefix = 'chapter5'
We have the notebook ready and the Amazon S3 bucket created for this section's solution. Let's see a quick architecture walkthrough in the next section to understand the key components and then we will walk you through the code in the notebook you have set up.
Walking through the solution
Setting up an enterprise-level search can be hard. That's why we have Amazon Kendra, which can crawl data from various data connectors to create a quick and easy search solution. In the following architecture, we will walk you through how you can set up a document search when you have your PDF documents in Amazon S3. We will extract the data using Amazon Textract from these PDF documents and send it to Amazon Comprehend to extract some key entities such as ORGANIZATION, TITLE, DATE, and so on. These entities will be used as filters while we sync the documents directly into Amazon Kendra for search.

Figure 5.24 – Architecture for the Amazon Kendra-powered search with Textract and Comprehend
So, we gave you a high-level implementation architecture in the previous diagram. In the next section, we will walk you through how you can build this out with few lines of code and using the Python Boto3 APIs.
Code walkthrough
In this section, we will walk you through how you can quickly set up the proposed architecture:
- We will refer to this notebook: https://github.com/PacktPublishing/Natural-Language-Processing-with-AWS-AI-Services/blob/main/Chapter%2005/Ch05-Kendra%20Search.ipynb. The following code presents the Boto3 client setup for Comprehend, Kendra, and Textract APIs
comprehend = boto3.client('comprehend')
textract= boto3.client('textract')
kendra= boto3.client('kendra')
- Now we will upload the PDF document at https://github.com/PacktPublishing/Natural-Language-Processing-with-AWS-AI-Services/blob/main/Chapter%2005/resume_Sample.pdf from this repo to Amazon S3.
Note:
You can upload as many documents for search as you wish. For this demonstration, we are providing just one sample. Please feel free to play around by uploading your documents to Amazon S3 and generating metadata files before you start syncing your documents to Amazon Kendra.
For extracting text from the PDF uploaded to Amazon S3, we will use the same code as we used for the asynchronous processing covered in Chapter 2, Introducing Amazon Textract.
- The following code shows text extraction from Amazon Textract:
text=""
for resultPage in response:
for item in resultPage["Blocks"]:
if item["BlockType"] == "LINE":
#print ('�33[94m' + item["Text"] + '�33[0m')
text += item['Text']+" "
print(text)
The sample results shown in the following screenshot contain the text from the PDF:
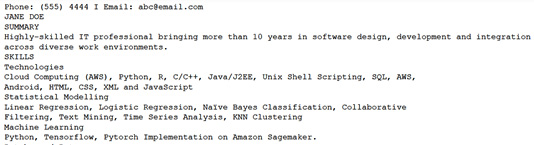
Figure 5.25 – Extracted text response from Amazon Textract for the resume data
- Now we will send this text to Amazon Comprehend for entity extraction by running the following code:
entities= comprehend.detect_entities(Text=text, LanguageCode='en')
- Now we will create an Amazon Kendra index. Go to the Kendra console at https://console.aws.amazon.com/kendra/home?region=us-east-1#indexes and click the Create index button. Specify Search for Index name, then scroll down and click on Create a new role (Recommended), shown highlighted in the following screenshot:
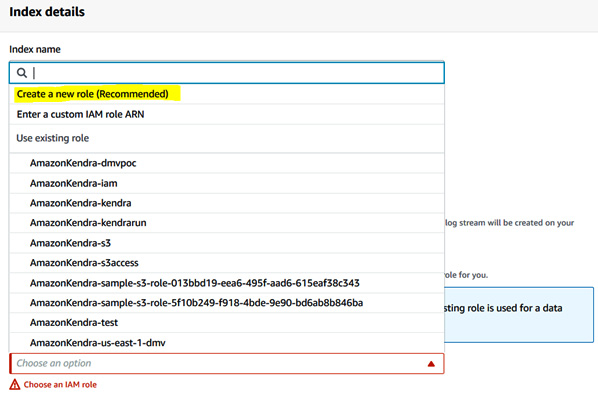
Figure 5.26 – Create a new role for the Kendra index
- Enter AmazonKendra-us-east-1-kendra as the role name and click on Next. Your role name will be prefixed with AmazonKendra-us-east-1-.
- For Configure user access control, Use tokens for access control? select No and click Next.
- For Specify provisioning, choose Developer Edition and click on Create. Alternatively, you can run the following notebook cell after creating an IAM role to create the index programmatically:
Note:
If you created the index using the console, please skip the programmatic creation and avoid running the following notebook cell to create the index.
response = kendra.create_index(
Name='Search',
Edition='DEVELOPER_EDITION',
RoleArn='<enter IAM role by creating IAM role in IAM console')
print(response)
Note:
Index creation can take up to 30 minutes.
- After creating the index, we need to get the index ID to run through this notebook.Once the index is created, click on Index and go to Index Settings to copy the index ID.
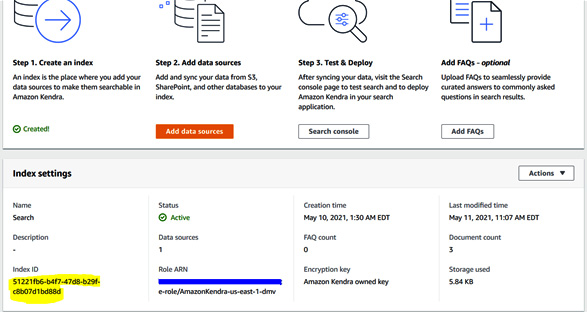
Figure 5.27 – Copying the Kendra index ID from the Kendra console
Alternatively, if you created the index programmatically using the CreateIndex API, its response will contain an index ID of 36 digits that you need to copy and paste to run the next piece of code to update the search filters based on the Comprehend entities.
- Copy and paste the Kendra index ID over the placeholder in the following cell, then run the cell to update the index we created with filters for search. Refer to the notebook for the complete code to add all the filters:
response = kendra.update_index(
Id="<paste Index Id from Create Index response>",
DocumentMetadataConfigurationUpdates=[
{
'Name':'ORGANIZATION',
'Type':'STRING_LIST_VALUE',
'Search': {
'Facetable': True,
'Searchable': True,
'Displayable': True
}
}}
- Now we will define the list of categories recognized by Comprehend:
categories = ["ORGANIZATION", "PERSON", "DATE", "COMMERCIAL_ITEM", "OTHER", "TITLE", "QUANTITY"]
- Now we will iterate over the entities and generate a metadata file to populate the filters based on the entities from Amazon Comprehend:
for e in entities["Entities"]:
if (e["Text"].isprintable()) and (not """ in e["Text"]) and (not e["Text"].upper() in category_text[e["Type"]]):
#Append the text to entity data to be used for a Kendra custom attribute
entity_data[e["Type"]].add(e["Text"])
#Keep track of text in upper case so that we don't treat the same text written in different cases differently
category_text[e["Type"]].append(e["Text"].upper())
#Keep track of the frequency of the text so that we can take the text with highest frequency of occurrance
text_frequency[e["Type"]][e["Text"].upper()] = 1
elif (e["Text"].upper() in category_text[e["Type"]]):
#Keep track of the frequency of the text so that we can take the text with highest frequency of occurrance
text_frequency[e["Type"]][e["Text"].upper()] += 1
print(entity_data)
- You will get a response back detailing the Comprehend entity types and values detected in the text from the PDF document.

Figure 5.28 – Comprehend's extracted entities
- Populate the Kendra metadata list from the previous entities for Amazon Kendra attributes filter:
elimit = 10
for et in categories:
- Take the elimit number of recognized text strings that have the highest frequency of occurrence:
el = [pair[0] for pair in sorted(text_frequency[et].items(), key=lambda item: item[1], reverse=True)][0:elimit]
metadata[et] = [d for d in entity_data[et] if d.upper() in el]
metadata["_source_uri"] = documentName
attributes["Attributes"] = metadata
- The last step is to save this file with the metadata.json. Make sure the filename is the original PDF document filename followed by metadata.json in the Amazon S3 bucket where your PDF document is uploaded:
s3 = boto3.client('s3')
prefix= 'meta/'
with open("metadata.json", "rb") as f:
s3.upload_file( "metadata.json", s3BucketName,'%s/%s' % ("meta","resume_Sample.pdf.metadata.json"))
We gave you a code walkthrough on how to upload a PDF document and extract data from it using Amazon Textract and then use Amazon Comprehend to extract entities. We then created a metadata file using the filters or entities extracted by Comprehend and uploaded it into Amazon S3. In the next section, we will walk you through how you can set up Amazon Kendra sync with the S3 document you uploaded, and how you can create a meta folder and place your metadata files there so that Amazon Kendra picks them up as metadata filters during the Kendra sync.
Searching in Amazon Kendra with enriched filters from Comprehend
In this section, we will walk you through how you can sync the documents to the index you have created, along with the filters in the metadata file:
- Set the Kendra data source as the Amazon S3 bucket to which you uploaded your documents. Navigate to Amazon Kendra | Indexes | <Name of the Index> | Data sources | Add data source | Amazon S3, as shown in the following screenshot:
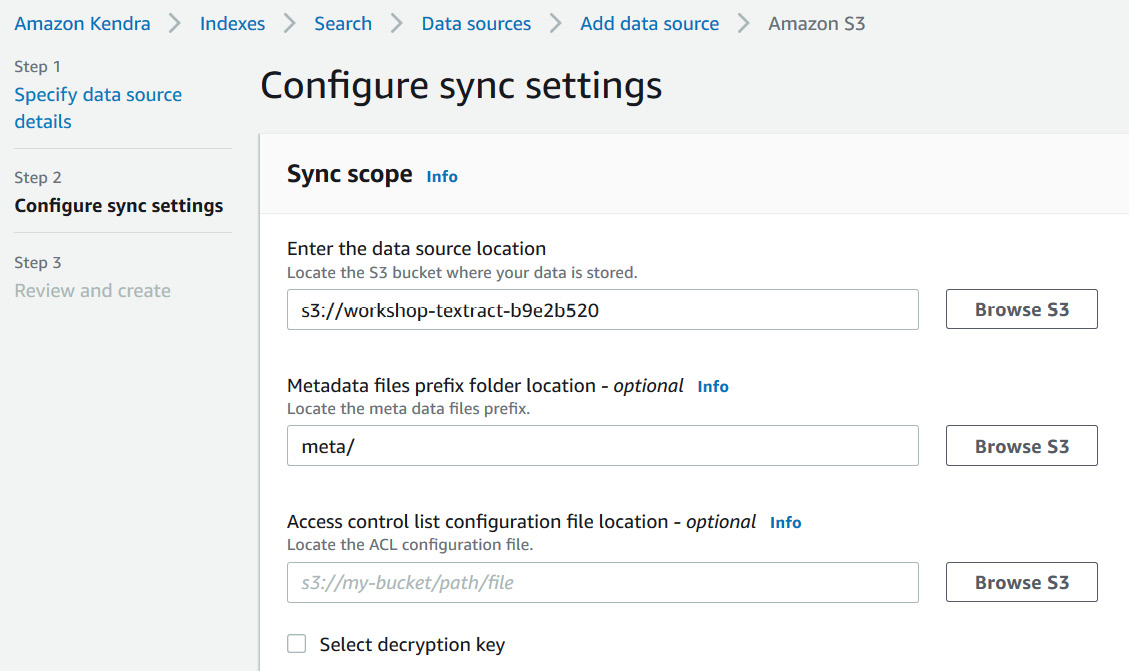
Figure 5.29 – Configuring Amazon Kendra sync
- Enter s3://<your bucket name> in the Enter the data source location field, and under Metadata files prefix folder location - optional, enter meta/ as shown in the previous screenshot.
- In the IAM role section, choose Create a new role and enter AmazonKendra-s3 in the Role name field.

Figure 5.30 – The run-on-demand schedule for Kendra
- Then set the frequency for the sync run schedule to be Run on demand and click Next.
- Click on Review + Create.
- After your data source has been created, click on Sync now.
Once the sync is successful, all your documents in Amazon S3 will be synced and the Kendra filters will be populated with the metadata attributes extracted by Amazon Comprehend.
In the next section, we will walk you through how you can navigate to the Amazon Kendra console to search.
Searching in Amazon Kendra
Amazon Kendra comes with a built-in search UI that can be used for testing the search functionality.
You can also deploy this UI in a React app after testing. The page at https://docs.aws.amazon.com/kendra/latest/dg/deploying.html has the deployment UI code available, which can be integrated with any serverless application using API Gateway and Lambda.
You can also use the Kendra.query() API to retrieve results from the index you created in Kendra.
In this section, we will walk you through using the built-in Kendra search console:
- Navigate to Amazon Kendra | Indexes | Search | Search console and you will find a Kendra-powered built-in search UI as shown in the following screenshot. Enter person with cloud skills in the search field:
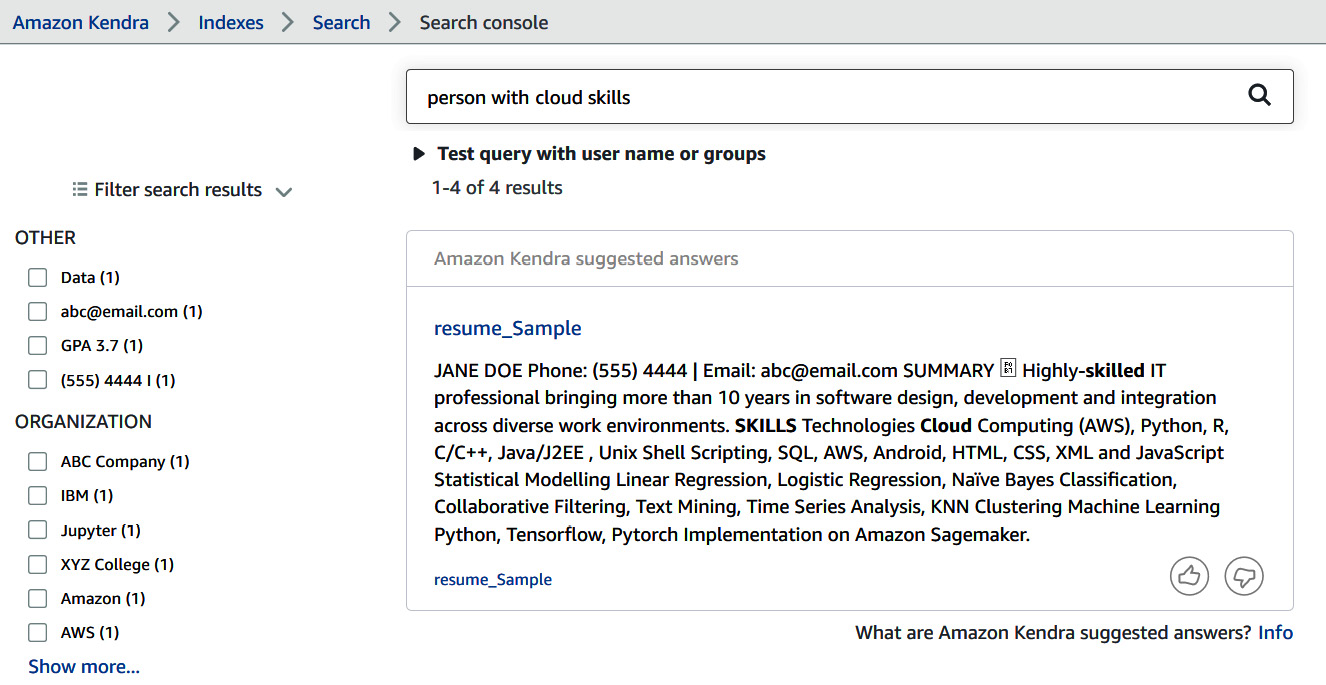
Figure 5.31 – Kendra query results
Amazon Kendra is able to give you a contextual answer containing Jane Doe, whose resume we indexed.
It also provides you with filters based on Comprehend entities on the left-hand side to quickly sort individuals based on entities such as ORGANIZATION, TITLE, DATE, and their word count frequencies.
You can also create Comprehend custom entities, as we covered in Chapter 4, Automated Document Processing Workflows, to enrich your metadata filters based on your business needs.
- Next, type the person with 10 years of experience query into the Kendra Search console.

Figure 5.32 – Kendra query results with filters on the left from Comprehend's metadata enrichment
Amazon Kendra is able to provide you with the exact contextual answer. You can also boost the response in Kendra based on relevance and provide feedback using the thumbs-up and thumbs-down buttons to improve your Kendra model.
Note:
Amazon Kendra supports the use of PDF, Word, JSON, TXT, PPT, and HTML documents for the search functionality. Feel free to add more documents through this pipeline for better search results and accuracy.
Summary
In this chapter, we covered two options to set up an intelligent search solution for your document-processing workflow. The first option involved setting up an NLP-based search quickly using Amazon Textract, Amazon Comprehend, and Amazon Elasticsearch using a Lambda function in a CloudFormation template for your scanned resume analysis, and can be used with anything scanned, such as images, invoices, or receipts. For the second option, we covered how you can set up an enterprise-level serverless scalable search solution with Amazon Kendra for your PDF documents. We also walked you through how you can enrich the Amazon Kendra search with additional attributes or metadata generated from Amazon Comprehend named entities.
In the next chapter, we will talk about how you can use AI to improve customer service in your contact center.
Further reading
- Building an NLP-powered search index with Amazon Textract and Amazon Comprehend by Mona Mona and Saurabh Shrivastava (https://aws.amazon.com/blogs/machine-learning/building-an-nlp-powered-search-index-with-amazon-textract-and-amazon-comprehend/)
- Build an intelligent search solution with automated content enrichment by Abhinav Jawadekar and Udi Hershkovich (https://aws.amazon.com/blogs/machine-learning/build-an-intelligent-search-solution-with-automated-content-enrichment/)