
Writing tests is a task that you could do by yourself; you just need to write code that throws exceptions when conditions are not met and then run the script any time you need. Luckily, other developers were not satisfied with this manual process, so they implemented tools to help us automate this process and get good feedback. The most used in PHP is PHPUnit. PHPUnit is a framework that provides a set of tools to write tests in an easier manner, gives us the ability to run tests automatically, and delivers useful feedback to the developer.
In order to use PHPUnit, traditionally, we installed it on our laptop. In doing so, we added the classes of the framework to include the path of PHP and also the executable to run the tests. This was less than ideal as we forced developers to install one more tool on their development machine. Nowadays, Composer (refer to Chapter 6, Adapting to MVC, in order to refresh your memory) helps us in including PHPUnit as a dependency of the project. This means that running Composer, which you will do for sure in order to get the rest of the dependencies, will get PHPUnit too. Add, then, the following into composer.json:
{
//...
    "require": {
        "monolog/monolog": "^1.17",
        "twig/twig": "^1.23"
    },
    "require-dev": {
        "phpunit/phpunit": "5.1.3"
    },
    "autoload": {
        "psr-4": {
            "Bookstore\": "src"
        }
    }
}
Note that this dependency is added as require-dev. This means that the dependency will be downloaded only when we are on a development environment, but it will not be part of the application that we will deploy on production as we do not need to run tests there. To get the dependency, as always, run composer update.
A different approach is to install PHPUnit globally so that all the projects on your development environment can use it instead of installing it locally each time. You can read about how to install tools globally with Composer at https://akrabat.com/global-installation-of-php-tools-with-composer/.
PHPUnit needs a phpunit.xml file in order to define the way we want to run the tests. This file defines a set of rules like where the tests are, what code are the tests testing, and so on. Add the following file in your root directory:
<?xml version="1.0" encoding="UTF-8"?>

<phpunit backupGlobals="false"
         backupStaticAttributes="false"
         colors="true"
         convertErrorsToExceptions="true"
         convertNoticesToExceptions="true"
         convertWarningsToExceptions="true"
         processIsolation="false"
         stopOnFailure="false"
         syntaxCheck="false"
         bootstrap="vendor/autoload.php"
>
<testsuites>
<testsuite name="Bookstore Test Suite">
<directory>./tests/</directory>
</testsuite>
</testsuites>
<filter>
<whitelist>
<directory>./src</directory>
</whitelist>
</filter>
</phpunit>
This file defines quite a lot of things. The most important are explained as follows:
- Setting
convertErrorsToExceptions,convertNoticesToExceptions, andconvertWarningsToExceptionstotruewill make your tests fail if there is a PHP error, warning, or notice. The goal is to make sure that your code does not contain minor errors on edge cases, which are always the source of potential problems. - The
stopOnFailuretells PHPUnit whether it should continue executing the rest of tests or not when there is a failed test. In this case, we want to run all of them to know how many tests are failing and why. - The
bootstrapdefines which file we should execute before starting to run the tests. The most common usage is to include the autoloader, but you could also include a file that initializes some dependencies, such as databases or configuration readers. - The
testsuitesdefines the directories where PHPUnit will look for tests. In our case, we defined./tests, but we could add more if we had them in different directories. - The
whitelistdefines the list of directories that contain the code that we are testing. This can be useful to generate output related to the code coverage.
When running the tests with PHPUnit, just make sure that you run the command from the same directory where the phpunit.xml file is. We will show you how in the next section.
Right, that's enough preparations and theory; let's write some code. We will write tests for the basic customer, which is a domain object with little logic. First of all, we need to refactor the Unique trait as it still contains some unnecessary code after integrating our application with MySQL. We are talking about the ability to assign the next available ID, which is now handled by the autoincremental field. Remove it, leaving the code as follows:
<?php

namespace BookstoreUtils;

trait Unique {
    protected $id;

    public function setId(int $id) {
        $this->id = $id;
    }

    public function getId(): int {
        return $this->id;
    }
}
The tests will be inside the tests/ directory. The structure of directories should be the same as in the src/ directory so that it is easier to identify where each test should be. The file and the class names need to end with Test so that PHPUnit knows that a file contains tests. Knowing this, our test should be in tests/Domain/Customer/BasicTest.php, as follows:
<?php

namespace BookstoreTestsDomainCustomer;

use BookstoreDomainCustomerBasic;
use PHPUnit_Framework_TestCase;

class BasicTest extends PHPUnit_Framework_TestCase {
    public function testAmountToBorrow() {
        $customer = new Basic(1, 'han', 'solo', '[email protected]');

        $this->assertSame(
            3,
            $customer->getAmountToBorrow(),
            'Basic customer should borrow up to 3 books.'
        );
    }
}
As you can note, the BasicTest class extends from PHPUnit_Framework_TestCase. All test classes have to extend from this class. This class comes with a set of methods that allow you to make assertions. An assertion in PHPUnit is just a check performed on a value. Assertions can be comparisons to other values, a verification of some attributes of the values, and so on. If an assertion is not true, the test will be marked as failed, outputting the proper error message to the developer. The example shows an assertion using the assertSame method, which will compare two values, expecting that both of them are exactly the same. The third argument is an error message that the assertion will show in case it fails.
Also, note that the function names that start with test are the ones executed with PHPUnit. In this example, we have one unique test named testAmountToBorrow that instantiates a basic customer and verifies that the amount of books that the customer can borrow is 3. In the next section, we will show you how to run this test and get feedback from it.
Optionally, you could use any function name if you add the @test annotation in the method's DocBlock, as follows:
/**
 * @test
 */
public function thisIsATestToo() {
  //...
}
In order to run the tests you wrote, you need to execute the script that Composer generated in vendor/bin. Remember always to run from the root directory of the project so that PHPUnit can find your phpunit.xml configuration file. Then, type ./vendor/bin/phpunit.
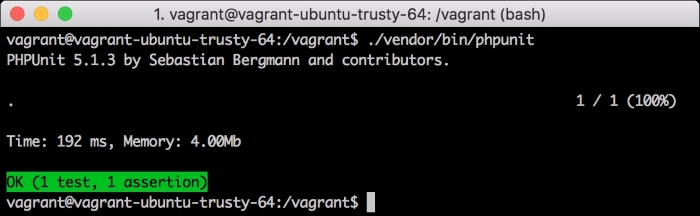
When executing this program, we will get the feedback given by the tests. The output shows us that there is one test (one method) and one assertion and whether these were satisfactory. This output is what you would like to see every time you run your tests, but you will get more failed tests than you would like. Let's take a look at them by adding the following test:
public function testFail() {
    $customer = new Basic(1, 'han', 'solo', '[email protected]');

    $this->assertSame(
        4,
        $customer->getAmountToBorrow(),
        'Basic customer should borrow up to 3 books.'
    );
}
This test will fail as we are checking whether getAmountToBorrow returns 4, but you know that it always returns 3. Let's run the tests and take a look at what kind of output we get.

We can quickly note that the output is not good due to the red color. It shows us that there is a failure, pointing to the class and test method that failed. The feedback points out the type of failure (as 3 is not identical to 4) and optionally, the error message we added when invoking the assert method.