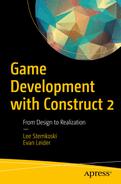
In this chapter, you will create a game called Racecar 500, a top-down racing game, as shown in Figure 7-1.

Figure 7-1. The Racecar 500 game
Introduction
In Racecar 500, the player controls a car, whose goal is to drive around a racetrack in the fastest time possible, while maneuvering around obstacles that may slow down or randomly change the direction of the player. The racetrack itself is larger than the game window, so only part of the track is visible at any time; the window remains centered on the car at all times.
The player controls the car using the arrow keys. Specifically, the up arrow key accelerates the car, the left and right arrow keys turn the car in its respective directions, and the down arrow key decelerates the car (and will eventually cause the car to travel in reverse if held down long enough). The user interface displays the total race time (in seconds), which begins once the car starts moving, and ends when the car crosses the finish line, displayed as a checkerboard pattern on the racetrack.
For this chapter, you should be familiar with sprites, text objects, and global variables. The Car behavior will be introduced as a basis for the movement described earlier. Since the game world (layout size) is larger than the window size, the Scroll to behavior will be introduced. To create a customized image for the track, the Tilemap object will also be introduced.
To begin, download the zip file containing the graphics for this chapter from the book web site. In the layout properties, set the layout Name to Game, and set Size to 2048, 1536. As you have in previous projects, set up three layers named Background, Main, and UI. In the project properties, change Window Size to 800, 600; the reason for these particular numbers will be explained in the next section.
Tilemaps and Level Design
To create a custom background image, you will use a tilemap. A tilemap is an arrangement of rectangular images, called tiles, that represent small areas of the game world. This is particularly useful for background images or level designs with lots of similar areas or repeated graphics. Tilemaps can be used for games with a top-down perspective or for side-scrolling platformer-style games, such as the classic Nintendo games The Legend of Zelda and Super Mario Bros. In your current project, the racetrack can be constructed from straight and curved segments of road and grassy areas; Figure 7-2 shows the set of tiles you will be using. Typically, all these images are packed into a single image file called a tileset, similar to how a spritesheet contains multiple images corresponding to animation frames for a sprite.

Figure 7-2. Tiles for creating a racetrack
These tiles can be arranged in many ways to create all types of road configurations , such as corners and loops, as illustrated in Figure 7-3, where spacing has been added to make the individual tiles more distinguishable.

Figure 7-3. A basic racetrack loop created with the tiles from Figure 7-2
To begin working with tilemaps in Construct, make sure that the active layer is set to Background, and in the layout, right-click and add a new Tilemap object. A crosshair cursor will appear (similar to when you add sprites); click anywhere in the layout (where you click is irrelevant, as the tilemap will be automatically sized and positioned to cover the entire layout). When the image editor window appears, open the image road-tileset.png, and close the image editor window. A new panel will be added to the Construct window, called the Tilemap panel , as shown in Figure 7-4. Depending on your window setup, it may appear as a tab in a preexisting panel (typically alongside the Objects panel). If you are unable to see it, in the View tab area, make sure that the Tilemap Bar check box is selected. You may want to adjust the panel borders so that there is more room available to see the tileset image, or you may use the scrollbars in the Tilemap panel to view the different areas in the image.

Figure 7-4. The Tilemap panel
Before working with the tilemap, there are a few properties to be changed in the Properties panel. By default, the tiles in a tileset are assumed to be 32 pixels by 32 pixels. In this project, however, the tiles are significantly larger (128 pixels by 128 pixels) to accommodate the car sprite that will be added later. With the tilemap object selected, in the Properties panel, change Tile width to 128 and change Tile height to 128. This particular tile size also influences the choice of layout size (2048 by 1536). Since a tilemap adjusts its size to match the size of the layout, it is important that the layout width and height be multiples of the tile width and height; otherwise, there will be an area on the bottom or right borders of the tilemap where tiles cannot be placed because there is not enough space. The layout size in this project was chosen to fit exactly 16 tiles along the width and 12 tiles along the height of the tilemap.
To create your tilemap, click the pencil tool icon in the Tilemap panel, which enables you to draw tiles onto the tilemap. Next, click a tile in the panel; your selection will be indicated by a light blue rectangle being drawn over the tile. Hover the mouse over the tilemap in the layout area, and a translucent image of the tile will be displayed in the square above which the mouse is hovering. Click to create a copy of the selected image there. To draw multiple copies of a tile quickly (such as the grass tile, which will be used for large sections of the background), click the rectangle tool icon and then click and drag the tilemap to specify a rectangular region, which will be filled with copies of the selected tile. To remove a tile from the tilemap, you can select the eraser tool icon or simply right-click when the pencil tool is active. Experiment with the placement of tiles and design your own racetrack; make it as simple or as complex as you like. One possible racetrack is shown in Figure 7-5, but yours need not look exactly like this.

Figure 7-5. A possible racetrack design using the provided tileset
Finally, you want the grassy areas of each tile to act as solid objects or barriers to stop the car from driving off the paved sections of the racetrack. To this end, add the Solid behavior to the tilemap object. However, the collision polygon (first discussed in Chapter 2) of each tile is set by default to be a square that completely covers the tile. Therefore, you need to adjust the collision polygons for individual tiles so that the polygon covers only the grassy area in each tile. To begin, in the Tilemap panel, double-click a tile (or single-click a tile and select the polygon tool icon) to open the collision polygon window. The vertices of the polygon will appear as red squares, connected by blue edges. The adjustments to be made are as follows:
For the solid grass tiles, no adjustments need to be made.
For the four straight road tiles (half grass and half road), two vertices can be moved so that the rectangle covers only the grass area.
For the four tiles containing a small quarter-circle of grass, the existing vertices can be rearranged to form a diamond shape that covers the grass fairly well and will be sufficiently accurate during gameplay.
For the four tiles containing a large arc of grass, two new vertices will need to be added (twice you will need to right-click any vertex and select Add point; each newly created vertex will be added at the midpoint of the adjacent edge in the clockwise direction). The six vertices can then be rearranged to cover the grass area.
Figure 7-6 shows sample vertex arrangements for the collision polygons.

Figure 7-6. Recommended collision polygons for different tile types
While working with the tileset, you may have noticed that there is no tile containing only pavement and no grass. This is because such a tile should have no solid areas, but it is impossible to remove or disable collisions for individual tiles. Even attempting to shrink a collision polygon to a single point will still result in collisions at that point, which may surprise, confuse, or possibly frustrate a player who is not expecting it. If you decide that your track design absolutely requires collision-free tiles, one workaround is to not place a tile at that position and, in the layout, create a sprite with the image road.jpg and position it so that it exactly covers the missing tile area.
Now that you are done working with the tilemap, select the cursor tool icon from the Tilemap panel. This tool lets you reposition the tilemap, although you won’t do so here. We recommend making this tool active to avoid accidentally drawing or erasing tiles from the tilemap. To further avoid accidentally selecting or altering the finished tilemap, in the layer panel click the lock icon next to the Background layer. This freezes all objects in that layer; they cannot be selected on the layout again unless the lock icon is clicked again and returned to the unlocked image.
Car Mechanics
In this section, you will set up the Car sprite and configure how it is controlled by the player. Make sure that the active layer is set to Main, and add a new Sprite object named Car with the image car-red.png. Position the car on a paved area of the track where you would like the race to begin. Add the behavior Car; this adds carlike steering controls to this sprite, as described at the beginning of this chapter. There are many properties that can be changed, such as Max speed (which controls how fast the car can move) and Steer speed (which controls how quickly the car can turn, in degrees per second). Also, add the behavior Scroll to to the car; this keeps the window centered on the car as it moves around the game world. Save and test your game, and feel free to experiment with the values of the Car behavior properties .
Just as is the case with driving a real car, the Car behavior permits the sprite to be turned only while it is moving; while it is not moving, the left and right arrow keys will have no effect. This may be unexpected or difficult for some players. If you want the car to always be able to turn, add a Keyboard object to the project, and implement the following (optional) events. Create an event with the condition Keyboard - Key is Down, select the Left arrow key, add the action Car - Angle: Rotate counter-clockwise, and enter 0.5 degrees. Create a similar event with the condition that the right arrow key is down and the action rotates the car angle clockwise by 0.5 degrees. The events will appear as in Figure 7-7. If you do decide to add these events, then the steering becomes very sensitive; you may want to reduce the Car behavior property Steer speed to 150 to compensate for this .

Figure 7-7. Events for additional car rotation control
Race Timer
In this section, you will set up a timer that displays how long the player has been racing. This requires some new ideas to not scroll the user interface layer, to start and stop the timer at the appropriate times, and to prevent the player from simply driving backward to trigger the race end condition early.
First, add a new Text object named TextTimer to the project. Place it on the UI layer, and position it in the upper-left corner of the layout. As the car moves around the layout, different parts of the game world become visible; however, the contents of the UI layer should stay fixed in place. To configure this setting, click the UI layer in the layer panel, and set the layer property Parallax to 0,0. This indicates that the corresponding layer should not scroll at all. Select the TextTimer object again, and change the default text to Time: 0.00. To make the text easier to read, change the font to Arial, bold, size 24. The black font color shows up well on the grass, but it would be hard to read when it appears above the dark-colored pavement. You could try to find a single color that contrasts well with all possible backgrounds, but it is far more effective to use the drop shadow effect discussed in the previous chapter. Create another TextTimer instance, move it a few pixels up and to the left, and then change the font color to white. At this point, the instances should appear as shown in Figure 7-8.

Figure 7-8. Text object to display race time with drop shadow effect applied
Next, you will add a finish line, which signals the end of the race when the car reaches it. Change the active layer to Main (this will be the active layer for the rest of the chapter). Add a new sprite named FinishLine with the image file checkboard.png. Position this at the “end” of the race track; if the track is a loop, this is typically behind where the car starts. The finish line fits best on a straight, horizontal part of track. Resize it if desired. Change the opacity to 60, and the transparency will make it appear as though it is painted onto the track. Also, since the FinishLine sprite was added to the Main layer after the Car sprite, FinishLine will be drawn on top of the car; to remedy this, right-click the car and select Z-Order - Send to top of layer.
With the finish line in place, you are ready to add the events to keep track of and display the elapsed time. In the event sheet, add a global variable named RaceTime with an initial value of 0; this will keep track of how much time has elapsed since the car first moved. However, this variable should be incremented only during the race and not before or after the race. To keep track of which of these three states the game is currently in (before race, during race, and after race), create another global variable named RaceState with an initial value of 0. The value 0 will indicate the race has not yet started, the value 1 will indicate the race is in progress (and the RaceTime variable should be incremented and the text display updated), and the value 2 indicates the race has finished. Add the Keyboard object if you have not done so already. Then you will create the following events:
An event is needed to detect the start of the race. Create a new event with the condition Keyboard - On key pressed, and select the Up arrow key. Add the condition System - Compare variable, checking whether RaceState equals 0. The event action to add is System - Variable: Set value; set RaceState equal to 1.
An event is needed to update the timer and text display when the race is in progress. Create a new event with the condition System - Compare variable, and check whether RaceState equals 1. There are two actions for this event. The first action to add is System - Variable: Add to. Add to the variable RaceTime the value dt (which stores the amount of time that has passed since the last update/last tick). The second action to add is TextTimer - Text: Set text. Set it to "Time: " & round(RaceTime * 100) / 100. This mathematical expression is used to round the value of RaceTime to two decimal places.
An event is needed to detect the end of the race. Create a new event with the condition Car - On collision with, and select FinishLine. The corresponding action is System - Variable: Set value. Set RaceState equal to 2 .
When completed, the events should appear as in Figure 7-9.

Figure 7-9. Events for determining the state of the race
Finally, you may have noticed that there is an easy way to “cheat” this game and trigger the end of the race earlier than expected. Instead of going around the track as intended, you can move forward a little bit and then move in reverse directly over the finish line, thus ending the race. To stop players from doing this, you will set up a “one-way gate” mechanic using an extra sprite and two additional events. Create a new sprite named Gate with the image gate.png (although it is the size of the sprite and not the image used that will be important, as you will soon see). Position the Gate sprite directly adjacent to the FinishLine sprite on the side closest to the car, as shown in Figure 7-10, and set the Initial Visibility property to Invisible. When making precise adjustments in the layout, it may help to zoom in or zoom out, either via the controls on the View tab or by holding down the Ctrl key and scrolling the mouse wheel.

Figure 7-10. The finish line, gate, and car positions on the race track
Add the Solid behavior to the Gate sprite. The idea is to “open the gate” (disable the Solid behavior) when the car is on (overlaps) the finish line. To accomplish this, create a new event with the condition Car - Is overlapping another object, and select FinishLine. The action is Gate - Solid: Set Enabled; choose Disabled. Finally, “closing the gate” (enable the Solid behavior) once the car moves past requires one additional event. Create an event with two conditions: for Car - Is overlapping another object, select FinishLine, and invert the condition. For Car - Is overlapping another object, select Gate, and invert this condition. Add the action Gate - Solid: Set Enabled, and choose Enabled. When finished, these events should appear as in Figure 7-11. Save and test your project, and make sure that you can pass the finish line in only one direction, as intended.

Figure 7-11. Events for a one-way gate mechanic
At this point, you have implemented all the basic mechanics for a racing game. Congratulations!
Side Quests
As usual, after completing the core mechanics for a game, many optional features remain to be added.
Scenery
Although the player’s attention will be mostly focused on the road, it would be nice to add some scenery to the grassy areas. Included in the graphics collection for this chapter are some basic images (bushes and trees) that you could use to create sprites for this purpose; for variety, you could create additional instances of these objects and resize them. Alternatively, you could search the Internet for related graphics (more plants, rocks, ponds, etc.) and use them as desired (but for commercial or professional projects, you would need to pay attention to the licenses of the files used).
For a neat cloud/foglike environmental effect, create a sprite named Cloud with the included image cloud.png. Add the Bullet and Wrap behaviors, change Opacity to 80 and Bullet Speed to 50, create a few duplicates spaced out across the layout, and make small changes in each instance’s Angle and Size properties for variety. When you start the game, it will appear as though there are clouds or fog drifting over the track.
Figure 7-12 illustrates what a track could look like after these scenic elements have been added.

Figure 7-12. Racetrack layout with scenery elements added
Obstacles
To break up the monotony of driving on an empty road, you can add a variety of obstacles. In this section, you will add wooden crates, which reduce your speed (and shatter) when hit, and oil slicks, which randomly change your direction while you are driving over them.
First, add a new sprite named Crate with the image crate.png. Resize the crate so it takes up less than half the width of the road (ideally it should be possible to drive around it). Also, add a sprite named CrateFragments with the image crate-fragments.png; resize it similarly, add the Fade behavior, change the fade property Wait time to 1, and move it into the layout margins. Add an event with the condition Car - On collision with another object, and select Crate. Add the following four actions to this event:
Add Car - Car: Set speed, and enter Self.Car.Speed / 2 (this reduces the car’s speed by half on impact).
Add Crate - Spawn another object, select CrateFragments, and enter layer "Main".
Add Crate - Destroy.
Add CrateFragments - Z-Order: Move to bottom (so that the car appears on top of the fragments).
The completed events for the Crate obstacle appear in the top part of Figure 7-13.

Figure 7-13. Complete events for the Crate and OilSlick obstacles
Finally, add a new sprite named OilSlick with the image oil-slick.png and resize it as you did the crate. Also, since the OilSlick and Crate sprites were added to the Main layer after the Car sprite, right-click these objects in the Objects panel and select Z-Order - Send to bottom of layer. Create an event with two conditions; add Car - Is overlapping another object, and select OilSlick. Then add System - Compare two values, checking whether random(0,100) is less than 50. The associated action is Car - Car: Simulate Control; select Steer left. Create another event identical to this one, but change the simulated control to Steer right. When the car drives over an oil slick, these two events will randomly steer the car to the left and right. Sometimes both the random conditions will be true and the motions will cancel each other out, but just as often the car will randomly veer to one side or the other. The completed events for the OilSlick obstacle appear in the bottom part of Figure 7-13.
On Your Own
There are many more features you could add on your own. You could add more complicated obstacles, such as obstacles that move (via the Sine behavior). Alternatively, in contrast to the obstacles discussed earlier, you could consider adding items (or powerups) that have a positive effect on the player, such as a Boost item that instantly sets the Car’s speed to its Max Speed value or a SpeedUp item that permanently increases Max Speed that the car can attain. You could add a variable that serves as a lap counter and end the game only once three (or some fixed number) of laps have been completed. You could display a “Congratulations!” message on the screen once the game is over, or you could display one of a number of messages (such as “Good,” “Great,” or “Excellent”) depending on the total time to complete the race (you will no doubt have to practice repeatedly to determine what qualifies each level of performance). You could add multiple tracks on different layouts, progressing from one to the next after each race is finished. Finally, don’t forget about basics such as audio and menus, as these features give your game a polished, professional presentation.
Summary
In this chapter, you created a top-down racing game. You learned how to use the Tilemap object and the Car and Scroll to behaviors. You learned how to set parallax to fix the UI layer in place when the game world size is larger than the window size. Along the way, you learned tricks and techniques that may be useful in future projects, such as keeping track of gameplay time, using variables to track the current state of the game, rounding a value to a fixed number of decimal places, and creating a one-way gate mechanic. The “Side Quests” section discussed extra features such as scenery, obstacles, and powerups.
In the next chapter, you’ll switch gears from racing games to a classic arcade-style brick-breaking game.