
Chapter 2. WebSocket API
This chapter exposes the details behind using the WebSocket application programming interface (API). WebSocket is an event-driven, full-duplex asynchronous communications channel for your web applications. It has the ability to give you real-time updates that in the past you would use long polling or other hacks to achieve. The primary benefit is reducing resource needs on both the client and (more important) the server.
While WebSocket uses HTTP as the initial transport mechanism, the communication doesn’t end after a response is received by the client. Using the WebSocket API, you can be freed from the constraints of the typical HTTP request/response cycle. This also means that as long as the connection stays open, the client and server can freely send messages asynchronously without polling for anything new.
Throughout this chapter you’ll build a simple stock-ticker client using WebSocket as data transport and learn about its simple API in the process. You’re going to create a new project folder, ch2, to store all of your code for this chapter. Your client code will be in a file named client.html, and your server code in a file named server.js.
Initializing
The constructor for WebSocket requires a URL in order to initiate a connection to the server. By default, if no port is specified after the host, it will connect via port 80 (the HTTP port) or port 443 (the HTTPS port).
If you’re running a traditional web server on port 80 already, you’ll have to use a server that understands and can proxy the WebSocket connection, or can pass the connection through to your custom-written application. Chapter 5 presents one popular option using nginx for passing through an upgraded connection to your Node.js-based server.
For now, because you’ll be running the WebSocket server locally, without a web server proxying the connection, you can simply initialize the browser’s native WebSocket object with the following code:
varws=newWebSocket("ws://localhost:8181");
You now have a WebSocket object called ws that you can use to listen for events. The section “WebSocket Events” details various events available to listen for. Table 2-1 lists the constructor parameters available with WebSocket.
| Parameter name | Description |
|---|---|
|
|
|
Parameter specifying subprotocols that may be used as an array or single string |
The second optional parameter in the WebSocket constructor is protocols, passed in headers as Sec-WebSocket-Protocol. This can be either a single protocol string or an array of protocol strings. These indicate subprotocols, so a single server can implement multiple WebSocket subprotocols. If nothing is passed, an empty string is assumed. If subprotocols are supplied and the server does not accept any of them, the connection will not be established. In Chapter 4 you’ll build a subprotocol for STOMP and learn how to use that over WebSocket.
If there is an attempt to initiate a WebSocket connection while using HTTPS at the origin website, but using the non-TLS protocol method of ws://, a SECURITY_ERR will be thrown. In addition, you’ll receive the same error if attempting to connect to a WebSocket server over a port to which the user agent blocks access (typically 80 and 443 are always allowed).
Following is a list of protocol types available to use with WebSocket:
- Registered protocols
-
In the spec for WebSocket RFC 6455, section 11.5 defines the Subprotocol Name Registry for IANA-maintained registrations.
- Open protocols
-
In addition, you can use open protocols that are unregistered, such as Extensible Messaging and Presence Protocol (XMPP) or Simple Text Oriented Message Protocol (STOMP), and various others.
- Custom protocols
-
You are free to design any protocol you like, as long as your server and client both support it. It is recommended that you use names that contain the ASCII version of the domain name of the subprotocol’s originator; for example, chat.acme.com.
Stock Example UI
The example you’ll build relies on static data to make life easier. Your server will have a list of stock symbols with predefined values and randomize the price changes across a spectrum of small positive/negative values.
To show a cleaner-looking UI and ease the CSS modification process, you’ll use Twitter’s Bootstrap and jQuery. Copy and paste the contents of the following code snippet into your client.html file:
<!DOCTYPE html><htmllang="en"><head><title>Stock Chart over WebSocket</title><metacharset="utf-8"><metahttp-equiv="X-UA-Compatible"content="IE=edge"><metaname="viewport"content="width=device-width, initial-scale=1"><linkrel="stylesheet"href="http://bit.ly/cdn-bootstrap-css"><linkrel="stylesheet"href="http://bit.ly/cdn-bootstrap-theme"><scriptsrc="http://bit.ly/cdn-bootstrap-jq"></script><scriptlanguage="text/javascript">// code from chapter goes here</script></head><bodylang="en"><divclass="vertical-center"><divclass="container"><h1>Stock Chart over WebSocket</h1><tableclass="table"id="stockTable"><thead><tr><th>Symbol</th><th>Price</th></tr></thead><tbodyid="stockRows"><tr><td><h3>AAPL</h3></td><tdid="AAPL"><h3><spanclass="label label-default">95.00</span></h3></td></tr><tr><td><h3>MSFT</h3></td><tdid="MSFT"><h3><spanclass="label label-default">50.00</span></h3></td></tr><tr><td><h3>AMZN</h3></td><tdid="AMZN"><h3><spanclass="label label-default">300.00</span></h3></td></tr><tr><td><h3>GOOG</h3></td><tdid="GOOG"><h3><spanclass="label label-default">550.00</span></h3></td></tr><tr><td><h3>YHOO</h3></td><tdid="YHOO"><h3><spanclass="label label-default">35.00</span></h3></td></tr></tbody></table></div></div><scriptsrc="http://bit.ly/maxcdn-bootstrap-js"></script></body></html>
WebSocket Events
The API for WebSocket is based around events. This section covers the four events that your stock-ticker code can listen for. I’ll give descriptions of each, describe how to handle situations you’ll see in the field, and build the example using what you learn. For the example, you need to define a few bits of sample data to pass to the server:
varstock_request={"stocks":["AAPL","MSFT","AMZN","GOOG","YHOO"]};varstocks={"AAPL":0,"MSFT":0,"AMZN":0,"GOOG":0,"YHOO":0};
Figure 2-1 shows what your stock application looks like after you hook up the server and client.
The first structure, stock_request, is passed after the successful connection between client and server and asks that the server keep telling you about the updated pricing on these specific stocks. The second structure, stocks, is a simple associative array that will hold the changing values passed back from the server and then used to modify the text in the table and colors.
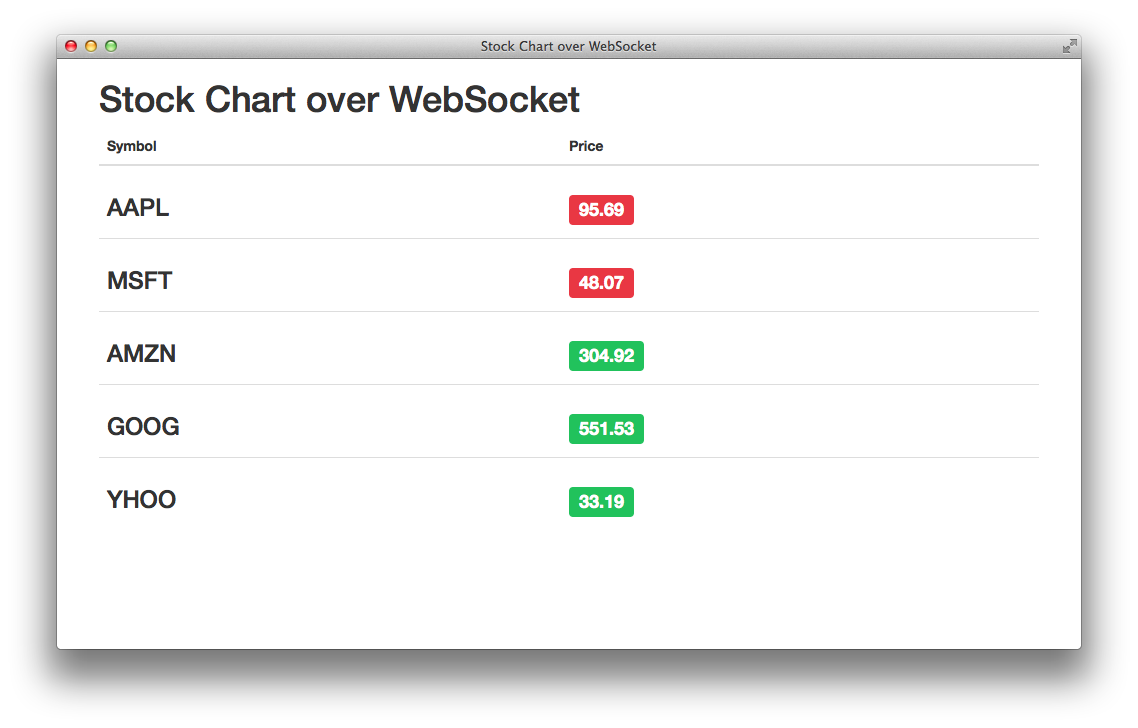
Figure 2-1. Stock chart over WebSocket
WebSocket fires four events, which are available from the JavaScript API and defined by the W3C:
-
open -
message -
error -
close
With JavaScript, you listen for these events to fire either with the handler on<event name>, or the addEventListener() method. Your code will provide a callback that will execute every time that event gets fired.
Event: Open
When the WebSocket server responds to the connection request, and the handshake is complete, the open event fires and the connection is established. Once this happens, the server has completed the handshake and is ready to send and receive messages from your client application:
// WebSocket connection establishedws.onopen=function(e){console.log("Connection established");ws.send(JSON.stringify(stock_request));};
From within this handler you can send messages to the server and output the status to the screen, and the connection is ready and available for bidirectional communication. The initial message being sent to the server over WebSocket is the stock_request structure as a JSON string. Your server now knows what stocks you want to get updates on and will send them back to the client in one-second intervals.
Event: Message
After you’ve established a connection to the WebSocket server, it will be available to send messages to (you’ll look at that in “WebSocket Methods”), and receive messages. The WebSocket API will prepare complete messages to be processed in the onmessage handler.
Chapter 8 covers the WebSocket protocol in more detail, including information about frames and the data flow back and forth between the server and client. For now, the only thing to remember is that when the server has data, the WebSocket API will call the onmessage handler:
// UI update functionvarchangeStockEntry=function(symbol,originalValue,newValue){varvalElem=$('#'+symbol+' span');valElem.html(newValue.toFixed(2));if(newValue<originalValue){valElem.addClass('label-danger');valElem.removeClass('label-success');}elseif(newValue>originalValue){valElem.addClass('label-success');valElem.removeClass('label-danger');}}// WebSocket message handlerws.onmessage=function(e){varstocksData=JSON.parse(e.data);for(varsymbolinstocksData){if(stocksData.hasOwnProperty(symbol)){changeStockEntry(symbol,stocks[symbol],stocksData[symbol]);stocks[symbol]=stocksData[symbol];}}};
You can see from this short snippet that the handler is receiving a message from the server via an onmessage callback. When querying for data, the data attribute will contain updated stock values. The preceding code snippet does the following:
-
Parses the JSON response within
e.data -
Iterates over the associative array
-
Ensures that the key exists in the array
-
Calls your UI update fragment
-
Assigns the new stock values to your local array
You’re passing around regular strings here, but WebSocket has full support for sending text and binary data.
Event: Error
When a failure happens for any reason at all, the handler you’ve attached to the error event gets fired. When an error occurs, it can be assumed that the WebSocket connection will close and a close event will fire. Because the close event happens shortly after an error in some instances, the code and reason attributes can give you some indication as to what happened. Here’s a sample of how to handle the error case, and possibly reconnect to the WebSocket server as well:
ws.onerror=function(e){console.log("WebSocket failure, error",e);handleErrors(e);};
Event: Close
The close event fires when the WebSocket connection closes, and the callback onerror will be executed. You can manually trigger calling the onclose event by executing the close() method on a WebSocket object, which will terminate the connection with the server. Once the connection is closed, communication between client and server will not continue. The following example zeros out the stocks array upon a close event being fired to show cleaning up resources:
ws.onclose=function(e){console.log(e.reason+" "+e.code);for(varsymbolinstocks){if(stocks.hasOwnProperty(symbol)){stocks[symbol]=0;}}}ws.close(1000,'WebSocket connection closed')
As mentioned briefly in “Event: Error”, two attributes, code and reason, are conveyed by the server and could indicate an error condition to be handled and/or a reason for the close event (other than normal expectation). Either side may terminate the connection via the close() method on the WebSocket object, as shown in the preceding code. Your code can also use the boolean attribute wasClean to find out if the termination was clean, or to see the result of an error state.
The readyState value will move from closing (2) to closed (3). Now let’s move on to the methods available to your WebSocket object.
WebSocket Methods
The creators of WebSocket kept its methods pretty simple—there are only two: send() and close().
Method: Send
When your connection has been established, you’re ready to start sending (and receiving) messages to/from the WebSocket server. The client application can specify what type of data is being passed in and will accept several, including string and binary values. As shown earlier, the client code is sending a JSON string of listed stocks:
ws.send(JSON.stringify(stock_request));
Of course, performing this send just anywhere won’t be appropriate. As we’ve discussed, WebSocket is event-driven, so you need to ensure that the connection is open and ready to receive messages. You can achieve this in two main ways.
You can perform your send from within the onopen event:
varws=newWebSocket("ws://localhost:8181");ws.onopen=function(e){ws.send(JSON.stringify(stock_request));}
Or you can check the readyState attribute to ensure that the WebSocket object is ready to receive messages:
functionprocessEvent(e){if(ws.readyState===WebSocket.OPEN){// Socket open, send!ws.send(e);}else{// Show an error, queue it for sending later, etc}}
Method: Close
You close the WebSocket connection or terminate an attempt at connection is done via the close() method. After this method is called, no more data can be sent or received from this connection. And calling it multiple times has no effect.
Here’s an example of calling the close() method without arguments:
// Close WebSocket connectionws.close();
Optionally, you can pass a numeric code and a human-readable reason through the close() method. This gives some indication to the server as to why the connection was closed on the client end. The following code shows how to pass those values. Note that if you don’t pass a code, the status 1000 is assumed, which means CLOSE_NORMAL:
// Close the WebSocket connection with reason.ws.close(1000,"Goodbye, World!");
Table 2-2 lists the status codes you can use in the WebSocket close() method.
| Status code | Name | Description |
|---|---|---|
0–999 |
Reserved and not used. |
|
1000 |
|
Normal closure; the connection successfully completed. |
1001 |
|
The endpoint is going away, either because of a server failure or because the browser is navigating away from the page that opened the connection. |
1002 |
|
The endpoint is terminating the connection due to a protocol error. |
1003 |
|
The connection is being terminated because the endpoint received data of a type it cannot accept. |
1004 |
|
The endpoint is terminating the connection because a data frame was received that is too large. |
1005 |
|
Reserved. Indicates that no status code was provided even though one was expected. |
1006 |
|
Reserved. Used to indicate that a connection was closed abnormally. |
1007–1999 |
Reserved for future use by the WebSocket standard. |
|
2000–2999 |
Reserved for use by WebSocket extensions. |
|
3000–3999 |
Available for use by libraries and frameworks. May not be used by applications. |
|
4000–4999 |
Available for use by applications. |
WebSocket Attributes
When the event for open is fired, the WebSocket object can have several possible attributes that can be read in your client applications. This section presents the attributes and the best practices for using them in your client code.
Attribute: readyState
The state of the WebSocket connection can be checked via the read-only WebSocket object attribute readyState. The value of readyState will change, and it is a good idea to check it before committing to send any data to the server.
Table 2-3 shows the values you will see reflected in the readyState attribute.
| Attribute name | Attribute value | Description |
|---|---|---|
|
|
The connection is not yet open. |
|
|
The connection is open and ready to communicate. |
|
|
The connection is in the process of closing. |
|
|
The connection is closed or couldn’t be opened. |
Each of these values can be checked at different points for debugging, and for understanding the lifecycle of your connection to the server.
Attribute: bufferedAmount
Also included with the attributes is the amount of data buffered for sending to the server. While this is mostly used when sending binary data, because the data size tends to be much larger the browser will take care of properly queueing the data for send. Because you’re dealing only with the client code at this point (the next chapter deals with the protocol), much of the behind-the-scenes is hidden from your view. Use of the bufferedAmount attribute can be useful for ensuring that all data is sent before closing a connection, or performing your own throttling on the client side.
Attribute: protocol
Reflecting back to the constructor for WebSocket, the optional protocol argument allows you to send one or many subprotocols that the client is asking for. The server decides which protocol it chooses, and this is reflected in this attribute for the WebSocket connection. The handshake when completed should contain a selection from one that was sent by the client, or empty if none were chosen or offered.
Stock Example Server
Now that you have a working client that will connect to a WebSocket server to retrieve stock quotes, it’s time to show what the server looks like:
varWebSocketServer=require('ws').Server,wss=newWebSocketServer({port:8181});varstocks={"AAPL":95.0,"MSFT":50.0,"AMZN":300.0,"GOOG":550.0,"YHOO":35.0}functionrandomInterval(min,max){returnMath.floor(Math.random()*(max-min+1)+min);}varstockUpdater;varrandomStockUpdater=function(){for(varsymbolinstocks){if(stocks.hasOwnProperty(symbol)){varrandomizedChange=randomInterval(-150,150);varfloatChange=randomizedChange/100;stocks[symbol]+=floatChange;}}varrandomMSTime=randomInterval(500,2500);stockUpdater=setTimeout(function(){randomStockUpdater();},randomMSTime)}randomStockUpdater();wss.on('connection',function(ws){varclientStockUpdater;varsendStockUpdates=function(ws){if(ws.readyState==1){varstocksObj={};for(vari=0;i<clientStocks.length;i++){symbol=clientStocks[i];stocksObj[symbol]=stocks[symbol];}ws.send(JSON.stringify(stocksObj));}}clientStockUpdater=setInterval(function(){sendStockUpdates(ws);},1000);varclientStocks=[];ws.on('message',function(message){varstock_request=JSON.parse(message);clientStocks=stock_request['stocks'];sendStockUpdates(ws);});ws.on('close',function(){if(typeofclientStockUpdater!=='undefined'){clearInterval(clientStockUpdater);}});});
After execution, the server code runs a function for a variable amount of time (between 0.5s and 2.5s) and updates the stock prices. It does this to appear as random as possible in a book example without requiring code to go out and retrieve real stock prices (see Chapter 4 for that). Your frontend is expecting to receive a static list of five stocks retrieved from the server. Simple. After receiving the connection event from the client, the server sets up a function to run every second and sends back the list of five stocks with randomized prices once a second. The server can accept requests for different stocks as long as those stock symbols and a starting price are added to the stocks JavaScript object defined in the server.
Testing for WebSocket Support
If you’ve coded anything for the Web over the years, it should come as no surprise that browsers do not always have support for the latest technology. Because some older browsers don’t support the WebSocket API, it is important to check for compatibility before using it. Chapter 5 presents alternatives if the client browsers used by your community of users don’t support the WebSocket API. For now, here is a quick way to check whether the API is supported on the client:
if(window.WebSocket){console.log("WebSocket: supported");// ... code here for doing WebSocket stuff}else{console.log("WebSocket: unsupported");// ... fallback mode, or error back to user}
Summary
This chapter went over essential details of the WebSocket API and how to use each of them within your client application. It discussed the API’s events, messages, attributes, and methods, and showed some sample code along the way.
In Chapter 3, you’ll write a bidirectional chat application, learning how to pass messages back and forth with multiple connected clients.