
Chapter 5
Leveraging a Deep Learning Framework
IN THIS CHAPTER
![]() Understanding frameworks
Understanding frameworks
![]() Using a basic framework
Using a basic framework
![]() Working with TensorFlow
Working with TensorFlow
Using a deep learning framework can greatly reduce the time, cost, and complexity of developing a deep learning solution. Even though deep learning frameworks have many characteristics of frameworks in general, they also provide specific functionality. This chapter explores some aspects of that functionality.
Not everyone uses the same ideas and concepts for running deep learning applications. In addition, not every organization wants to invest in a complex deep learning framework when a less expensive and simpler framework will do. Consequently, you find a lot of deep learning frameworks that can provide you with basic functionality that you can use for experimentation and for simpler applications. This chapter explores some of these basic frameworks and compares them so that you have a better idea of what is available.
To provide the best possible learning environment, this book relies on the TensorFlow framework for the examples. The final sections of the chapter describe TensorFlow and tell you how to install it. TensorFlow works better for the situations presented in this book than the other solutions covered earlier in the chapter, and these final sections explain why. The discussion also tells you precisely why TensorFlow is a good general solution to many deep learning scenarios.
Understanding Deep Learning Framework Usage
Book 1, Chapter 3 offers a basic overview of frameworks in the “Presenting Frameworks” section. Some of the examples in this book, most notably those in minibooks 4 and 5, rely on TensorFlow to achieve their goal. If you want to move on to more advanced examples, you need a deep learning framework.
A framework is an abstraction that provides generic functionality, which your application code modifies to serve its own purposes. Unlike a library that runs within your application, when you’re using a framework, your application runs within it. You can’t modify basic framework functionality, which means that you have a stable environment in which to work, but most frameworks offer some level of extensibility. Frameworks are generally specific to a particular need, such as the web frameworks used to create online applications.
When thinking about a deep learning framework, what you’re really considering is how the framework manages the frozen spots and the hot spots used by the application. In most cases, a deep learning framework provides frozen spots and hot spots in these areas:
- Hardware access (such as using a GPU with ease)
- Standard neural network layer access
- Deep learning primitive access
- Computational graph management
- Model training
- Model deployment
- Model testing
- Graph building and presentation
- Inference (forward propagation)
- Automatic differentiation (backpropagation)
A good deep learning framework also exhibits specific characteristics that you may not find in other framework types. These characteristics help create an environment in which the deep learning framework enables you to create intelligent applications that learn and process data quickly. Here are some of the characteristics to consider when looking at a deep learning framework:
- Optimizes for performance rather than resource usage or some other consideration
- Performs tasks using parallel operations to reduce the time spent creating a model and associated neural network
- Computes gradients automatically
- Makes coding easy because many of the people using deep learning frameworks aren’t developers, but rather subject matter experts
- Interacts well with standard libraries used for plotting, machine learning, and statistics
Frameworks address other issues, such as providing good community support for specific problem domains, and the focus on specific issues determines the viability of a particular framework for a particular purpose. As with many forms of software development aid, you need to choose the framework you use carefully.
Working with Low-End Frameworks
Low-end deep learning frameworks often come with a built-in trade-off. You must choose between cost and usage complexity, as well as the need to support large applications in challenging environments. The trade-offs you’re willing to endure will generally reflect what you can use to complete your project. With this caveat in mind, the following sections discuss a number of low-end frameworks that are incredibly useful and work well with small to medium-size projects, but that come with trade-offs for you to consider as well.
Chainer
Chainer (https://chainer.org/) is a library written purely in Python that relies on the NumPy (http://www.numpy.org/) and CuPy (https://cupy.chainer.org/) libraries. Preferred Networks (https://www.preferred-networks.jp/en/) leads the development of this library, but IBM, Intel, Microsoft, and NVidia also play a role. The main point with this library is that helps you use the CUDA capabilities of your GPU by adding only a few lines of code. In other words, this library gives you a simple way to greatly enhance the speed of your code when working with huge datasets.
Many deep learning libraries today, such as Theano and TensorFlow (discussed later in this chapter), use a static deep learning approach called define and run, in which you define the math operations and then perform training based on those operations. Unlike Theano and TensorFlow, Chainer uses a define-by-run approach, which relies on a dynamic deep learning approach in which the code defines math operations as the training occurs. Here are the two main advantages to this approach:
- Intuitive and flexible approach: A define-by-run approach can rely on a language’s native capabilities rather than require you to create special operations to perform analysis.
- Debugging: Because the define-by-run approach defines the operations during training, you can rely on the internal debugging features to locate the source of errors in a dataset or the application code.
 TensorFlow 2.0 can also use define-by-run by relying on Chainer to provide eager execution.
PyTorch
PyTorch (https://pytorch.org/) is the successor to Torch (http://torch.ch/) written in the Lua (https://www.lua.org/) language. A core one of the Torch libraries (the PyTorch autograd library) started as a fork of Chainer, which is described in the previous section. Facebook initially developed PyTorch, but many other organizations use it today, including Twitter, Salesforce, and the University of Oxford. Here are the features that make PyTorch special:
- Extremely user friendly
- Efficient memory usage
- Relatively fast
- Commonly used for research
Some people like PyTorch because it’s easy to read like Keras, but the scientist doesn’t lose the ability to use complicated neural networks. In addition, PyTorch supports dynamic computational model graphing directly (see the “Grasping why TensorFlow is so good” section, later in the chapter, for more details on this issue), which makes it more flexible than TensorFlow without the addition of TensorFlow Fold.
MXNet
The biggest reason to use MXNet is speed. It might be hard to figure out whether MXNet (https://mxnet.apache.org/) or CNTK (https://www.microsoft.com/en-us/cognitive-toolkit/) is faster, but both products are quite fast and are often used as a contrast to the slowness that some people experience when working with TensorFlow. (The white paper at https://arxiv.org/pdf/1608.07249v7.pdf provides some details on benchmarking of deep learning code.)
MXNet is an Apache product that supports a host of languages, including Python, Julia, C++, R, and JavaScript. Numerous large organizations use it, including Microsoft, Intel, and Amazon Web Services. Here are the aspects that make MXNet special:
- Features advanced GPU support
- Can be run on any device
- Provides a high-performance imperative API
- Offers easy model serving
- Provides high scalability
It may sound like the perfect product for your needs, but MXNet does come with at least one serious failing: It lacks the level of community support that TensorFlow offers. In addition, most researchers don’t look at MXNet favorably because it can become complex, and a researcher isn’t dealing with a stable model in most cases.
Microsoft Cognitive Toolkit/CNTK
As mentioned in the previous section, its speed is one of the reasons to use the Microsoft Cognitive Toolkit (CNTK). Microsoft uses CNTK for big datasets — really big ones. As a product, it supports the Python, C++, C#, and Java programming languages. Consequently, if you’re a researcher who relies on R, this isn’t the product for you. Microsoft has used this product in Skype, Xbox, and Cortana. This product’s special features are
- Great performance
- High scalability
- Highly optimized components
- Apache Spark support
- Azure Cloud support
As with MXNet, CNTK has a distinct problem in its lack of adequate community support. In addition, it tends not to provide much in the way of third-party support, either, so if the package doesn’t contain the features you need, you might not get them at all.
Understanding TensorFlow
At the moment, TensorFlow is at the top of the heap with regard to deep learning frameworks (see the chart at https://towardsdatascience.com/deep-learning-framework-power-scores-2018-23607ddf297a for details). TensorFlow’s success stems from many reasons, but mainly it comes from providing a robust environment in a relatively easy-to-use package. The following sections help you understand why this book uses TensorFlow. You discover what makes TensorFlow so exciting and how add-ons make it even easier to use.
Grasping why TensorFlow is so good
A product has to offer quite a bit in terms of functionality, ease-of-use, and reliability to make much of a dent in the market when people have many choices. Part of the reason for TensorFlow’s success is that it supports a number of the most popular languages: Python, Java, Go, and JavaScript. In addition, it’s quite extensible. Each extension is an op (as in operation), which you can read about at https://www.tensorflow.org/guide/extend/op. The point is that when a product has great support for multiple languages and allows for significant extensibility, the product becomes popular because people can perform tasks in a manner that best suits them, rather than what the vendor thinks the user needs.
The manner in which TensorFlow evaluates and executes code is important as well. Natively, TensorFlow supports only static computational graphs. However, the TensorFlow Fold extension (https://github.com/tensorflow/fold) supports dynamic graphs as well. A dynamic graph is one in which the structure of the computational graph varies as a function of the input data structure and changes dynamically as the application runs. Using dynamic batching, TensorFlow Fold can create a static graph from the dynamic graphs, which it can then feed into TensorFlow. This static graph represents the transformation of one or more dynamic graphs modeling uncertain data. Of course, you might not even need to build a computational graph because TensorFlow also supports eager execution (evaluating operations immediately without building a computational graph) so that it can evaluate Python code immediately (called dynamic execution). The inclusion of this dynamic functionality makes TensorFlow extremely flexible in the data it can accommodate.
 In addition to various kinds of dynamic support, TensorFlow also enables you to use a GPU to speed calculations. You can actually use multiple GPUs and spread the computational model over several machines in a cluster. The capability to bring so much computing power to solving a problem makes TensorFlow faster than much of the competition. Speed is important because answers to questions often have a short life expectancy; getting an answer tomorrow for a question you have today won’t work in many scenarios. For example, a doctor who relies on the services of an AI to provide alternatives during a surgery needs answers immediately or the patient could die.
Computational features only help you obtain a solution to a problem. TensorFlow also helps you visualize the solution in various ways using the TensorBoard extension (https://www.tensorflow.org/guide/summaries_and_tensorboard). This extension helps you to
- Visualize the computational graph
- Plot graph execution metrics
- Show additional data as needed
As with many products that include a lot of functionality, TensorFlow comes with a steep learning curve. However, it also enjoys considerable community support, provides access to a wealth of hands-on tutorials, has great third-party support for online courses, and offers many other aids to reduce the learning curve. You’ll want to start with the tutorial at https://www.tensorflow.org/tutorials/ and peruse the guide of offerings at https://www.tensorflow.org/guide/.
Making TensorFlow easier by using TFLearn
One of the major complaints people have about using TensorFlow directly is that the coding is both low level and difficult at times. The trade-off that you make with TensorFlow is that you gain additional flexibility and control by writing more code. However, not everyone needs the depth that TensorFlow can provide, which is why packages such as TFLearn (http://tflearn.org/), which stands for TensorFlow Learn, are so important. (You can find a number of packages on the market that attempt to reduce the complexity; TFLearn is just one of them.)
TFLearn does make working with TensorFlow easier, but in specific ways:
- A high-level Application Programming Interface (API) helps you to produce results with less code and reduce the amount of standardized (boilerplate) code you write.
- Prototyping is faster, akin to the functionality found in PyTorch (described earlier in this chapter).
- Transparency with TensorFlow means that you can see how the functions work and use them directly without relying on TFLearn.
- The use of helper functions automates many tasks that you normally need to perform manually.
- The use of great visualization helps you see the various aspects of your application, including the computational model, with greater ease.
You get all this functionality, and more, without giving up the aspects that make TensorFlow such a great product. For example, you still have full access to TensorFlow’s capability to use CPUs, GPUs, and even multiple systems to bring more computing power to task on any problem.
Using Keras as the best simplifier
Keras is less of a framework and more of an API (a set of interface specifications that you can use with multiple frameworks as backends). It’s generally lumped in as a deep learning framework, though, because that’s how people use it. To use Keras, you must also have a deep learning framework, such as TensorFlow, Theano, MXNet, or CNTK. Keras is actually bundled with TensorFlow, which also makes it the easy solution for reducing TensorFlow complexity.
This book assumes that you use Keras with TensorFlow, but knowing that you can use Keras with other deep learning frameworks is an advantage. That’s why this book doesn’t use the Keras version incorporated into TensorFlow, but instead installs it separately (see https://medium.com/tensorflow/standardizing-on-keras-guidance-on-high-level-apis-in-tensorflow-2-0-bad2b04c819a for details). You can use the same interface with multiple frameworks, enabling you to use the framework that you need without having to deal with yet another learning curve. The biggest selling point of Keras is that it puts the process of creating applications using a deep learning framework into a paradigm that most people can understand well.
You can’t develop an application of any kind that is both easy to use and able to handle truly complex situations — all while being flexible as well. So Keras doesn’t necessarily handle all situations well. For example, it’s a good product to use when your needs are simple, but not a good choice if you plan to develop a new kind of neural network.
The strength of Keras is that it lets you perform fast prototyping with little hassle. The API doesn’t get in your way while it tries to provide flexibility that you might not need in the current project. In addition, because Keras simplifies how you perform tasks, you can’t extend it as you can with other products, which limits your ability to add functionality to an existing environment.
 More than a few people have complained about the sometimes ambiguous error reporting provided by Keras. However, Keras partially offsets this issue by providing strong community support. In addition, many of the people complaining about the error messages are also apparently trying to do something complex. Keeping the fast prototyping nature of Keras in mind could prevent you from trying projects that might be too much for the product to handle.
Getting your copy of TensorFlow and Keras
Your copy of Python that comes with Anaconda doesn’t include a copy of TensorFlow or Keras; you must install these products separately. To avoid problems with integrating TensorFlow with the Anaconda tools, don’t follow the instructions found at https://www.tensorflow.org/install/pip for installing the product using pip. Likewise, avoid using the Keras installation instructions at https://keras.io/#installation.
To ensure that your copies of TensorFlow and Keras are available with Notebook, you must open an Anaconda prompt, not a standard command prompt or a terminal window. Otherwise, you can’t ensure that you have the appropriate paths set up. The following steps will get you started with your installation.
-
At the Anaconda prompt, type python --version and press Enter.
You see the currently installed Python version, which should be version 3.7.3 for this book, as shown in Figure 5-1. The path you see in the window is a function of your operating system, which is Windows in this case, but you may see a different path when using the Anaconda prompt.
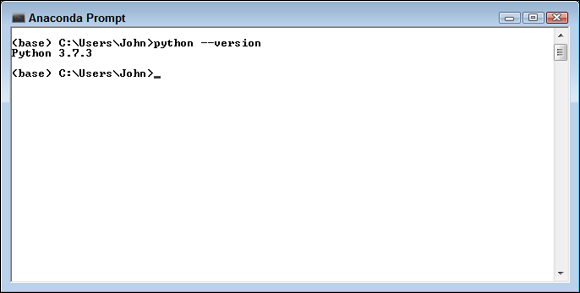
FIGURE 5-1: Be sure to use the Anaconda prompt for the installation and check the Python version.
-
Type conda update --all and press Enter.
Before you attempt to install TensorFlow and Keras, make sure that the conda environment is up to date. Otherwise, you might find that some dependencies are outdated and that your installation won’t work. Conda will perform an analysis of your system and then provide a list of steps to take. When asked whether you should proceed, type Y and press Enter. This step will take a while — time to refill your coffee cup.
 The next step is to create an environment in which to execute code that relies on TensorFlow and Keras. The advantage of using an environment is that you maintain a pristine environment for later use with other libraries. You use Conda, rather than another environment product such as virtualenv, to ensure that the software integrates with the Anaconda tools. If you use a product such as virtualenv, the resulting installation will work, but you’ll have to perform a lot of other steps to access it, and these steps don’t appear in the book. The name of the environment for this book is TF_env.
 -
Type conda create -n TF_env python=3.6 anaconda=2019.03 tensorflow=1.11.0 keras=2.2.4 nb_conda and press Enter.
You may see a warning message about the availability of a newer version of Conda. Ignoring this message generally isn’t safe, especially when working with a Windows 10 system. When asked whether you should proceed, exit the installation process by typing N and pressing Enter. Update your copy of Conda using the information in the “Reducing Conda and PIP errors” sidebar, and then restart the installation process. If you don’t see an error message, type Y and press Enter when asked to proceed.Notice that this installation is actually using Python 3.6. The Python 3.7.3 version used for the other examples in the book is incompatible with the current version of TensorFlow.
This step can require some time to execute because your system will have to download TensorFlow 1.11.0 and Keras 2.2.4 from an online source. After the download is complete, the setup needs to create a complete installation for you. You see the Anaconda prompt return after all the required steps are complete. In the meantime, reading a good technical article or getting coffee can help pass the time.
-
Type conda activate TF_env and press Enter.
The prompt changes to show the TF_env environment rather than the base or root environment. Any tasks you perform now will affect the TensorFlow environment rather than the original base environment.
-
Type python -m pip install --upgrade pip and press Enter.
Note that this step upgrades the copy of pip used for TF_env, rather than the base environment. This step requires a little time, but not nearly as long as creating the environment. The purpose of this step is to ensure that you have the most current version of pip installed so that later commands (some of which appear in the book’s code) don’t fail.
-
Type conda deactivate and press Enter.
Deactivating an environment returns you to the base environment. You perform this step to ensure that you always end a session in the base environment.
-
Close the Anaconda Prompt.
Your TensorFlow and Keras installations are now ready for use.
Fixing the C++ build tools error in Windows
Many Python features require C++ build tools for compilation because the developers wrote the code in C++, rather than Python, to obtain the best speed in performing certain kinds of processing. Fortunately, Linux and macOS both come with C++ build tools installed. So, you don’t have to do anything special to make Python build commands work.
Windows users, however, need to install a copy of the C++ 14 or higher build tools if they don’t already have them installed. In fact, the Notebook environment is actually quite picky — you need Visual C++ 14 or higher, rather than just any version of C++ (such as GCC, https://www.gnu.org/software/gcc/). If you recently installed Visual Studio or another Microsoft development product, you may have the build tools installed and won’t need to install a second copy.
This book uses the most current tools available as of this writing, which are found in C++ 17. Getting just the build tools won’t cost you anything. The following steps show a short and easy method for getting your required build tools if you don’t already have C++ 14 or above installed:
-
Download the offline build tools installer from
https://aka.ms/vs/15/release/vs_buildtools.exe.Your download application downloads a copy of
vs_buildtools.exe. Trying to use the online build tools often comes with too many options, and Microsoft, naturally, wants you to buy its product. -
Locate the downloaded file on your hard drive and double-click
vs_buildtools.exe.You see a Visual Studio Installer dialog box. Before you can install the build tools, you need to tell the installer what you want to install.
-
Click Continue.
The Visual Studio Installer downloads and installs some additional support files. After this installation is complete, it asks which Workload to install, as shown in Figure 5-2.

FIGURE 5-2: Choose the Visual C++ Build Tools workload to support your Python setup.
-
Select the Visual C++ Build Tools option and then click Install.
You don’t need to install anything more than the default features. The Installation Details pane on the right side of the Visual Studio Installer window contains a confusing array of options that you won’t need for this book. The download process of approximately 1.1GB begins immediately. You can get a cup of coffee while you wait. The Visual Studio Installer window displays the progress of the download and installation. At some point, you see a message saying that the installation succeeded.
-
Close the Visual Studio Installer window.
Your copy of the Visual C++ Build Tools is ready for use. You may need to restart your system after performing the installation, especially if you had Visual Studio installed previously.
Accessing your new environment in Notebook
When you open Notebook, it automatically selects the base or root environment — the default environment for the Anaconda tools. However, you need to access the TF_env environment to work with the code in this book. To make this happen, open Anaconda Navigator, rather than Jupyter Notebook as usual. In the resulting window, shown in Figure 5-3, you see an Applications On drop-down list. Choose the TF_env option from the drop-down list. You can then click Launch in the Jupypter Notebook panel to start Notebook using the TF_env environment.
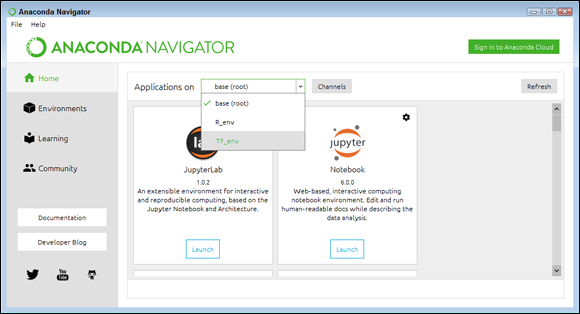
FIGURE 5-3: Select an environment to use in Anaconda Navigator.