
Chapter 24
Source Control
In this chapter, you will learn to:
- File Services
- Apache Subversion
- VisualSVN Server
- TortoiseSVN Client
- Users and Groups
- Create a Repository
- Create a Project Structure
- Check Out a Project with TortoiseSVN
- Add Code to a Project with TortoiseSVN
- Update Code in a Project with TortoiseSVN
- Check for Changes in a Project with TortoiseSVN
- Revert Changes in a Project with TortoiseSVN
- Remove Code from a Project with TortoiseSVN
- Using the VisualSVN Server Web Browser Interface
- Using PowerShell to Automate VisualSVN Server
- Using PowerShell to Automate Subversion Client Operations
- GitHub
- Create a GitHub Account
- SourceTree Client
- Create a Repository
- Make the First Commit
- Clone a Repository with SourceTree
- Add Code to a Repository
- Update Code in a Repository
- Check for Changes in a Repository
- Revert Changes in a Repository
- Remove Code from a Repository
- Using PowerShell to Automate GitHub Client Operations
Organizing and maintaining the code you’ve worked so hard on—particularly when collaborating on a project with others—can be a challenge. IT professionals are often not great at practicing what they preach. After imploring users to back up their data, applications, and servers, programmers and administrators sometimes fail to take that same approach with code that is critical to the functioning of their enterprise. Maintaining changes to critical also is code vital. No well-run organization should implement code changes that affect their systems without an established process for rolling back changes and investigating changes that occur between releases that can cause problems.
This chapter examines a few methods for securing code against data loss, as well as the use of source control systems for collaborative code projects.
File Services
File services, such as Windows-based file servers or file shares offered on the network by network-attached storage devices, have historically been popular systems for storing and sharing documents. Using file services to store your code is by no means recommended by any of the authors of this book. However, we have all seen examples of code that is critical to an organization stored and maintained on a laptop’s local hard drive. At an absolute minimum, infrastructure code should be stored in a centralized area, such as a file server, and backed up on a regular basis. If you’re a consultant and you have code projects for multiple customers, consider a cloud-based file service such as Dropbox or OneDrive for code storage. Your laptop’s hard drive is at risk of failure, loss, or theft.
Most of the systems mentioned, such as file servers and cloud-based storage, typically offer some basic versioning features that allow code files to be reverted to a previous version. By providing a central point of access, either for colleagues using file servers in the same organization or for independent folks working on a community project via cloud-based storage, a form of basic collaboration is enabled.
What all of these solutions lack is the ability to track what changed between different versions of code, and that is why we recommend using a source control system.
Apache Subversion
If you are looking to get started with a source control system that can be installed within a Windows environment and is relatively straightforward, then Apache Subversion (https://subversion.apache.org/) might be for you. Subversion is an open-source version control system with support for the majority of operating systems and excellent options for both running it on Windows-based servers and accessing it via Windows clients. In this chapter, we will cover both free and commercially available packages built on Apache Subversion. There are some advanced source control features that you may find useful to consider for a commercial enterprise and that are available in paid-for software. Depending on your experience level with open-source software, you may prefer to pay money for a company to supply that level of functionality for you.
In this chapter, we will use Windows-based Subversion server and client products VisualSVN Server and TortoiseSVN (client), available from two different organizations. VisualSVN only offers a plug-in for Visual Studio as a client to complement their Subversion server product. Since Visual Studio is not typically used by most PowerShell coders, we like and recommend the use of the TortoiseSVN client for client-side source control operations when developing PowerShell code. The TortoiseSVN client can also be used to work with other Subversion server products if required.
VisualSVN Server
VisualSVN Server, offered by VisualSVN Limited (https://www.visualsvn.com/server/), provides an easy way to set up and configure a Subversion server on Windows. There are two flavors: a free Standard Edition and a paid-for Enterprise Edition containing some advanced features.
System Requirements
VisualSVN Server can be run on Windows Server 2008 or later with the following minimum hardware specifications:
- 1.4 GHz CPU
- 512 MB of RAM
- 50 MB hard drive space
Installation and Initial Configuration
Download the latest version of VisualSVN Server and install the server software onto a Windows server that meets the system requirements. Installation is straightforward; just follow the onscreen prompts, accepting all the defaults and selecting the Standard Edition (Figure 24-1).
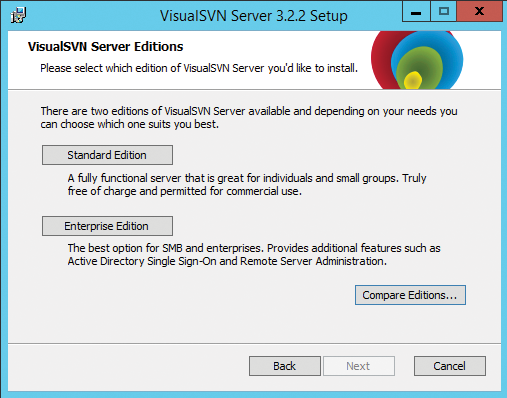
Figure 24-1: VisualSVN Server installation
Once the installation is complete, open the VisualSVN Server management console and take a look at what is available to you (Figure 24-2).
At this point, consider the use of certificates within your VisualSVN installation. You can use the built-in, self-signed certificate or replace it with a certificate from a certificate authority (CA) within your organization or one from a commercial third party. Some of the client-based examples later in this chapter will be influenced by this decision. The security requirements within your organization will likely determine your certificate use, and typically, it is best to take advice from those responsible.

Figure 24-2: VisualSVN Server management console
TortoiseSVN Client
TortoiseSVN (http://tortoisesvn.net/) is also free to use, even in a commercial environment. It provides a client implemented as a Windows shell extension—essentially a nice GUI for Subversion.
System Requirements
TortoiseSVN can be run on any Windows system that is Windows XP SP3 or later, in both 32-bit and 64-bit editions. Administrative privileges are required for installation.
Installation and Initial Configuration
Download the latest version of TortoiseSVN and install the software onto a Windows client machine that meets the system requirements. Accept all the defaults (Figure 24-3).

Figure 24-3: TortoiseSVN installation
Users and Groups
Once you have systems running both VisualSVN Server and TortoiseSVN, the first thing that needs to be done is to configure authentication so that permissions for access to code can be assigned. It is possible to create local Users and Groups in the system. However, if you have joined the VisualSVN Server to an Active Directory domain, then you can use Users and Groups from that system and take advantage of an existing authentication system within your organization.
To configure authentication from the VisualSVN Server management console, navigate to the Authentication tab on the Properties page of the server. Select the Use Windows Authentication option and select the Basic Authentication check box under Authentication Methods (Figure 24-4). Click OK to save your settings and allow you to use AD Users and Groups.

Figure 24-4: VisualSVN server authentication
Create a Repository
Now you can create a repository for storing and managing the code and assign permissions for access.
- From within the VisualSVN Server console, right-click Repositories, start the Create New Repository wizard, and select Regular FSFS Repository as the preferred repository type (Figure 24-5). Click Next.
- Give the repository a name. For this exercise, use Repository01 (Figure 24-6). Click Next.

Figure 24-5: Selecting the repository type in the Create New Repository wizard

Figure 24-6: Specifying the repository name
- Select a preferred initial repository structure. For this exercise, select Empty Repository (Figure 24-7). Click Next.

Figure 24-7: Selecting the repository structure
- For the Repository Access Permissions step of the wizard, select Customize Permissions, click the Custom button, and then select the group to which you want to grant permissions from the Group Or User Name list on the Customize Permissions Security tab. (We selected SUNNYDALERepository01. Repository01 is an AD group containing the users we want to give access to.) The Permissions options allow you to grant a variety of permissions. The default is Read / Write, which is appropriate for this example (Figure 24-8). Click OK to set the Group Or User Name and Permissions options and then click Create to finish creating the repository.

Figure 24-8: Creating repository access permissions
The wizard then supplies summary details of the repository (Figure 24-9). The Repository URL is important information since that is what you will use to connect to the repository from the TortoiseSVN client. It is useful to make a note of it now, but it can be retrieved later if necessary.

Figure 24-9: Summary details
- Click Finish to end the wizard.
Create a Project Structure
Single or multiple code projects can be maintained within a repository, or depending on your requirements, multiple repositories can be used to store single or multiple projects. A single repository lends itself to lower levels of ongoing server maintenance tasks; conversely, multiple repositories can give more flexibility for different projects in terms of items such as event triggers or email notifications. You need to create at least one project within your repository to store the example code.
From within the VisualSVN Server management console, right-click the Repository01 repository that you just created and choose New ⇒ Project Structure. When the Create Project Structure wizard opens, give the project the name Project01. Click OK to create the project (Figure 24-10).

Figure 24-10: Create Project Structure: Project Name
Observe in the management console that a project has been created. The top-level folder matches the project name, and three subfolders also have been created: branches, tags, and trunk (Figure 24-11).

Figure 24-11: Repository folder structure
Typically, you would start by storing code in the trunk folder, which is what we will do in the next exercise.
Check Out a Project with TortoiseSVN
Now that we have created a Subversion repository and a project to work with, we need to head over to the client machine where the code will be developed and TortoiseSVN has been installed.
- 1. On the client machine, create a folder for storing a local copy of code projects. For the purpose of this exercise, use
C:Code. - Navigate to the
C:Codefolder and right-click in an empty space. Note the addition of SVN Checkout and TortoiseSVN menu options shown in Figure 24-12.

Figure 24-12: SVN Checkout and TortoiseSVN Windows Explorer menu options
- Select the SVN Checkout option to open the Checkout dialog box shown in Figure 24-13.
- Enter the previously saved URL of the repository; it will be something like https://visualsvnserver/svn/repositoryname. (If you didn’t save it, you can retrieve it from the Repository properties back in the VisualSVN Server management console, or by clicking the ellipsis button in this dialog box if you have provided the server name.) The Checkout Directory field will be automatically populated and the rest can be left as defaults. Click OK to continue.
- Since we have not replaced the default VisualSVN Server certificate for this example, select Accept The Certificate Permanently. If you have replaced it with a certificate valid throughout your organization, then you will not be prompted with this choice (Figure 24-14).

Figure 24-13: Checking out an SVN repository

Figure 24-14: Certificate validation
- Because we are using Basic Authentication, you will now be prompted for AD credentials in the Authentication dialog box. We entered the credentials of the account we wish to use (a sample user from AD who belongs to the
Repository01group we used earlier to provide Read / Write permissions to the repository) and checked the box Save Authentication (Figure 24-15) so that authentication prompts are not required for every future action. Click OK.

Figure 24-15: Authentication dialog box
- When the Checkout Finished! dialog box opens (Figure 24-16), notice the addition of folders to the
C:Codefolder. Click OK to finish the process.
Figure 24-16: Checkout Finished!
Add Code to a Project with TortoiseSVN
We now have a repository and project on the VisualSVN Server and a local copy of the folder structure on the client machine, so we’re in a position to add some code. Let’s create a function and save it in a Test-Function01.ps1 file in the C:CodeProject01 runk folder. For the purposes of this example, it doesn’t matter what code you use, but we were using the following:
function Test-Function01 {
  Write-Host "This is test 01"
}
In Windows Explorer, navigate to the C:CodeProject01 runk folder and find the Test-Function01.ps1 file; in particular, notice the question mark icon to the left of the filename (see Figure 24-17). This indicates that the file has not yet been added to the project and is a useful visual aid when selecting multiple files that do not yet belong to the project.
To add the code to the project:
- Right-click the
Test-Function01.ps1file and choose TortoiseSVN ⇒ Add from the context menu (Figure 24-17).
Figure 24-17: Adding a code file to your project
- At this point there will be no noticeable changes and no wizard starts. This is because a second step is required. Right-click the
Test-Function01.ps1file again and notice that there is a new option: SVN Commit (Figure 24-18). Select SVN Commit.

Figure 24-18: Committing a code file to your project
- When the Commit dialog box opens, notice that the
Test-Function01.ps1file is preselected in the list of files to commit and that there is a Message text box (Figure 24-19). It is a good practice to add a comment to each commit made so that when you or somebody else reviews the change at a later date, the thought process behind that change is obvious. We added an Initial draft message because that seemed to be the most helpful information at this point. - Click OK to make the commit (Figure 24-19).
- If all is successful, then the Commit Finished! dialog box will open with a summary of changes and a new revision level, which is useful for future reference. We were given Revision 2 (Figure 24-20). Click OK to close the dialog box.

Figure 24-19: Set into the habit of adding a comment to each commit.

Figure 24-20: Commit Finished!
- For completeness, look back in the
C:CodeProject01 runkfolder and verify that theTest-Function01.ps1file is now displayed with a green check mark icon, which confirms there are no outstanding changes on the file to be committed to the project (Figure 24-21).

Figure 24-21: No outstanding changes
Update Code in a Project with TortoiseSVN
With code now stored in the project, it is likely that at some point the code will be updated with changes on the local client system that need to be checked into the repository.
Make some changes to the Test-Function01.ps1 file so that you can try checking in the updates. We updated our file to include an extra Write-Host line so that it now looks like
function Test-Function01 {
  Write-Host "This is test 01"
  Write-Host "This is test 01"
}
Navigate to the C:CodeProject01 runk folder and observe that the Test-Function01.ps1 file has a red exclamation mark icon, indicating that changes should be checked in (Figure 24-22).
To check in the changes, right-click the Test-Function01.ps1 file and select SVN Commit (Figure 24-23).

Figure 24-22: A red exclamation mark indicates that changes should be checked in.

Figure 24-23: Dight-click the file and select SVN Commit.
When the Commit dialog box opens, notice that the Test-Function01.ps1 file is preselected in the list of files to commit and that there is an option for a message. Add an appropriate comment in the Message field. For this exercise, we added the message Added another Write-Host line. Click OK to make the commit (Figure 24-24).

Figure 24-24: Click OK to make the commit.
All being well, the Commit Finished! dialog box opens with a summary of changes and a new revision level. We were given Revision 3 (Figure 24-25).

Figure 24-25: Revision 3
For completeness, look back in the C:CodeProject01 runk folder and verify that the Test-Function01.ps1 file now displays with an icon with a green check mark and confirm that there are no outstanding changes to the file that need to be committed to the project (Figure 24-26).

Figure 24-26: Confirm that there are no outstanding changes.
Check for Changes in a Project with TortoiseSVN
Working with other people on the same code project means that they will likely be making changes to code, too. When working in this manner, it is important that you regularly update your local system with any changes made by other people on the project. To continue with this example, use another system to connect to this project via a different user account than the one used already, and make some changes. We logged in as another user and updated the Test-Function01.ps1 file with an additional Write-Host line:
function Test-Function01 {
  Write-Host "This is test 01"
  Write-Host "This is test 01"
  Write-Host "This is test 01"
}
We also added a new file Test-Function02.ps1 containing a simple function:
function Test-Function02 {
  Write-Host "This is test 02"
  Write-Host "This is test 02"
}
To update your local system with these changes, navigate to the C:CodeProject01 runk folder. Notice that on your system there is only the single Test-Function01.ps1 file. Right-click in a blank space to bring up the context menu. Select SVN Update (Figure 24-27).

Figure 24-27: Checking for changes in your project by selecting SVN Update
When the Update Finished dialog box appears, you’ll see that, as expected, Test-Function01.ps1 has a status of Updated and Test-Function02.ps1 has a status of Added (Figure 24-28).
Back in the C:CodeProject01 runk folder observe that the new file Test-Function02.ps1 exists and that both files are displayed with a green check mark icon (Figure 24-29).

Figure 24-28: Update finished

Figure 24-29: After the update, both files are displayed with a green check mark icon.
You can verify the changes in these files made by other users by looking at the TortoiseSVN commit log. Right-click in a blank space in the C:CodeProject01 runk folder and select TortoiseSVN ⇒ Show Log. When the Log Messages dialog box opens, observe the changes made and any related comments. In this example, our user, xander.harris, added the new file Test-Function02.ps1 and made a change to the existing file Test-Function02.ps1 (Figure 24-30).

Figure 24-30: Checking the Commit log
In addition to relying on comments, you can identify changes by looking at the difference in files between versions. We right-clicked the Test-Function01.ps1 file and selected TortoiseSVN ⇒ Diff With Previous Version. The difference between Revision 4 of the file and the current version is shown in Figure 24-31. An additional Write-Host line has been added.

Figure 24-31: Observing differences between versions
Reverting Changes in a Project with TortoiseSVN
There are many reasons why it becomes necessary to revert a change to previously committed code. For example, a code change may have not been tested sufficiently and subsequently caused an issue, or perhaps the functional requirements changed. Using the TortoiseSVN client, you are able to revert the code to a previously known good version of the code.
For this example, we will revert the Test-Function01.ps1 file from Revision 5 back to Revision 3.
Navigate to the C:CodeProject01 runk folder, right-click the Test-Function01.ps1 file, and select TortoiseSVN ⇒ Show Log. In the log dialog, right-click Version 3 and select Revert To This Revision from the extensive array of options available (Figure 24-32).

Figure 24-32: Reverting changes in your project
In the Reverting Changes dialog box, select Revert to revert all changes to Test-Function01.ps1 and go back to Revision 3 (Figure 24-33).

Figure 24-33: The Revert confirmation
When the Merge Finished! dialog box opens, observe the confirmation of changes (Figure 24-34).

Figure 24-34: Merge Finished!
Note that at this point we have only reverted the local copy. Examine the content of the Test-Function01.ps1 file to confirm that the third Write-Host command added in Version 5 has been removed:
Get-Content C:CodeProject01	runkTest-Function01.ps1

function Test-Function01 {
  Write-Host "This is test 01"
  Write-Host "This is test 01"
}
If the code you see locally is the code you wish to keep, then you need to check it back into the project to make it the definitive version (for now) for everyone else. Navigate to the C:CodeProject01 runk folder, right-click the Test-Function01.ps1 file, and select SVN Commit. Follow the same procedure as previously detailed in the section “Update Code in a Project with TortoiseSVN” to commit the changes. When the Commit Finished! dialog box opens, observe that the revision number has been incremented (Figure 24-35).

Figure 24-35: The revision number has been incremented.
Remove Code from a Project with TortoiseSVN
We have covered adding, updating, reverting, and checking for changes in code. To round things off, let’s look at removing code. We’ll show you how to remove the Test-Function02.ps1 file from the project.
Navigate to the C:CodeProject01 runk folder, right-click the Test-Function02.ps1 file, and select TortoiseSVN ⇒ Delete (Figure 24-36).

Figure 24-36: Removing code from your project
Now you need to commit that deletion to the project. Right-click in a blank space in the C:CodeProject01 runk folder and select SVN Commit. When the Commit dialog box opens, add a message to explain the deletion. Click OK to commit the change (Figure 24-37).
When the Commit Finished! dialog box opens, observe the summary of changes and the new revision level. The example code is now at Revision 7 (Figure 24-38).

Figure 24-37: Click OK to commit the deletion.

Figure 24-38: We’re up to Revision 7!
Using the VisualSVN Server Web Browser Interface
VisualSVN includes a web browser interface for working with a VisualSVN Server repository. To access it, navigate to https://visualsvnservername and log in with credentials that have access to a repository. Although functionality is limited, it can be used for informational purposes. As shown in Figure 24-39, clicking the History button allows you to drill down into a project and view the change history.

Figure 24-39: In the VisualSVN Server web interface, you can view project history.
Using PowerShell to Automate VisualSVN Server
Everything we have shown you so far with SVN has been accomplished using the GUI tools. You will be pleased to know that it is also possible to work with SVN via the command line. The VisualSVN Server management console is built on top of a Windows-based WMI interface. Consequently, it is possible to automate tasks in it via PowerShell.
The functions New-VisualSVNRepository and Set-VisualSVNADSecurity in Listing 24-1 and Listing 24-2 use the rootVisualSVN WMI namespace and will enable you to automate the same tasks performed in the GUI in the earlier sections “Create a Repository” and “Create a Project Structure.”
Listing 24-1: New-VisualSVNRepository
function New-VisualSVNRepository {
<#
.SYNOPSIS
Create a new Repository in VisualSVN Server
.DESCRIPTION
Create a new Repository in VisualSVN Server
.PARAMETER Name
Repository Name
.PARAMETER Project
Project Name
.PARAMETER CreateFolders
Create the standard folder structure: branches, tags, trunk
.INPUTS
System.String.
.OUTPUTS
None.
.EXAMPLE
New-VisualSVNRepository -Name Repository01 -Project Project01 -CreateFolders
#>
[CmdletBinding()]

    Param
    (
    [parameter(Mandatory=$true)]
    [ValidateNotNullOrEmpty()]
    [String]$Name,

    [parameter(Mandatory=$false)]
    [ValidateNotNullOrEmpty()]
    [String]$Project,

    [parameter(Mandatory=$false)]
    [Switch]$CreateFolders
    )

try {

# --- Create the Repository
$Repository = [wmiclass]"rootVisualSVN:VisualSVN_Repository"
$Repository.Create($Name)

$RepositoryObject = ([wmiclass]"rootVisualSVN:`
 VisualSVN_Repository").CreateInstance()
$RepositoryObject.Name = $Name

# --- Create the Project
if ($PSBoundParameters.ContainsKey('Project')){

    $Message = "Creating Project folder $Project"
    $RepositoryObject.CreateFolders($Project,$Message)
}

# --- Create Folder Structure
if ($PSBoundParameters.ContainsKey('CreateFolders')){

    $Message = "Creating Folder Structure"

    if ($PSBoundParameters.ContainsKey('Project')){

        $Folders = "/$($Project)/branches","/$($Project)/tags",`
          "/$($Project)/trunk"
        $RepositoryObject.CreateFolders($Folders,$Message)
    }
    else {

        $Folders = "/branches","/tags","/trunk"
        $RepositoryObject.CreateFolders($Folders,$Message)
    }
}
}
catch [Exception]{

    throw "Unable to create new VisualSVN Repository"
}
}
Listing 24-2: Set-VisualSVNADSecurity
function Set-VisualSVNADSecurity {
<#
.SYNOPSIS
 Append rather than overwrite
.INPUTS
System.String.
.OUTPUTS
None.
.EXAMPLE
Set-VisualSVNADSecurity -Name Repository01 -SID `
 "S-1-5-21-1928118033-2945057307-3130799568-1805" `
 -AccessLevel ReadWrite
.EXAMPLE
"Repository01" | Set-VisualSVNADSecurity -SID `
 "S-1-5-21-1928118033-2945057307-3130799568-1805" `
 -AccessLevel ReadWrite -Path '/Project01/trunk'
.EXAMPLE
Get-ADGroup Repository01 |
 Set-VisualSVNADSecurity -Name Repository01 -AccessLevel ReadWrite
#>
[CmdletBinding(SupportsShouldProcess,ConfirmImpact="High")]

    Param
    (
    [parameter(Mandatory=$true,ValueFromPipeline=$true)]
    [ValidateNotNullOrEmpty()]
    [PSObject[]]$Name,

    [parameter(Mandatory=$true,ValueFromPipeline=$false,`
     ValueFromPipelineByPropertyName=$true)]
    [ValidateNotNullOrEmpty()]
    [String]$SID,
    [parameter(Mandatory=$true,ValueFromPipeline=$false)]
    [ValidateSet('NoAccess','ReadOnly','ReadWrite')]
    [String]$AccessLevel,

    [parameter(Mandatory=$false,ValueFromPipeline=$false)]
    [ValidateNotNullOrEmpty()]
    [String]$Path = "/",

    [parameter(Mandatory=$false,ValueFromPipeline=$false)]
    [Switch]$Append
    )

begin {

    # --- Set the Access Level value
    switch ($AccessLevel)
    {
        'NoAccess' {$AccessLevelNumber = 0}
        'ReadOnly' {$AccessLevelNumber = 1}
        'ReadWrite' {$AccessLevelNumber = 2}
    }
}

process {

try {

    foreach ($Repo in $Name){

        # --- Create the Repository Object
        $RepositoryObject = ([wmiclass]"rootVisualSVN:`
         VisualSVN_Repository").CreateInstance()
        $RepositoryObject.Name = $Repo

        # --- Create the AD Object
        $ADObject = ([wmiclass]"rootVisualSVN:`
         VisualSVN_WindowsAccount").CreateInstance()
        $ADObject.SID = $SID
        # --- Create the Permission Object
        $PermissionEntry = @()

        $PermissionObject = ([wmiclass]"rootVisualSVN:`
         VisualSVN_PermissionEntry").CreateInstance()
        $PermissionObject.AccessLevel = $AccessLevelNumber
        $PermissionObject.Account = $ADObject

        $PermissionEntry += $PermissionObject

        # --- Add the existing permissions if append is specified
        if ($true -eq $Append){

            $ExistingPermissions = `
            ($RepositoryObject.GetSecurity($Path)).Permissions
            $PermissionEntry += $ExistingPermissions
        }

        # --- Set the Security Permission
        if ($PSCmdlet.ShouldProcess($Name)){

            $RepositoryObject.SetSecurity($Path, $PermissionEntry, 0)
        }
    }
}
catch [Exception]{

    throw "Unable to set VisualSVN Security"
}
}
end {
}
}
Listing 24-3 creates a repository called Repository03 with a project named Project03 and the standard folder structure using New-VisualSVNRepository. It then adds the security group Repository03 with ReadWrite permissions via its Active Directory SID. Finally, the listing uses the standard PowerShell cmdlet Get-WmiObject to verify what has been created.
Listing 24-3: Creating a VisualSVN Server repository with AD permissions
New-VisualSVNRepository -Name Repository03 -Project Project03 `
 -CreateFolders
"Repository03" | Set-VisualSVNADSecurity -SID `
 "S-1-5-21-1928118033-2945057307-3130799568-1807" `
 -AccessLevel ReadWrite
$Repository = Get-WmiObject -Namespace rootVisualSVN `
 -Class VisualSVN_Repository -Filter "Name='Repository03'"
$Repository | Format-List *
($Repository.GetSecurity('/')).Permissions | Select `
 @{Name='SID';Expression={$_.Account.Sid}},AccessLevel |
 Format-Table -AutoSize
Using PowerShell to Automate Subversion Client Operations
TortoiseSVN doesn’t have a command-line equivalent that you can use to automate client operations. You can prepopulate the GUI using tortoiseproc.exe, but you can’t execute commits or updates. You can, however, turn to the svn.exe command-line tool to automate these operations.
Requirements
You will need the following:
- The Subversion command-line client (
svn.exe), which is available from www.collab.net/downloads/subversion. Install this software first before opening a PowerShell session since it will make changes to yourPATHenvironment variable to include the path forsvn.exe. - The PowerShell Subversion module, which is available from https://gallery.technet.microsoft.com/Subversion-PowerShell-bbd1db40. Unblock the file after downloading it, unzip the file, and copy to any of your available module paths.
With svn.exe and the PowerShell Subversion module installed and ready to go, let’s look at automating some client-side tasks.
Available Functions in the Subversion Module
The following code snippet shows how to find the functions that are available in the Subversion module:
Get-Command -Module Subversion

CommandType     Name                               ModuleName
-----------     ----                               ----------
Function        Add-SvnWorkingCopyItem             Subversion
Function        Get-SvnWorkingCopy                 Subversion
Function        Import-SvnUnversionedFilePath      Subversion
Function        New-SvnWorkingCopy                 Subversion
Function        prompt                             Subversion
Function        Publish-SvnWorkingCopy             Subversion
Function        Remove-SvnWorkingCopyItem          Subversion
Function        Repair-SvnWorkingCopy              Subversion
Function        Update-SvnWorkingCopy              Subversion
Add Code to a Project with the Subversion Module
In the earlier GUI-based example for adding code to a project, we went through a number of steps to add a new piece of code to the local working copy and then commit the changes to the project. Listing 24-4 details how to do this with the Subversion module for a new file, C:CodeProject01 runkTest-Function03.ps1.
Listing 24-4: Adding code to a project with the Subversion module
Add-SvnWorkingCopyItem -Path C:CodeProject01	runkTest-Function03.ps1
Publish-SvnWorkingCopy -Path `
 'C:CodeProject01	runkTest-Function03.ps1' `
 -Message 'Initial Draft'
Typical output would be similar to this:
PS C:> Add-SvnWorkingCopyItem -Path 'C:CodeProject01	runkTest-Function03.ps1'

A         CodeProject01	runkTest-Function03.ps1

PS C:> Publish-SvnWorkingCopy -Path `
'C:CodeProject01	runkTest-Function03.ps1' `
-Message 'Initial Draft'

Adding         CodeProject01	runkTest-Function03.ps1
Transmitting file data .
Committed revision 11.
Check for Changes in a Project with the Subversion Module
The earlier GUI-based example for checking for changes in a project required a number of steps with the TortoiseSVN client. Listing 24-5 demonstrates how to do the same thing via a single code line for the project path C:CodeProject01 runk.
Listing 24-5: Checking for changes in a project with the Subversion module
Update-SvnWorkingCopy -Path 'C:CodeProject01 runk'Here is the output from our example Project01. The return shows the updated Test-Function03.ps1, a new Test-Function04.ps1 file, and the current revision number:
Update-SvnWorkingCopy -Path 'C:CodeProject01	runk'

Updating 'CodeProject01	runk':
U    CodeProject01	runkTest-Function03.ps1
A    CodeProject01	runkTest-Function04.ps1
Updated to revision 13.
GitHub
Another common alternative to Subversion for an internally run source control system is Git. Typically, Git is run on Linux servers, although it is possible to run it on Windows servers, too. Rather than demonstrate another similar tool to Subversion geared toward internal use and particularly since the authors heavily promote sharing their work with the community, this section will instead focus on GitHub.
GitHub is a web-based repository hosting service based on Git that provides source control features for use either by an individual or by groups of developers on a project. The social nature of the service lends itself to community involvement in a project. So, for example, an individual might create a code project on GitHub to share some of their own work. Other developers who find the project of interest are then able to download the code, join the project, and make their own contributions for the original developer to approve if they wish. For a fee, you can create private repositories when you don’t wish to share code publicly.
GitHub has become so popular that many well-known organizations share code projects on the site for software they wish to be developed in an open-source manner. In addition, it is not uncommon for a developer heading for a job interview to have been pre-researched by their interviewer by checking out the interviewee’s GitHub page.
Create a GitHub Account
You will need to register an account on GitHub if you want to do anything more than download code already stored there. Navigate to https://github.com and walk through the registration process to register an account.
SourceTree Client
The SourceTree client (www.sourcetreeapp.com) from Atlassian provides a GUI client-side experience for working with Git-based projects, including GitHub. It is free to use and available in both Windows and Mac versions, although registration is required after 30 days.
Requirements
SourceTree is supported on Windows 7 and newer clients and Mac OS X 10.6 and above.
Installation and Configuration
Download the latest version of SourceTree and install the software onto a Windows or Mac client machine that meets the system requirements. During installation accept all the defaults (Figure 24-40).

Figure 24-40: SourceTree installation
Create a Repository
After creating your GitHub account, sign in to the website with your registered credentials. From any page you can click the + icon in the upper-right corner to open a drop-down menu and access the option to create a new repository. Select New Repository to begin the process (Figure 24-41).

Figure 24-41: Select New Repository to begin.
Give the repository a name (Test01 for our example). Optionally, enter a description of the repository you are creating. Choose a repository type; we selected Public for this example. Remember that access to private repositories is a paid-for option. Select the Initialize This Repository With A README check box. This option displays a description of your project in more detail on the project homepage and lets you immediately clone the repository to your computer. Click Create Repository when you are ready to go (Figure 24-42).

Figure 24-42: Once you’ve selected the options, click Create Repository.
Make the First Commit
The web interface for GitHub is currently more featured than VisualSVN Server, and it is possible (although not necessarily recommended) to make edits to files directly via the site. Once you’ve followed the process to create the new repository, its homepage will be displayed. If you selected the option to create a README, click the README.md file in the repository’s list of files. Above the file’s content click the pencil icon to edit the file (Figure 24-43).

Figure 24-43: Making the first commit—the initial README.md content
Add some text to the file. At the bottom of the page, under Commit Changes enter a message to indicate what has changed in the file—we added First update. Click the green Commit Changes button to execute the commit (Figure 24-44).

Figure 24-44: Click the green Commit Changes button.
The README.md file will be displayed again with the updated text.
Clone a Repository with SourceTree
It will not be common to make code edits directly on the GitHub website. Most likely, code will be developed in a local working copy, changes committed to the site, and updates downloaded. To illustrate this, we will demonstrate with the SourceTree client.
The first time the SourceTree client is opened, the user will be prompted to add an account for a remote server hosting repositories. This step can be skipped. Once the client is open, select the Clone / New button. When the Clone / Add / Create Repository dialog box opens, complete it as follows (Figure 24-45):
- Source Path / URL Enter the HTTPS clone URL from the website of the GitHub repository. (Look in the bottom-right corner of your website’s homepage for a Copy To Clipboard button.) For our example, it is https://github.com/jonathanmedd/Test01.git.
- Destination Path Select a folder on the local system—we chose
C:GitHubTest01. - Name We chose Test01.
Click Clone to continue. If you haven’t previously supplied credentials for your GitHub account, you may be prompted for them at this point.

Figure 24-45: Adding a repository in SourceTree
Add Code to a Repository
Now that you have a GitHub repository and its clone in a local folder, you are in a position to add some code. Let’s create a function and save it in the Test-Function01.ps1 file in the folder C:GitHubTest01. It doesn’t matter for the time being what is actually in the code, but we used the following:
function Test-Function01 {
  Write-Host "This is test 01"
}
In Windows Explorer, navigate to the C:GitHubTest01 folder and verify that the Test-Function01.ps1 file, as well as the README.md file that was already part of the repository and a hidden GIT folder that contains Git configuration information, are all contained in the folder (Figure 24-46).

Figure 24-46: Adding code to a repository in Windows Explorer
Open the SourceTree client and navigate to the Test01 repository. On the File Status tab notice that the Test-Function01.ps1 file is listed under Unstaged Files (Figure 24-47).

Figure 24-47: SourceTree file status
Click the check box next to the Test-Function01.ps1 file and the file will move to the Staged Files area. Enter a commit message and select Push Changes Immediately To Origin/Master (Figure 24-48). Click the Commit button. If you haven’t previously supplied credentials for your GitHub account, you may be prompted for them at this point.

Figure 24-48: Enter a commit message and click Push Changes Immediately To Origin/Master.
Update Code in a Repository
After code is stored in a project, it is likely that at some point the code will be updated with changes on the local system, which will need to be committed to the repository. We made changes to the Test-Function01.ps1 file to provide an example of checking in updates.
Navigate to the File Status tab in SourceTree and observe that the Test-Function01.ps1 file is back in the Unstaged Files area and that in the code area the additional line of code added is highlighted in green (Figure 24-49).

Figure 24-49: The line of code we added is highlighted in green.
Click the check box next to the Test-Function01.ps1 file and it will move to the Staged Files area. Enter a commit message and check Push Changes Immediately To Origin/Master (Figure 24-50). Click the Commit button.

Figure 24-50: Updating your code in a repository
Check for Changes in a Repository
Working with other people on the same code project means that they will likely be making changes to code, similar to those we have just demonstrated. When working in this manner, it is important that you regularly update your local system with any changes made by other people on the project. For this example, make some changes to code in your repository from another system with permissions to your repository. We have (via another user) updated the Test-Function01.ps1 file with a code change and added a new file, Test-Function02.ps1. An advantage of the SourceTree client over TortoiseSVN is that it shows a notification on your system when there are pending changes on the repository—look for a Red notification containing the number of changes above the Pull toolbar button.
To update your local system with these changes, click the Pull button on the toolbar and then click OK (Figure 24-51).

Figure 24-51: Checking for changes in a repository
Revert Changes in a Repository
Suppose you wish to go back to an earlier version of a code file. GitHub supports your need to do that. You can use the SourceTree client to make a Git revert and revert the code to a previously known good version of the code. For this example, let’s revert the Test-Function01.ps1 file back to the Initial Draft version.
From within the SourceTree client, navigate to the File Status tab and change the view to All Files ⇒ Sorted By File Status. Right-click the Test-Function01.ps1 file and select Log Selected (Figure 24-52).

Figure 24-52: Reverting changes in a repository
When the Log window opens, look through the different versions of this file and associated comments and changes. Right-click the version you want to revert the file to and select Reset To Commit (Figure 24-53).

Figure 24-53: Reset to Commit
Click OK to confirm the reset (Figure 24-54).

Figure 24-54: Click OK in this warning.
You can verify that the Test-Function01.ps1 file has reverted back to the content you chose with a single Write-Host line:
Get-Content C:GitHubTest01Test-Function01.ps1

function Test-Function01 {
  Write-Host "This is test 01"
}
This locally made change now needs to be committed to the repository to make it the definitive version (for now) for everyone else. Navigate to the File Status tab, set the view back to Pending Files ⇒ Sorted By File Status, and verify that the Test-Function01.ps1 file is in the Unstaged Files area (Figure 24-55).

Figure 24-55: Verify that the Test-Function01.ps1 file is in the Unstaged Files area.
Click the check box next to the Test-Function01.ps1 file and it will move to the Staged Files area. Enter a commit message and select Push Changes Immediately To Origin/Master. Click the Commit button (Figure 24-56).

Figure 24-56: Click Commit to revert changes in a repository.
Remove Code from a Repository
Finally, in this set of repository actions let’s examine how to remove the Test-Function02.ps1 file from the repository.
Navigate to the C:GitHubTest01 folder and delete the Test-Function02.ps1 file. Within the SourceTree client, navigate to the File Status tab and verify that the Test-Function02.ps1 file is in the Unstaged Files area and that it is accompanied by a red Remove icon (Figure 24-57).

Figure 24-57: Checking the file status after deleting a file
Click the check box next to the Test-Function02.ps1 file and it will move to the Staged Files area. Enter a commit message and select Push Changes Immediately To Origin/Master. Click the Commit button (Figure 24-58).

Figure 24-58: Click Commit to remove the file from the repository.
Using PowerShell to Automate GitHub Client Operations
The SourceTree client we have been using is actually executing commands for GitHub via a number of Git command-line tools that ship as part of the SourceTree client installation. You may notice these commands listed if you look at the full output when, for example, committing a change in the client. From the SourceTree client, it is possible to open a Terminal window to manage code in repositories with these tools. The Terminal window contains a number of visual enhancements, including colors, to make for a better experience. Out of the box this same functionality is not available in a PowerShell console. However, the PowerShell community has come to the rescue, and by using a project going by the fabulous name posh-git, you can bring that Git functionality to a PowerShell console.
Requirements
You will need the following:
- Git command-line tools preinstalled. You can get them from http://git-scm.com/download/win.
posh-git, which is available from http://dahlbyk.github.io/posh-git/
Installing Git Command-line Tools
Accept all of the defaults during the downloaded installation apart from modifying the Windows PATH environment variable. Select Use Git from the Windows command prompt instead (Figure 24-59).

Figure 24-59: Installing Git command-line tools
Installing posh-git
The easiest way to install posh-git is via PsGet (http://psget.net), a tool for managing PowerShell modules. You can install PsGet and subsequently posh-git via the following two lines of code. Be sure to run both lines from a PowerShell session with administrative permissions:
(New-Object Net.WebClient).DownloadString`
 ("http://psget.net/GetPsGet.ps1") | Invoke-Expression
Install-Module posh-git
Once it has been successfully installed, posh-git will activate anytime the PowerShell console is in a folder with a Git repository. Helpful colors will appear and the ability to Tab-complete Git commands will be active (Figure 24-60).

Figure 24-60: PowerShell console with posh-git active
Add Code to a Repository with posh-git
To add the Test-Function03.ps1 file to the repository with posh-git, navigate to the C:GitHubTest01 folder via a PowerShell console and use the commands git add, git commit, and git push in Listing 24-6. You will be prompted to authenticate with GitHub after the git push command.
Listing 24-6: Adding code to a repository with posh-git
cd C:GitHubTest01
git config --global credential.helper wincred
git add C:GitHubTest01Test-Function03.ps1
git commit -m 'Initial draft'
git push origin master
Check for Changes in a Repository with posh-git
To check for changes in the repository, navigate to the C:GitHubTest01 folder and use the commands git fetch and git pull as we did in Listing 24-7. If you used the credential helper, you won’t be prompted for GitHub credentials again; otherwise, you will need to reauthenticate.
Listing 24-7: Checking for changes in a repository with posh-git
git fetch origin
git pull origin master
These two examples of using Git commands and posh-git merely scratch the surface of what can be achieved. We recommend you look into using it further once you are comfortable with the GitHub system.