Chapter 29
Altering Rows with the OLE DB Command Transform
The OLE DB Command Transform is used to run a SQL statement for each row in the Data Flow. It sounds innocent enough, doesn’t it? The reality is that the statement “for each row” should immediately make alarms go off in your head. This involves kicking off an update, insert, or delete statement for each row in an input stream.
To put this into perspective, imagine you are loading a product dimension table in your ETL process. Your predecessor decided it would be best to update and delete these rows using an OLE DB Command. The company you work for is a major department store, and the new spring clothing line is coming in. So, all the winter clothes are being marked down. This means you are going to get an update with a price reduction for all the winter clothes your company has in inventory at one time. Using the OLE DB Command Transform would mean that your package would be running several thousand update statements and your package would run for hours. A situation like that one is why we recommend you avoid using the OLE DB Command Transform.
This doesn’t mean you should never use this transform, but it is important to understand its shortcomings when working with large amounts of data.
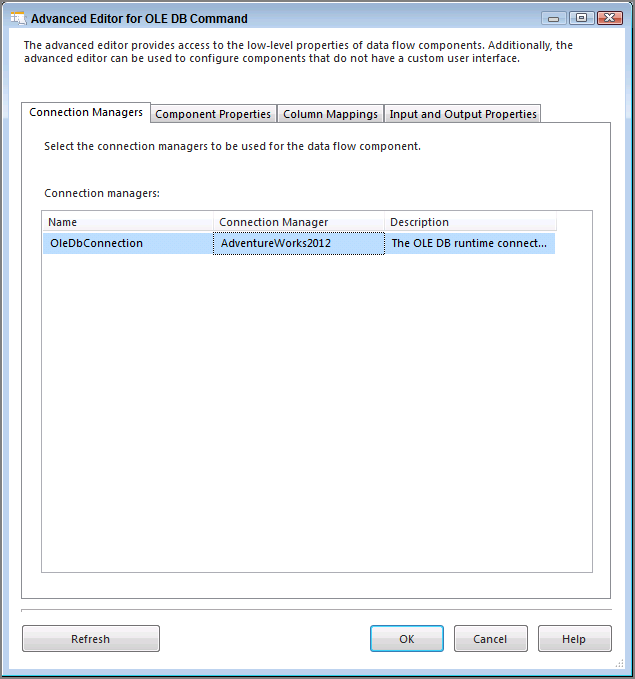
To use the OLE DB Command Transform, drag it from the Toolbox to the Data Flow design surface and double-click it. The configuration looks more complicated than it really is. From the Connection Managers tab, specify which OLE DB Connection you want to execute the SQL statement on. Figure 29-1 shows the AdventureWorks2012 database as the connection manager.
You set the SQL statement you plan to execute on the Component Properties tab. To enter your SQL statement, click the ellipsis next to the SqlCommand property. Remember that to tell SSIS that you are going to be using parameters in a SQL statement, you use a question mark (?).
You can also configure the amount of time before a timeout occurs in the CommandTimeout property, shown in Figure 29-2. This uses an interval of seconds where 0 denotes no timeout.

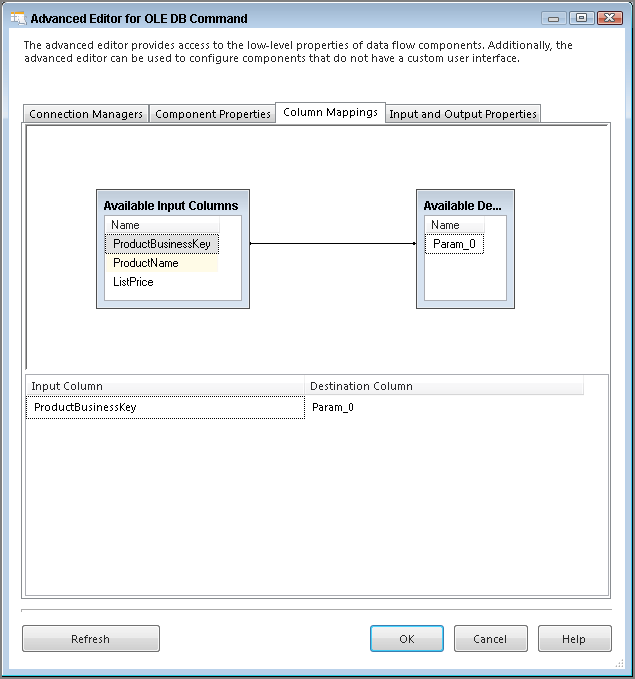
The Column Mappings tab in the Advanced Editor for OLE DB Command window is similar to the Mappings page in a destination editor. (Configuring destinations is discussed in more detail in Lesson 19.) It displays the input stream and destination columns, which are really the parameters indicated in the SqlCommand property. Any input column mapped to a parameter replaces the parameter with the value of that field. When you are mapping, remember that the order in which you place the parameters while writing the SQL statement is also the order in which they must be mapped. In Figure 29-3 you see how to map the following Update statement:
Update Production.TransactionHistory
Set ModifiedDate = ?
Where ProductID = ?
The last tab is the Input and Output Properties tab, which you will likely not ever have to change; it simply provides another place where you can add or remove columns that are used in the transform.
Try It
In this Try It, you work for a company that sells dartboard supplies. As new supplies are added to your inventory, some of the older products are being discounted. Use the flat file extract provided and update the price on all required products. After completing this lesson, you will know how to use the OLE DB Command Transform to alter data with a SQL statement inside the Data Flow.
You can download the completed Lesson29.dtsx and sample files for this lesson from www.wrox.com.
Lesson Requirements
Create a table in the AdventureWorks2012 database named Product_OLEDBCommand. You can find the code to create this table in the download for this lesson available at www.wrox.com.
Download the flat file named OLEDBCommandExample.txt from www.wrox.com to use as your source. Save this file to the C:ProjectsSSISPersonalTrainer directory.
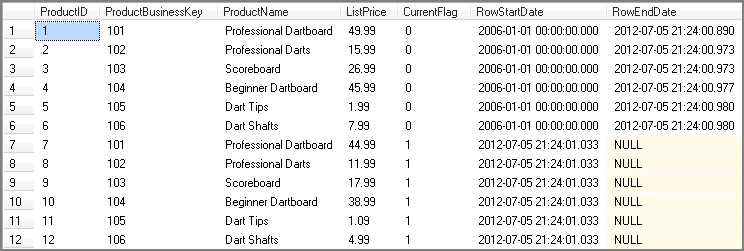
Update the current flag and row end date columns in the Product_OLEDBCommand table and then create new rows in the table representing the new list price.
Hints
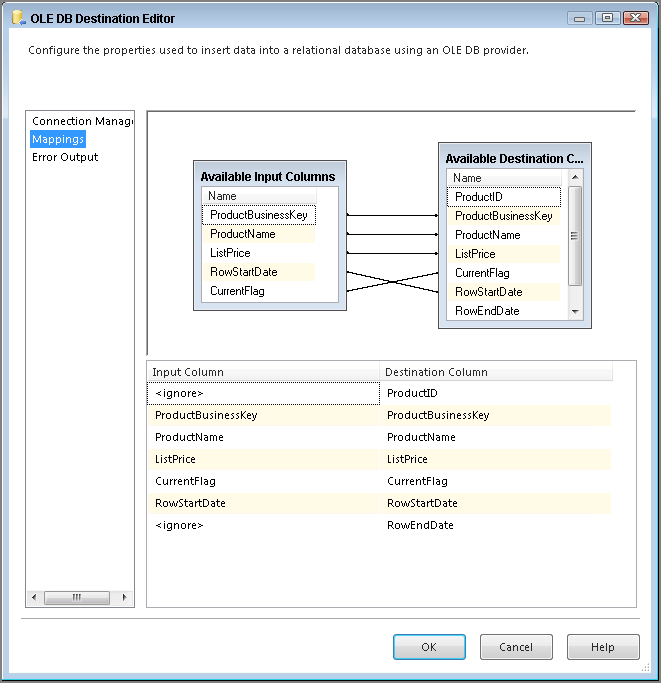
- Use the OLE DB Command Transform to update only two columns.
- After updating these fields, send the rest of the input stream to a regular OLE DB Destination to insert new records with the new list price.
Step-by-Step

CREATE TABLE [dbo].[Product_OLEDBCommand](
    [ProductID] [smallint] IDENTITY(1,1) NOT NULL,
    [ProductBusinessKey] int,
    [ProductName] [varchar](50) NOT NULL,
    [ListPrice] [money],
    [CurrentFlag] [smallint],
    [RowStartDate] [datetime],
    [RowEndDate] [datetime]
 CONSTRAINT [PK_Product_OLEDBCommand_ProductID] PRIMARY KEY CLUSTERED
(
        [ProductID] ASC
) ON [PRIMARY]
) ON [PRIMARY]

GO
INSERT INTO [dbo].[Product_OLEDBCommand] Select 101,
'Professional Dartboard','49.99', '1', '1/1/2006',Null
INSERT INTO [dbo].[Product_OLEDBCommand] Select 102,
'Professional Darts',15.99,1, '1/1/2006',Null
INSERT INTO [dbo].[Product_OLEDBCommand] Select 103,
'Scoreboard',26.99,1, '1/1/2006',Null
INSERT INTO [dbo].[Product_OLEDBCommand] Select 104,
'Beginner Dartboard',45.99,1, '1/1/2006',Null
INSERT INTO [dbo].[Product_OLEDBCommand] Select 105,
'Dart Tips',1.99,1, '1/1/2006',Null
INSERT INTO [dbo].[Product_OLEDBCommand] Select 106,
'Dart Shafts',7.99,1, '1/1/2006',NullUpdate Product_OLEDBCommand
Set CurrentFlag = 0,
RowEndDate = GETDATE()
Where ProductBusinessKey = ?
and RowEndDate is null