Chapter 15
Using the Send Mail Task
The Send Mail Task sends e-mail via Simple Mail Transfer Protocol (SMTP) from a SQL Server Integration Services (SSIS) package. This task enables you to receive information about the package that can be passed into the mail task through variables—system variables or user-defined variables. The Send Mail Task is most commonly used as a notification tool. The system variables in an SSIS package hold information such as package start time, errors, and warnings.
You can place the Send Mail Task at the end of a Control Flow to send e-mail on the successful completion of a package. The event handler of a package is also a great place to place the Send Mail Task (event handlers are covered in Lesson 48). You can place the task in the OnPreExecute Event Handler to notify you via e-mail that a package has begun. The OnPostExecute Event Handler can send mail at the end of a package showing the start and end for a package, therefore enabling you to track the run time of a package. When you place a Send Mail Task in the OnError or the OnWarning Event, you can be notified when an error or warning occurs anytime during the running of a package.
You can also use the Send Mail Task to send files, because it can send attachments. A Data Flow can exist in a package that creates a file, and a Send Mail Task can then send that file via e-mail. The file can be created in a Data Flow or by a File System Task. It can also be any file not created or altered by the package.
When you first open the Send Mail Task Editor by double-clicking a Send Mail Task, you see the General node, as shown in Figure 15-1. This contains the name and description of the task. These properties are used for ease of reference when viewing the task in the Control Flow; the name shows on the tasks in the Control Flow and the description is usually a longer line of text describing the purpose of the Send Mail Task. It is a best practice to always change the values of these fields to values that make it easy for anyone to see and understand the function of the task.

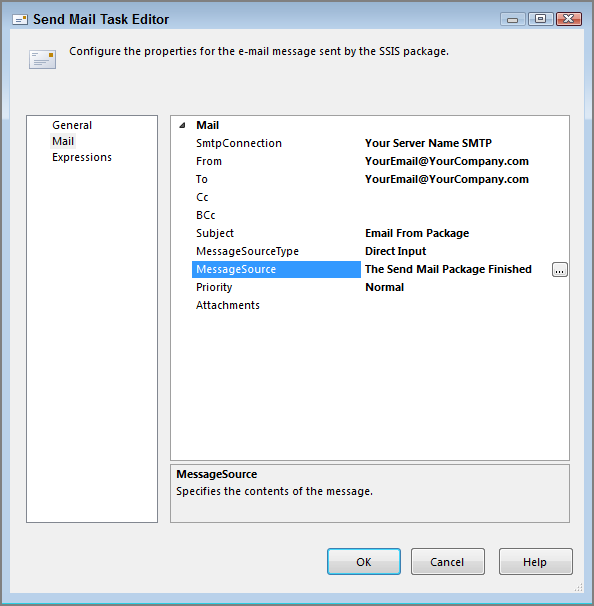
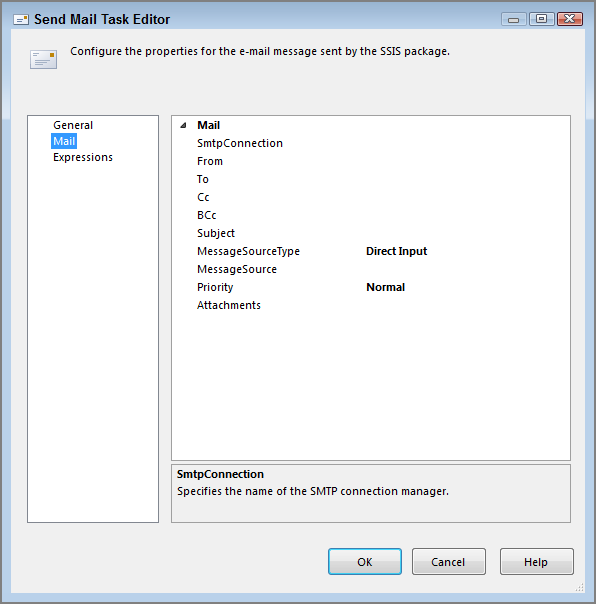
Clicking the Mail node in the left-hand pane opens the Mail properties. Here, you see the main properties of the Send Mail Task, as shown in Figure 15-2. The first property is the SMTP connection. This connection must exist in the connection manager.
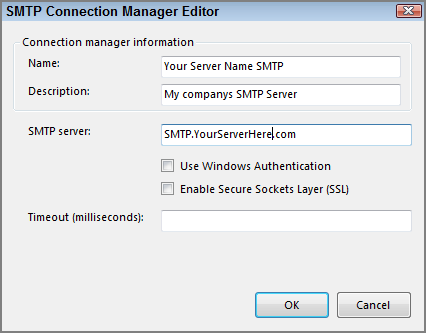
If the SMTP connection does not exist, you can create it by clicking <New Connection…> in the SmtpConnection drop-down menu, which opens the SMTP Connection Manager Editor, as shown in Figure 15-3. This enables you to create an SMTP connection in the connection manager. Once an SMTP connection exists in the connection manager, you can use this connection in all Send Mail Tasks.

Just as in the Send Mail Task, the SMTP connection (which is created in the connection manager) has a name and description. The name shows in the connection manager area below the Control Flow. The description is usually a longer line of text describing the purpose of SMTP connection. The SMTP server is the name of your server that will handle e-mail sent via SMTP. Below the server name, you see two check boxes: Use Windows Authentication and Enable Secure Sockets Layer (SSL). When you check Use Windows Authentication, the package passes the user credentials of the person running the package through to the SMTP server for verification to send the e-mail. Checking Enable Secure Sockets Layer (SSL) sends the e-mail via Secure Sockets Layer. The security type you select will vary based on your environment. One new feature of the SMTP Connection is the Timeout option. Set this to the number of seconds you want the SMTP Connection to attempt to connect before timing out if it has trouble connecting.
Returning to the Send Mail Task Editor, you see that the next properties of the Send Mail Task are the basic fields of an e-mail:
- From—The e-mail address that will show as the sender
- To—The receiver of the e-mail
- Cc—Sends a carbon copy e-mail
- Bcc—Sends a blind carbon copy e-mail
- Subject—Shows in the subject line of the e-mail
The From, To, and Subject properties should be very familiar to anyone who has sent an e-mail. The carbon copy sends a copy of the e-mail to another e-mail address along with the To e-mail address. The recipients can see both of the e-mail addresses receiving the e-mail. Blind carbon copy sends the e-mail to another recipient along with the user in the To field, but the To recipient cannot see the Bcc e-mail address.
The next property to set is the MessageSourceType. It has three options:
- Direct Input—Message is typed into the Send Mail Task
- File Connection—Message is saved in an external file
- Variable—Message is stored in a package variable
Direct Input is the easiest to use. This method enables you to type the message command directly into the Execute SQL Task. The advantage of this method is that the message is easy to enter. The disadvantage is that the message cannot be altered outside of the package. So, maintenance is more difficult and requires you to alter and redeploy the package, which can be cumbersome and time consuming.
The File Connection option makes it easy to alter the message from outside of the package. So, as your business needs change and you need to select different data for your package, you can do this very easily. The disadvantage here concerns maintaining and securing your files. Imagine if someone inadvertently deletes all of the message files that your company’s packages use daily. Any packages using these files would then fail at run time.
The Variable option as the message source is similar to Direct Input because the variable is stored in the package. However, configuration files make it easy to alter variables outside of the package. Thus, you can alter the package without altering and redeploying it, giving you the best of both worlds in this situation.
Once you have selected the MessageSourceType, you have an option to enter a message statement, select a file connection, or select a variable. The option shown changes based on the MessageSourceType you selected.
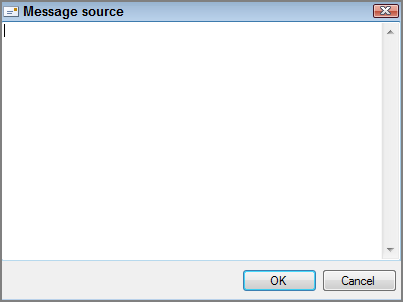
If you selected Direct Input, you see a message source option, and clicking the property makes an ellipsis appear. Clicking this ellipsis opens a small editor window in which to enter the message, as shown in Figure 15-4. The editor is not much more than a small notepad with fewer options. This is not an optimal place to enter a message. When you select Variable or File Connection for the MessageSourceType, the message source changes to a drop-down menu that enables you to select the file or variable. Files and variables are easier to edit than direct input and are, therefore, a better practice.
The Priority property enables you to set the priority mail flag on an e-mail. These are the small symbols you see in Outlook. High priority shows a red exclamation point, normal priority shows no icon, and low priority shows a blue arrow pointing down. However, remember that although this is true in Outlook, other e-mail programs may not show icons.
The last option is Attachments. Here, you can select a file that you would like to send to the recipients. This attaches the file to the e-mail just the same as if you attached it to a standard e-mail. This can be a file that was created in the package by a File System Task, or a completely separate file not used anywhere else in the package.
Try It
In this Try It, you create a Send Mail Task to send an e-mail. This e-mail will be in a Control Flow. When the package is successful, the e-mail will be sent and tell you the package has finished running, giving you an understanding of how the task can be used as a notification tool.
You can download the completed Lesson15.dtsx from www.wrox.com.
Lesson Requirements
You need to create a Send Mail Task. The SMTP information needs to be your own SMTP connection information so that the e-mail can be sent via your SMTP connection.
Hints
- You need one Send Mail Task.
- You need to set up an SMTP connection.