Chapter 12
Using the Execute SQL Task
When you are creating a SQL Server Integration Services (SSIS) package, you will find that one of the most commonly used tasks is the Execute SQL Task. This task is used to insert, update, select, and truncate data from SQL tables. Any normal SQL commands you would use can be used in this task. You can use parameters just like a stored procedure and can even call stored procedures from the task. A connection to the database must exist in the connection manager for the Execute SQL Task to reference.
Double-click an Execute SQL Task in the Control Flow to open the Execute SQL Task Editor. The first screen on the editor lists four nodes in the left pane:
- General
- Parameter Mapping
- Result Set
- Expressions
In the General node, shown in Figure 12-1, you see the main properties that you need to set for the Execute SQL Task. The first two properties are Name and Description. These properties do not affect the task. They are used for ease of reference when viewing the task in the Control Flow. The name shows on the task in the Control Flow. The description is usually a longer line of text describing the purpose of the Execute SQL Task. It is a best practice to always change the values of these fields to values that make it easy for anyone to see and understand the function of the task.

The next two options are the TimeOut and CodePage. The timeout is the number of seconds you want the Execute SQL Task to run before the task stops and reports a timeout failure. A setting of zero is infinite.
Code pages are set based on the code page that is used on the SQL server. In the United States, the common code page is Western European (1252). If you are using a different code page, such as Korean (949), you would need to change the code page to match the code page of the server. The code page option is available only for the following connection types:
- Excel
- OLE DB
- ADO.NET
- SQL Mobile
The TypeConversionMode option is new in SQL Server 2012. This option allows the Execute SQL Task to convert data types when saving to a variable. The data types for SSIS variables do not match exactly to the data types in SQL Server. This mismatch can cause headaches due to needed data conversions. In SQL Server 2012, that headache is relieved with the new TypeConversionMode option. Set this mode to Allowed and the Execute SQL Task will convert some items to match the variable types when necessary.
To see this in action, run the following query in an Execute SQL Task and map the results to an int32 variable in SSIS (mapping is covered later in this chapter):
Select Cast(1 as decimal) as Col1If you have the TypeConversionMode set to Allowed, the task succeeds. If you have the TypeConversionMode set to None, the Execute SQL Task fails with the following error:
[Execute SQL Task] Error: An error occurred while assigning a value to variable
"intVar": "The type of the value (String) being assigned to variable
"User::intVar" differs from the current variable type (Int32). Variables may not
change type during execution. Variable types are strict, except for variables
of type Object.
The ResultSet property is the type of returned data from the SQL command. This can be None when the SQL command is not returning data, as with an insert command. The result set can be a single row. This single row can be stored in a string or integer variable. It can also be a full result set or XML, which can be stored in an object variable. These variables are set in the Result Set node.
When you click the Result Set node in the left pane of the Execute SQL Task Editor, you see the Result Set pane, as shown in Figure 12-2, where you can create new result set variables by clicking the Add button. The Add button is not available here if the ResultSet property on the General node is set to None. The result set name is the name of the returning data. This can be an alias you gave to a selected set of data. If you did not give the data an alias, you would enter the number 0 to indicate the first result set returned.

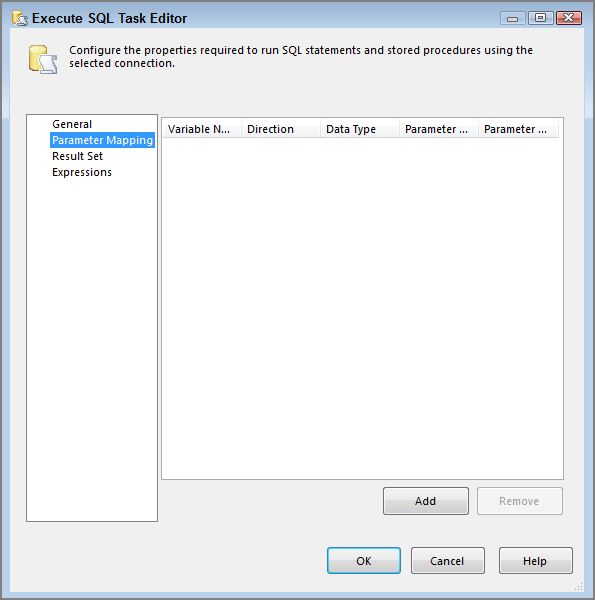
The Parameter Mapping node (also in the left pane of the Execute SQL Task Editor) is where you set up the parameters that you want to pass into the SQL query. The SQL query can handle multiple parameters. In this screen, as shown in Figure 12-3, you can create the parameter mappings to connect the parameter in the SQL command to a package variable. You see an example of parameters later in this lesson.
You can use the Execute SQL Task to count data in a table and return a number for the result set. If the count is returned as an alias, you can name the result set. For example, if the SQL query looks like this:
Select Count(*) as Counter From Production.Productthe result set will be Counter, and you can assign it to an integer variable that you create in the package using the Result Set node. If the SQL query is returning more than one row, you need to store that in an object variable. Once you have the data stored in a package variable, you can use this data throughout the rest of the package and in other tasks or expressions.
Returning to properties in the General node, you can see the next property you need to address is the ConnectionType. The Connection Type drop-down box contains six options:
- Excel
- OLE DB
- ODBC
- ADO
- ADO.NET
- SQL Mobile
These connections can be used to retrieve data from the connection types using the SQL language. This lesson covers the OLE DB connection and selecting data from a SQL Server table because this is very common.
Once you have selected the connection type, you can click the Connection drop-down menu. If the connection you want to use already exists in the connection manager, you can select the connection from the drop-down menu. However, at the top you see the <New Connection> option. Clicking <New Connection> opens a corresponding connection creation window depending on the connection type you select. If you select the OLE DB connection type, you see the window shown in Figure 12-4, where you can create a new OLE DB connection.

The next property to set is the SQLSourceType. It has three options:
- Direct Input—SQL command typed into the Execute SQL Task
- File Connection—SQL command saved in an external file
- Variable—SQL command stored in a package variable
Direct Input is the easiest to use. This method enables you to type the SQL command directly into the Execute SQL Task. The advantage of this method is that the SQL command is easy to enter. The disadvantage is that the SQL command cannot be altered outside of the package. So, maintenance is more difficult and requires the package to be altered and redeployed. This can be cumbersome and time consuming.
The File Connection option makes it easy to alter the SQL command from outside of the package. So, as business needs change and you need to select different data for your package, you can accomplish those changes very easily. The disadvantage here concerns maintaining and securing your files. Imagine if someone inadvertently deletes all of the SQL command files that your company’s packages use daily. Any packages using these files would then fail at run time.
The Variable option as the SQL source is similar to Direct Input because the variable is stored in the package. However, because configuration files make it easy to alter variables outside of the package, you can alter the package without altering and redeploying it, giving you the best of both worlds in this situation.
Once you have selected the SQL source type, you are given an option to enter a SQL statement, select a file connection, or select a variable. The option shown changes depending on the SQL source type selected.
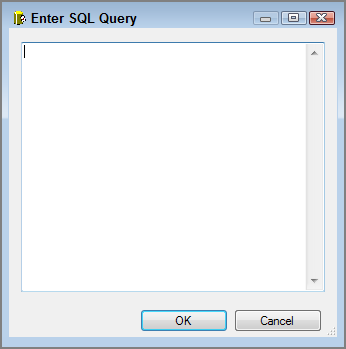
If you have selected Direct Input, you see a SQL statement option, and clicking the property makes an ellipsis appear. Clicking this ellipsis opens a small editor window in which to enter the SQL command, as shown in Figure 12-5. The editor is not much more than a small notepad with fewer options. It’s not an optimal place to enter SQL, and there is no color coding to help developers entering SQL code. You might find it a better option to go to SQL Server Management Studio and type the SQL command there so you receive the benefits of color coding and IntelliSense. This will make the SQL coding much easier. Then, copy and paste the SQL command into the Direct Input window.
Parameters enable you to select different data with the same SQL command. The parameters are entered into the direct SQL command using question marks, as shown in the following code:
Select Count(*) as Counter from Production.Product where ProductID = ?This SQL command selects the number of products in a table that have the product ID in the parameter you pass into the tasks. You set this up with variables in the Parameter Mapping node. You can click the Parameter Mapping node and click the Add button to create a parameter mapping for the task. The names of the parameters start at 0 and count up. So, if you have three question marks in your SQL query, representing three parameters, your parameter mappings will be 0, 1, and 2.
Once again returning to properties in the General node, you can see the next property is IsQueryStoredProcedure. This property is available on the ADO and ADO.NET options only. This is set to True when the SQL command is calling a stored procedure from the ADO connection. This stored procedure name can be stored in direct input, a file connection, or a variable.
The BypassPrepare property indicates whether the task should prepare the query before the execution of the query. Preparing a query is similar to compiling. A prepared SQL statement does not need to be analyzed every time it is used. This property must be set to False before the Parse Query button will actually parse the SQL query.
The three buttons at the bottom of the Execute SQL Task on the General node are:
- Browse—Searches for .SQL files in the filesystem
- Build Query—Query builder, similar to the query builder in SQL Management Studio
- Parse Query—Parses the SQL query checking for syntax errors
These can be used to help build the SQL query for the task. The browse features allow users to find SQL queries stored in files in the structured filesystem. The query builder helps build an error-free SQL query with a visual representation of the tables and their joins. And as already mentioned, the Parse Query button will not parse the query unless the BypassPrepare property is set to False.
Try It
In this Try It, you build an Execute SQL Task to return data from a table in the AdventureWorks2012 database. After this lesson, you will have a grasp of how to use the Execute SQL Task to query data from a data source and store the results in a variable.
You can download the completed Lesson12.dtsx and sample code from www.wrox.com.
Lesson Requirements
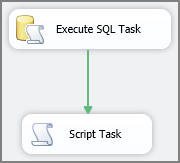
First, you want to count the number of products with a certain product ID. Then, you are going to have a Script Task pop up the value of the variable.
Hints
- You need a Script Task and an Execute SQL Task.
- Create a variable to hold the return value.
- Create a variable to hold the product ID.
- Create a Script Task with a popup message showing the variable value.
Step-by-Step
Select Count(*) as Counter from Production.Product Where ProductID = ?Msgbox(DTS.Variables(“intProductCount”).Value)