Chapter 8
Upgrading to the Project Deployment Model
In SSIS 2012, the project deployment model has become the new standard for how packages are created, configured, and deployed. Any new packages that are developed are automatically set up to use the project deployment model.
Having this new deployment model means several things for you, especially if you developed SSIS packages in previous versions of SQL Server. For example, these features, which you may have used previously, are no longer available in the project deployment model:
- Data sources
- Configurations
- Package deployment
Although the features have been removed in the project deployment model, they are easily replaced with new tools. Following are some of the major features that are either new or have been changed in the project deployment model:
- Project connection managers (discussed in Lesson 6)
- Project deployment (discussed in Lesson 53)
- Project parameters (discussed in Lesson 33)
- Environments and environment variables (discussed in Lesson 54)
As you can see, much of what you can do when developing is focused more on the project than the package, as it was in the past. This may change how you organize your packages because, as “project deployment” implies, you will now be deploying entire projects and not just individual packages. So if you put all your packages into a single project, regardless of what part of the business they affect, they will all have to go into the same deployment path with the new model.
So, if all new packages developed use the project deployment model by default, what about packages that have been upgraded from SSIS 2005 or 2008? Remember in Lesson 7 you learned that when you upgrade packages to SSIS 2012, they are converted to use the package deployment model by default, which is the legacy way of developing packages. If you want to fully upgrade your packages to use the new deployment model, you must run the Integration Services Project Conversion Wizard.
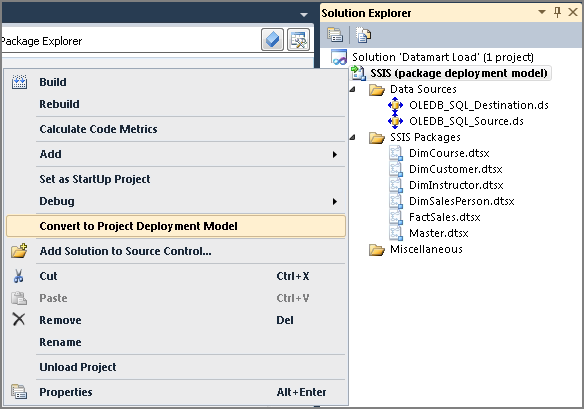
To launch the Integration Services Project Conversion Wizard, right-click a project in the Solution Explorer and select Convert to Project Deployment Model, as shown in Figure 8-1. This wizard walks you through the steps of applying project encryption, updating Execute Package Tasks to use internal project references, and converting configurations to parameters. The Try It section of this lesson walks you through the detailed steps of using this wizard.
You can also choose to leave your packages in the package deployment model if you prefer the old method of administrating packages. However, if you decide to stay in the package deployment model, you will miss the features like executing packages with T-SQL and monitoring package execution reports. These features are detailed later in this book.
Try It
In this Try It, you use the solution you upgraded in the previous lesson and convert it to use the project deployment model.
If you did not complete the previous lesson, you can download the files you need from www.wrox.com. The Lesson 8.zip file contains the completed Try It files from Lesson 7 and the Lesson 8_Completed.zip file contains the completed files from this lesson.
Lesson Requirements
Make the following changes to convert the solution to a project deployment model. You can also find the fully converted Lesson 8 project at www.wrox.com:
- Use the Integration Services Project Conversion Wizard to convert to the project deployment model.
- Apply project-level encryption.
- Update Execute Package Tasks to use internal project references.
- Replace configurations with project parameters.
Hints
- Right-click the SSIS project in the Solution Explorer to launch the Integration Services Project Conversion Wizard.
Step-by-Step
1. Open the Datamart Load.sln file in SQL Server Data Tools. This file is in the folder C:ProjectsSSISPersonalTrainerLesson 8, which you downloaded from
www.wrox.com. If you completed the Try It section of Lesson 7, then you can also use that.
2. After opening the solution file, open the Solution Explorer and right-click the project named SSIS. Click Convert to Project Deployment Model to launch the Integration Services Project Conversion Wizard.
3. As soon as you select to convert the packages, a prompt appears (
Figure 8-2) warning you that data sources you have in the Solution Explorer will be removed with the project deployment model. Click OK to continue past the warning.
4. The Introduction screen briefs you on the steps the wizard will take to convert your package. Click Next.
5. Select the packages you want to convert and apply any password you may have on the packages, as shown in
Figure 8-3. Click Next after reviewing the selection.
6. You are prompted to add a package protection level. If you’ve developed in SSIS in prior versions, this may be familiar to you because you could do this on individual packages. Now this capability has been extended to projects. Change the protection level to DontSaveSensitive, then click Next. DontSaveSensitive means that any “sensitive” information, usually referring to connection string passwords, will not be saved for others to open and use.
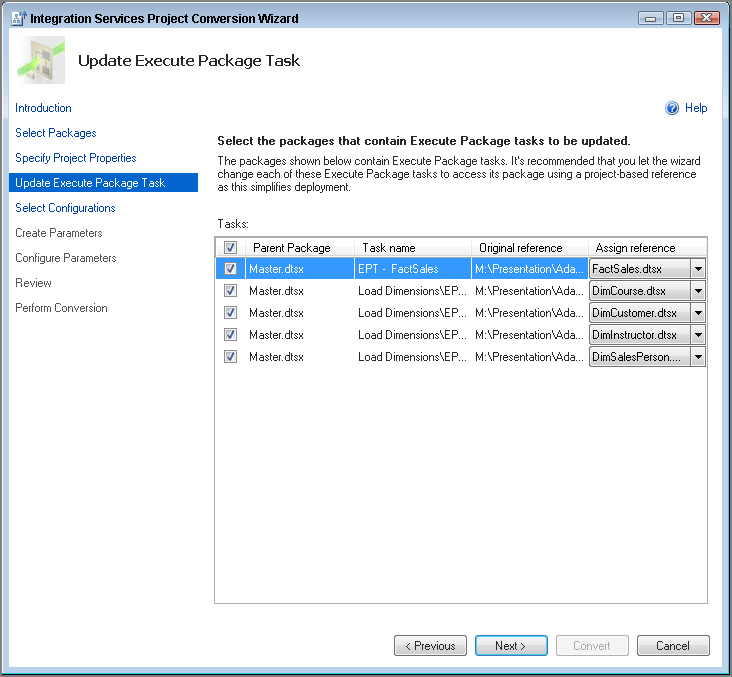
7. On the Update Execute Package Task screen, use the default assign reference as shown in
Figure 8-4 and click Next. This updates the Execute Package Task in Master.dtsx to no longer use a file connection, but instead use an internal project reference.
8. The next step identifies all configurations that are being used to convert them to parameters. With the project deployment model, configurations are no longer used and are replaced with either package or project parameters.
Figure 8-5 shows each of my packages has two configuration files being used. These will be replaced with parameters on the next screen. Use the default selection here and click Next.
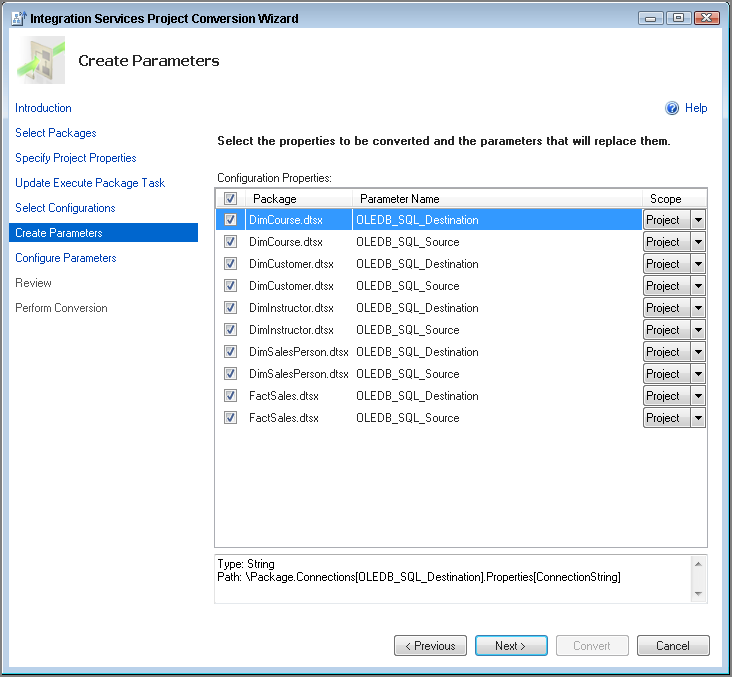
9. The wizard suggests that two project parameters be created to replace the configuration files. A project parameter is used because it can be shared across the entire project. A package parameter would only be available in a single package. In
Figure 8-6, it appears as though several parameters will be created, but keep in mind that these are project parameters and they can be shared in multiple packages, so only two will be created on the next screen. Click Next.
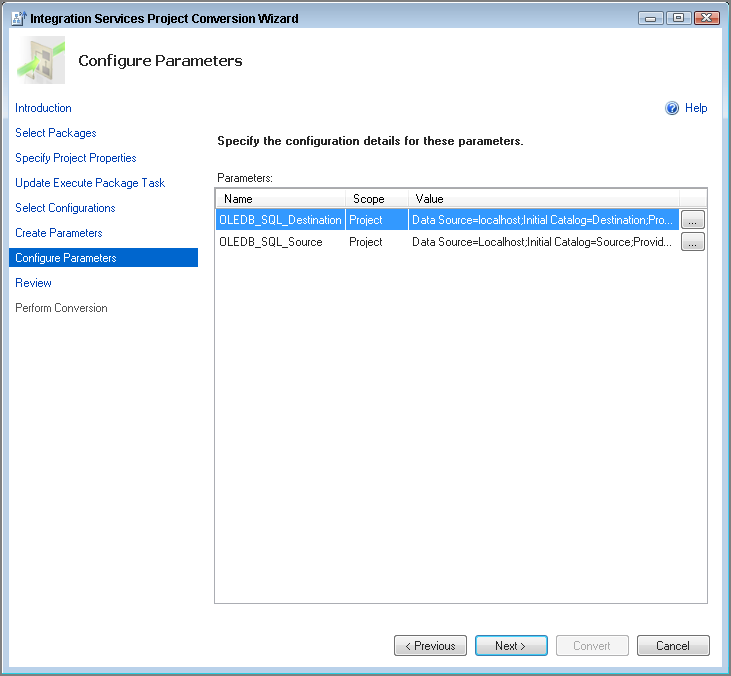
10. Next, the wizard creates the two parameters identified in the previous screen, but you can make changes to them prior to completing the wizard. Go with the default configuration (
Figure 8-7) and click Next.
11. The final review screen enables you to evaluate your settings. Click Convert to begin the conversion process.
12. Once the conversion completes, your screen should look like
Figure 8-8. You will see an information pop-up telling you that the changes will not be saved until you save your Visual Studio session. Click OK on the information pop-up and click Close on the Integration Services Project Conversion Wizard.
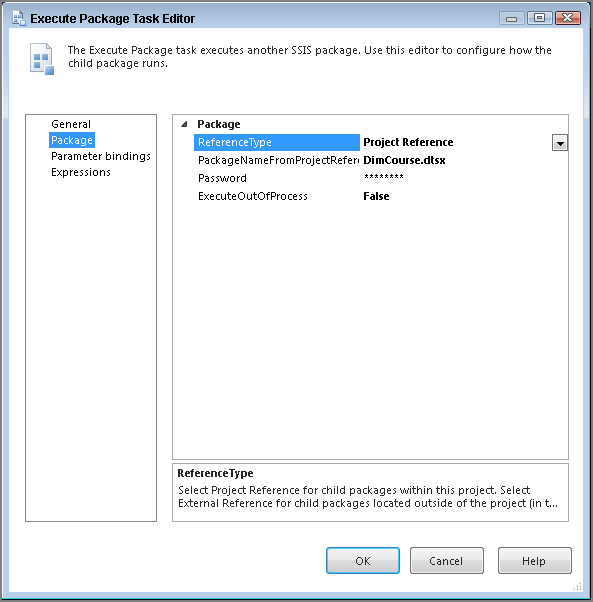
13. If you would like to review the changes the wizard made, open the Master.dtsx package and take a look at the configuration for one of the Execute Package Tasks.
Figure 8-9 shows the ReferenceType property changed to Project Reference.
14. The wizard also created two project parameters called OLEDB_SQL_Destination and OLEDB_SQL_Source, which replace the previously-used configurations. These parameters fully replace the configurations by applying expressions on the connection managers that reference the project parameter values.
Figure 8-10 shows the expression the wizard applied to the one of the connection managers. Read Lesson 54 to see how these parameters can easily be changed from outside the package using environments in the Integration Services Catalog.