
Mobile Cloud Programming and Application Platform
Using NIST cloud computing definition [200], PaaS is a good reference model to describe the functional collaboration features, in which it provides a standard Application Platform Interface (API) for functions (or services) to call each other.1 The main challenge in establishing MCC PaaS is the compatibility issue among many mobile operating systems in the current market, e.g., Android, iOS, Windows 7, Symbian, etc. A general application platform is required to integrate the IaaS delegation and NaaS service model to support different mobile application platforms. To this end, we presented an XMPP [282] plus OSGi [222] (i.e., Extensible Messaging and Presence Protocol plus Open Services Gateway initiative) solution in Section 4.2. XMPP is a set of open technologies. It provides a lightweight middleware solution to coordinate the operations among MCC components. It also supports multimedia data transmissions and presence services that can be easily integrated as general interfaces for MCC PaaS. By interfacing with XMPP, OSGi provides multiplatform supported Java programming capabilities. Standard OSGi bundles supporting MCC basic functions can be created as software development kits for easier programming. Distributed OSGi allows MCC to run applications in a distributed fashion to balance performance and energy consumptions of mobile devices. An example based on OSGi framework is presented in this appendix.
The example includes two parts: an Android app and a surrogate server in VM. The experiment includes two stages: passing the compute code from Android app to the surrogate server, and establishing the service binding between original app and the offloaded code. The experiment example leverages the OSGi framework for code encapsulation and service discovery/binding. Although there are many offloading implementation approaches, we use OSGi and Android to illustrate the compute offloading process as an example to let the reader get the basic compute offloading ideas.
The OSGi framework provides the modular encapsulation. The compute offloading packages the code piece and sends to the surrogate to host it, which requires that the code piece is well packaged. Besides, the mobile application and the surrogate server agree on the code format so that the surrogate can successfully run the offloaded code. We run OSGi framework on both mobile device and the VM, which make the code agreement easy. Moreover, the OSGi framework is service oriented, which may help the code discovery and sharing.
In the experiment, we use a PC as VM. But you can use either laptop or PC, or a VM in the cloud if you want, as long as your phone can talk to the surrogate machine. We use TCP instead of XMPP to simplify the implementation. In our experiment, the PC and the phone are in the same local network through a WiFi switch.
This chapter is organized in four sections. Section B.1 sets up the environment and prepares the OSGi on Android application. Section B.2 implements the code transfer from Android application to the surrogate server. Section B.3 implements the service binding to let mobile application to consume the hosted code in the VM. Section B.4 puts all the components together to run the experiment application in offloading mode.
In this chapter, we will build 4 OSGi bundles: surrogate.jar in Section B.2 and the other 3 bundles (provider.jar, consumer.jar and manager.jar) in Section B.3. We will run the two OSGi frameworks and four bundles together to demonstrate how the compute offloading works in Section B.4. All the code in this chapter is available on github.2 The code runs on Nexus 4 with Android 5.1.1 and Windows 10.
B.1 Run OSGi Frameworks
This section demonstrates how to run OSGi framework on both PC and Android to prepare for the following sections.
B.1.1 OSGi on Laptop
There are several OSGi framework implementations, among which Apache Felix is adopted in our experiment. The Felix is available from http://felix.apache.org/downloads.cgi#framework. The Felix Framework Distribution is what we need. Download and unzip it into any directory you want. Then start a command line window to interact with the Felix OSGi framework. We assume that Java is already installed.
B.1.2 OSGi on Android
To run the OSGi on a PC is straightforward, but to run OSGi in an Android application is a bit tricky.

The OSGi framework can be instantiated as an object which can be embedded into the Android application. The Felix subproject Main implements an embedded OSGi framework, which helps implement the embedded OSGi framework object on Android.
1. Create an Android application. From Android Studio Create Project wizard, choose the simple Android application to create an Android application with empty activity; see Fig. B.2.

2. Runing Felix on Android. For the Android project, we do not use the Felix OSGi Distribution like we did for the PC. Instead, we download the Main subproject jar file.3 The Main subproject is the essential core of the Felix Framework Distribution, while Felix Framework Distribution provides directory structures and configurations and default bundles for a user to run the Felix framework easily.
3. Setup directory. To use the downloaded Main jar file, we have to put it in the libs folder of Android project and indicate it as dependency library; see Fig. B.3.

4. Update configuration file. Update the /app/src/main/res/layout/activity_main.xml file to have the text view match the screen. This TextView widget is used to display output from the OSGi bundles.

5. Setup logging. Update the app/src/main/java/edu.asu.snac.offloading/MainActivity file to redirect the standard out and err stream to the TextView widget we just set. Thus, all the prints from OSGi bundles will show up on the screen.

6. System files directories. In our experiment, we need 3 directories for bundles: auto-load directory, file-install directory, and runtime-cache directory.
• The auto-load directory contains the bundles that will be loaded when the OSGi framework starts, which includes the remote-shell bundle and file-install bundle.
• The file-install directory is monitored by file-install bundle. Any bundles in the file-install directory will be automatically installed in the OSGi framework and removing the bundle jar file from the directory will lead to uninstalling the bundle from OSGi framework. The file-install bundle is helpful for easy deployment.
• The runtime-cache directory is for Felix OSGi framework to cache the bundles at runtime. The runtime-cache directory is managed by Felix OSGi framework.
We prepare these directories and clean the runtime-cache directory every time we start the OSGi framework so that it is in a clean state every time.

7. Start the framework. Set OSGi framework configuration and start it in a new thread.

8. Setup access permissions. Add permission for network and storage access in the app/src/main/AndroidManifest.xml file.

9. Prepare auto-load bundles. We need several bundles from Felix subprojects to make us access the OSGi inside Android application easily. From http://felix.apache.org/downloads.cgi#subprojects, download the Shell, Remote Shell, File Install, Bundle Repository, Configuration Admin bundle jar files in one directory. These jar files cannot be used directly on Android. We have to dex them before Android can recognize them.
(a) Set the Environment Path so that the command dx and aapt are available on the command line. The dx and aapt programs are available from Android SDK build-tools. On the PC, add AndroidSDKPathbuild-tools<version> to the System environment path. Type dx and aapt on command line and make sure the help information is shown.
(b) Open a command line window in the directory where you put the 5 bundle jar files. Run the following one-line command to dex them.

10. Connect devices. Connect the phone to Android Studio through USB connection and run the application. The application shows in the phone similar to Fig. B.4. We ignore the config.properties file and last class loader problem.

11. Transfer files. Transfer the 5 dexed jar files to the phone and put them into the “auto-load” directory shown on the phone screen using any tools you like. Then, restart the application from Android Studio.
12. Remote access to the Android phone. Open command line window and try to telnet to the phone by command “telnet <phone ip> 6666”. The telnet command shows the Remote Shell of the Felix OSGi, which is exactly like you are accessing the local OSGi framework as shown in Fig. B.5. In this way, we can easily access the OSGi framework on the Android phone through our development PC.

B.2 Running Surrogate Server
The surrogate server runs on the VM. It accepts the code from the Android application and hosts the code. The code is actually an OSGi bundle, which can be fetched from the bundle cache on Android and sent to the VM. The surrogate server accepts the bundle and runs it.
The surrogate server has two TCP servers binding to an address and listening to two ports. In our simple example, it accepts all the coming bundles and all remote invocations. The surrogate server itself is a bundle, which can be installed on the OSGi framework.
The Eclipse provides easy development environment as Eclipse itself is based on OSGi framework. We will use Eclipse Java Enterprise Edition or JaveEE to develop our bundles.
1. Create OSGi project using Eclipse Plug-in Wizard. We choose simple Hello World bundle template to start; see Fig. B.6.

2. The surrogate server bundle has two servers. One of them, named JarFileReceiver, is to accept the bundle jar files from the Android phone and start the received bundle. The JarFileReceiver starts TCP server listening on a port and writes to a temporary directory. The other server, named ServiceCaller, is to respond to the remote procedure call when the Android phone would like to call the offloaded code. The ServiceCaller also starts a TCP server and fetches the local OSGi service object through Java reflection mechanism. The surrogate bundle starts the both servers as two threads.
The TCP server code sketch used by both servers is as follows:

3. Implement JarFileReceiver server. The JarFileReceiver server reads the stream from the socket and writes a local temporary file which is the bundle file and which will be installed. The code sketch to write the bundle file is as follows:

After we have the bundle jar file, we can install and start it. The bundle context from the bundle Activator input parameter is the bridge to the OSGi framework through which we can install the bundle file. The code sketch to install and start the bundle is as follows:

4. Implement ServiceCaller server. The request from the Android phone is encoded in a Json string and the response is also a Json string. A Json utility to serialize and deserialize the Java object is adopted in the ServiceCaller implementation.
The Java reflection mechanism help us to locate the method the request would like to call. The following code sketch shows the method invocation on the local service object:

The invocation has 4 steps. The first two steps locate the service object as well as the method and the input parameters. The third step makes the invocation to get the result.
5. Package the bundle and run it on the VM; see Fig. B.7. The generated bundle can be installed to the local Felix OSGi distribution through the command line.

B.3 Service Binding
When the surrogate server is hosting the offloaded code, the Android application may access the hosted code through many ways, such as remote procedure call, web service, language binded approach like Java RMI, or application customized approach. In our experiment, we use OSGi service binding to make the Android application access the code in the VM.
B.3.1 A Simple Service
Since the OSGi framework is service oriented, we define a very simple addition service just for illustration. In real scenario, more complicated service may be defined.
1. The interface has only one add() method. The service interface is presented below:

2. We create a bundle which registers an object that implements the SimpleServiceInterface. The registration happens when the bundle starts, and unregistration happens when the bundle stops.

3. The bundle that contains the service implementation of the previous steps is the service provider, which will be offloaded to the surrogate server. We need a service consumer to call the service, e.g.,

It calls the service once when the bundle starts and prints the result.
4. Wire the service consumer and service provider. Since the service provider and service consumer are in different bundles, there has to be a way to let them know each other. The MANIFEST.MF indicates the export and import packages, so that they know each other's package.
In the service provider bundle, we add

In the service consumer bundle, we add

5. Update the MANEFEST.MF file. The Eclipse plug-in Wizard generates the dependency on JavaSE; however, it is not available on Android. We have to remove the Bundle-RequiredExecutionEnvironment: JavaSE-1.x from the bundle manifest file.
6. Export, dex/aapt and upload the jar file to the phone as we did in Section B.1.2, step 9. There is bundle-watch-dir directory for File-Install bundle, where we put both the service provider and consumer bundles.
We can start the uploaded bundles from the remote shell and observe the bundle output on the phone screen. Both bundles should work on the PC as well.
When the service bundle is started, starting consumer bundle displays the result of calling the service. When the service bundle is not started, starting the consumer bundle displays a notice saying the service is not ready.
B.3.2 Service Proxy on Android
To bind the service provider in the VM and the service consumer in the Android application, we need a proxy and a stub to make the service binding transparent to the service consumer and provider. The stub on the PC side is implemented in Section B.2.
A manager bundle is created to generate the proxy on the phone. In our experiment, the manager bundle finds the local SimpleServiceInterface service object and sends it to surrogate server. Then, it creates a proxy and connects to the remote surrogate server on the PC.
The manager bundle and both simple service bundles are developed in Eclipse and prepared to be uploaded to the Android phone.
Sending Code to Surrogate Server
The Android application needs a client to talk to the surrogate server to send the code to it. A simple TCP client will do the work. The bundle code file is sent as a byte stream.
1. Fetch the bundle file from the bundle cache. The Felix OSGi framework caches the installed bundle in the cache directory which is set when we start the framework.
The Felix bundle in the runtime cache is versioned. We find the latest version and get the file path given bundle id:

2. Initiate the byte stream transfer. On Android, the network operations should be in a thread other than UI thread. We create a new thread to send the bundle file to the surrogate server.
In the field, the VM has URL to access to. In our experiment, we use IP address directly to simplify the implementation.

Since the surrogate server in our example accepts the bundle code blindly, the bundle thread sends the bundle file and exits.
Generate Proxy at Runtime
Once the service bundle is migrated to the PC, there has to be a proxy on the Android phone to proxy the service consumer request to the remote PC so as not to break the service binding. Thanks to the Java reflection mechanism, we can generate the proxy object on the Android phone at runtime.
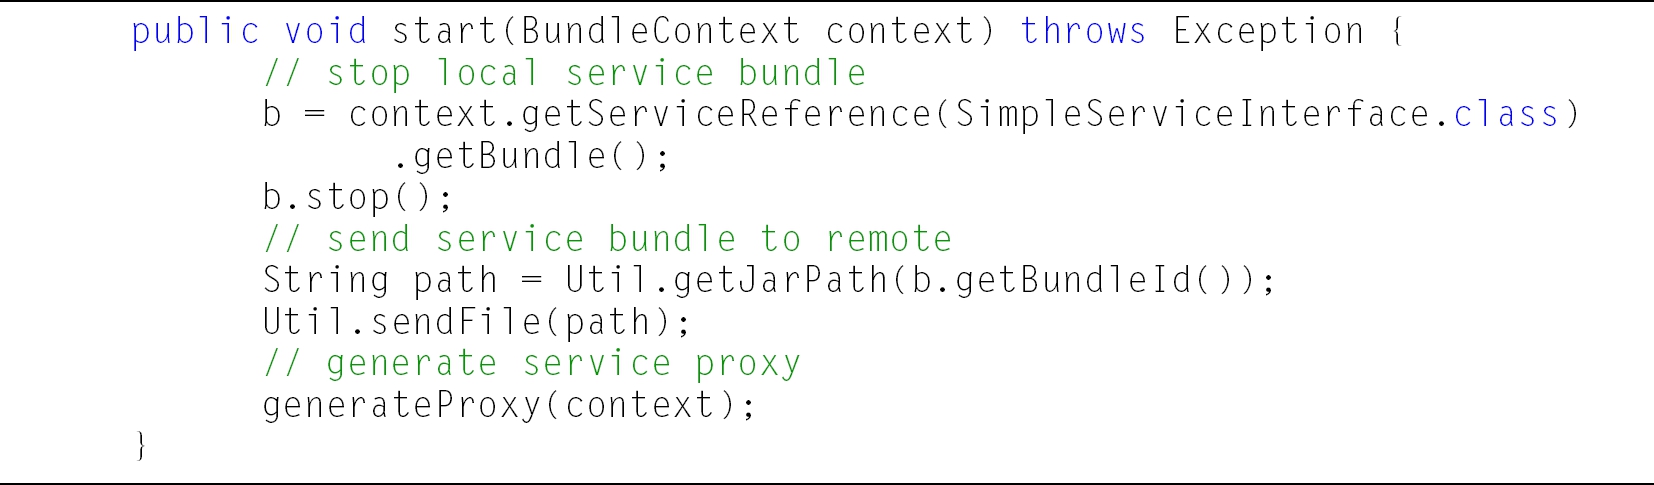
1. When the bundle starts, it stops the local service bundle, which is sent to the remote, and generates the proxy at runtime.
2. The Java reflection helps to generate the service proxy which is an object that hooks the service function call and which is registered under the same name as the original service. When the service consumer invokes the function call to the service provider, the proxy is triggered before the real function call happens, so that we have chance to connect to the remote PC. The proxy starts a TCP session to the surrogate server and asks for the remote service object to reply the request.

3. Similarly to the surrogate server, we will encode the objects in the Json string before sending to the surrogate and decode the Json string from surrogate, which is implemented in the Marshalling class which shares the same key words so that the surrogate can recognize the message correctly.

B.4 Putting All Together
In the previous sections, we made 4 bundles: surrogate.jar, manager.jar and 2 service bundles, provider.jar and consumer.jar, among which surrogate.jar runs on the PC while the other three bundles are uploaded to the Android phone. In this section, we run all the bundles to observe how the compute offloading happens.
1. Start OSGi on an Android application and put the consumer.jar, provider.jar and manager.jar bundles in the directory that the File-Install bundle watches so that all the bundles are installed in the OSGi framework. We can verify it from the Remote-Shell as shown in Fig. B.8.

2. We first test the service bundles and observe how the service binding happens in Android phone locally. Through Remote-Shell, we first start service provider bundle and then start service consumer bundle. Observe the printout on the phone screen, like shown in Fig. B.9, to verify that the “service called with parameters” shows, which proves that the service function is called locally. After verification, we stop the service consumer bundle for the next service invocation.

3. On the PC, we run the Felix OSGi distribution and start the surrogate bundle. We can verify it from the command line as shown in Fig. B.10.

4. Once both OSGi frameworks are ready, we can start offloading the bundle from the Android to the PC by starting the manager bundle on Android. The bundle prints the log of proxy and bundle file on the phone screen as shown in Fig. B.11.

We can verify that the bundle is offloaded to the PC by listing the bundles on PC as shown in Fig. B.12.

We can also verify that the bundle is stopped on Android by listing the bundles on Remote-Shell as shown in Fig. B.13.

5. After migrating the bundle code to the PC, we let the service consumer call the service again on Android Remote-Shell. Since the service provider bundle is not active on Android, the service object is provided by the proxy. The service invocation request is sent to the surrogate server on the PC to run the service function call. We can verify that the service is actually called on the PC by verifying the log printout on the PC as shown in Fig. B.14.
