
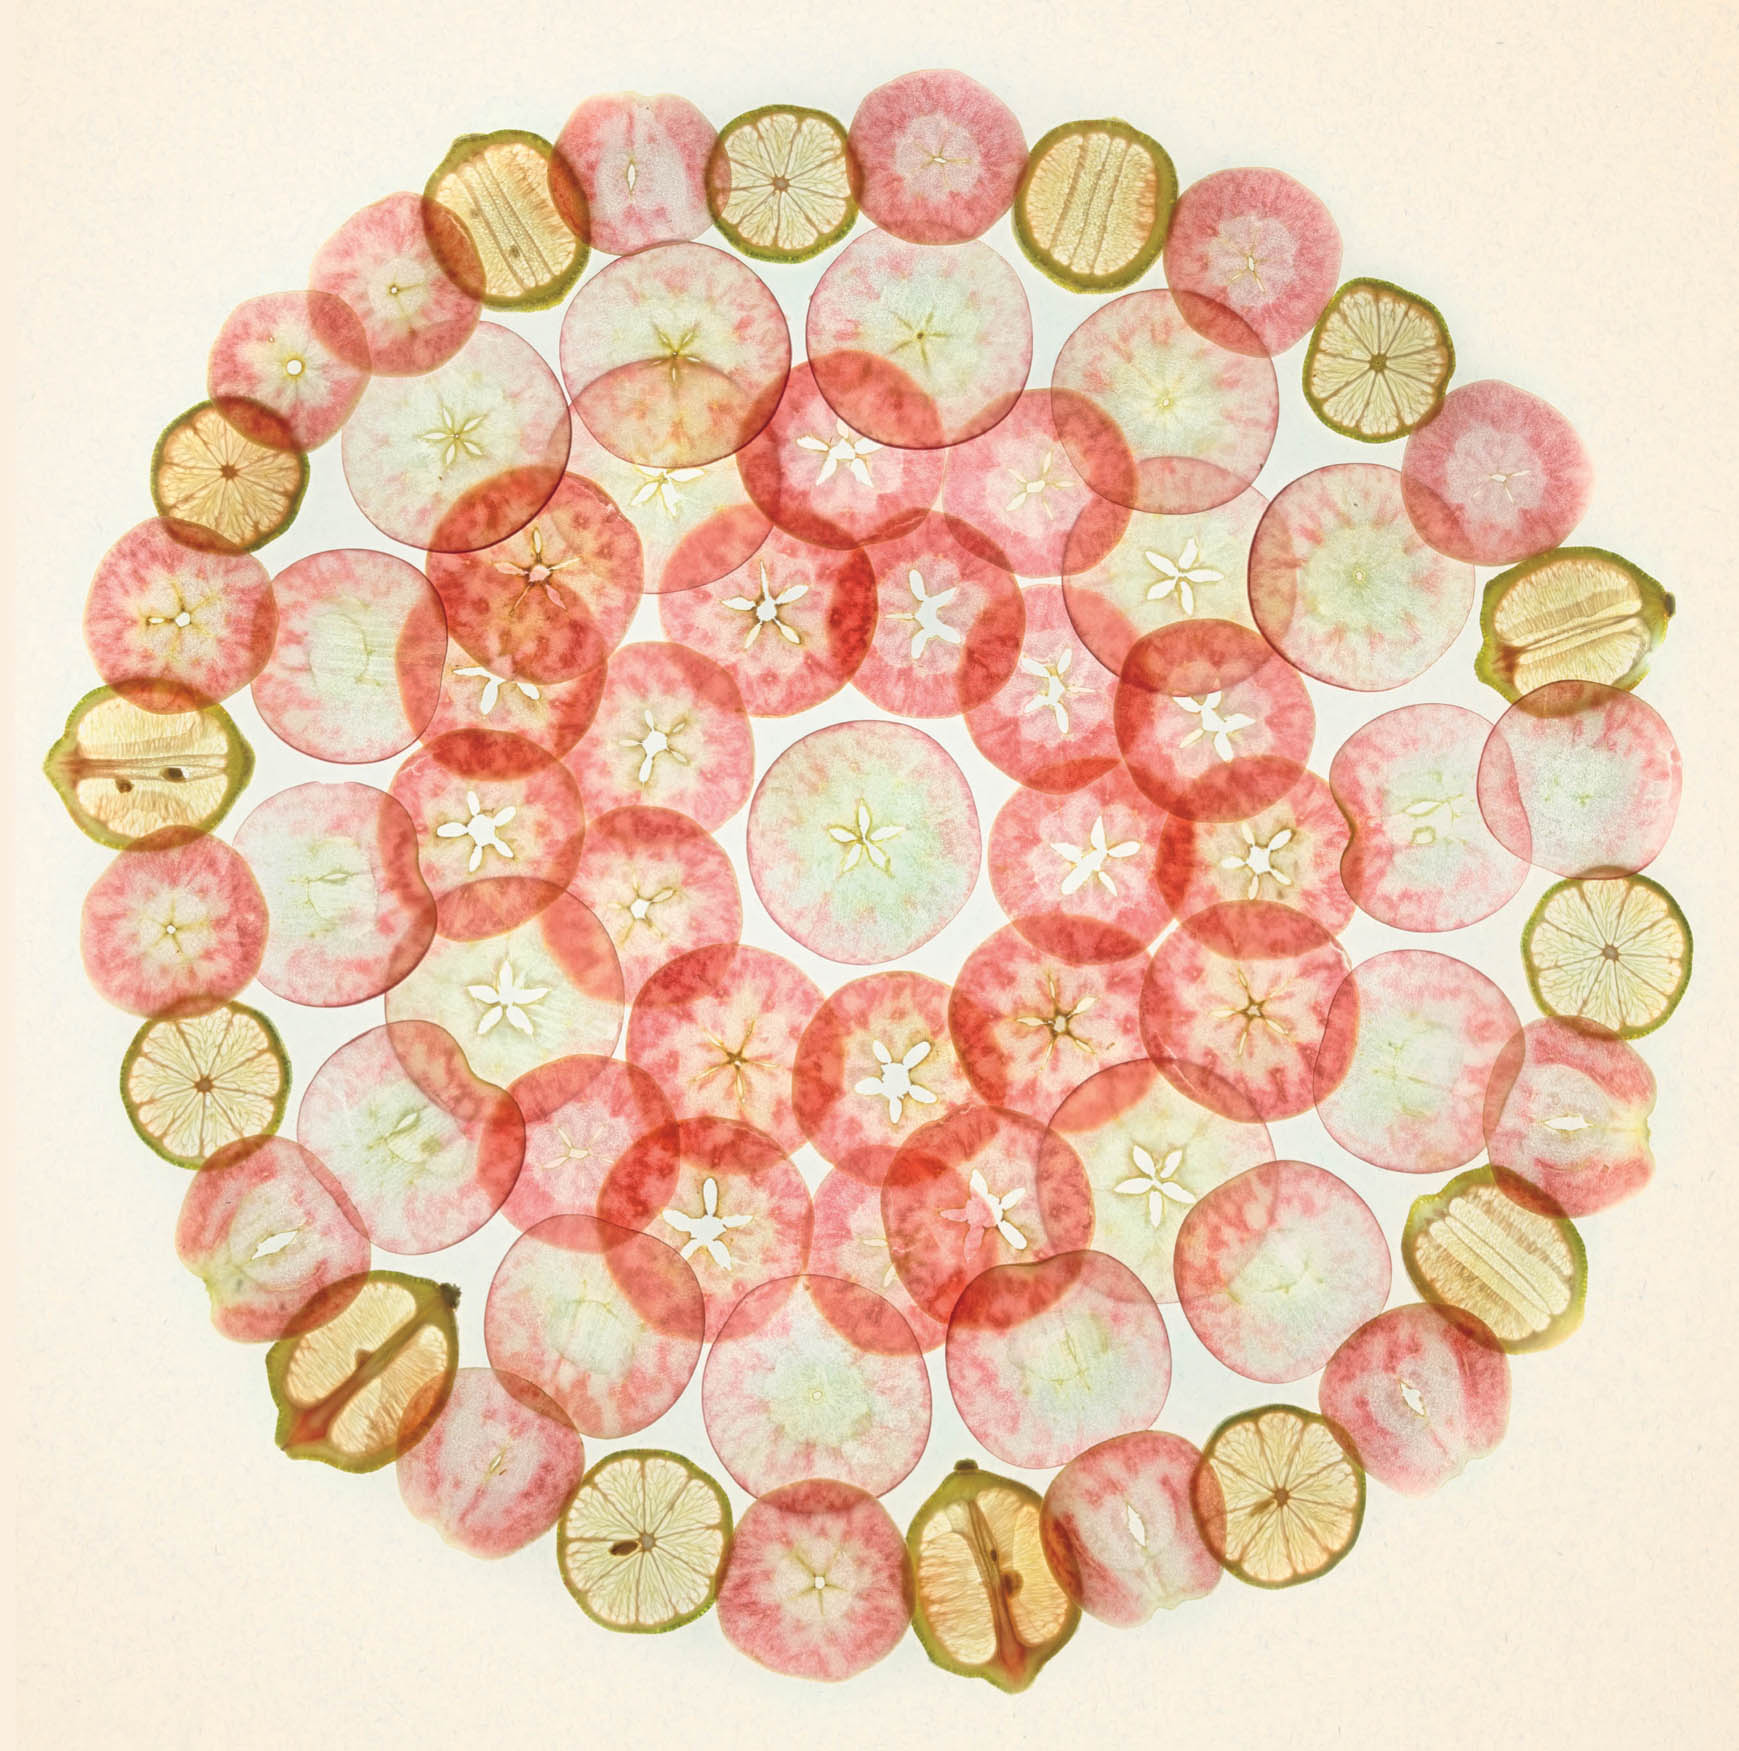
Lady Pink Apple Slices with Lemons—When I made this image, I was spending much of my creative time photographing slices of fruits and vegetables on my light box. I was lucky enough to score some beautiful Pink Lady apples and a few variegated pink lemons.
One of the most difficult things about photographing backlit fruit slices is cutting them thin enough. To achieve this, I used a mandoline food slicer. If you try this at home, please be very, very careful!
I started with the apple slice in the center of the image. This slice itself shows partial symmetry around a vertical medial axis. From the central slice, I enlarged the composition using radial symmetry, trying to keep a pattern of colors so that the symmetry was in balance. Since each slice of fruit is necessarily different, symmetry of this kind of subject matter can only be approximate. The viewer takes in the partial symmetry, and perceives it as mostly symmetrical to see the pattern as a whole.
The final image delivers a symmetrical pattern that is reminiscent of a flower or a mandala.
Nikon D850, 50mm Zeiss Makro-Planar, eight exposures with shutter speeds ranging from 1/60 of a second to 4 seconds, each exposure at f/14 and ISO 64, tripod mounted.

“Tyger Tyger burning bright,In the forests of the night:What immortal hand or eye,Dare frame thy fearful symmetry?”
—William Blake
One of the most important organizing principles of life, the universe, and everything is symmetry. As Michio Kaku puts it, “To a physicist, beauty means symmetry and simplicity.”
What’s true for a physicist also applies to the visual arts. Graphic designer Darrin Crescenzi speaks of the “unique visual tension between comforting symmetry and compelling asymmetry.” Crescenzi believes that the “thoughtful application [of this tension] can bring beauty and harmony and intrigue to all manner of designed things.”
This chapter explores what it means to be visually symmetrical, and the different kinds of visual symmetry. Symmetry can apply to an entire frame, or proportionally to part of an image.
Visual symmetry occurs frequently and often in some kinds specific kinds of shapes, such as mandalas and spirals.
When we think of symmetry, most often we think of bilateral symmetry—symmetry along two sides of a median axis, so that there are two halves, one on each side of the axis. In addition to bilateral symmetry along a horizontal or vertical axis, radial symmetry and reflective symmetry are also important to the photographer.
Symmetry—or lack thereof—also has some rather unexpected consequences for photographs, and plays a role with the source of light, color balance, and more, depending upon the image.
What are the differences between symmetry and asymmetry, and how can asymmetry be exploited by the photographer? There’s an automatic assumption that being asymmetric means being visually out of balance. Put another way, breaking symmetry causes a certain amount of tension. If so, how can this out-of-balance tension be exploited? Creating an asymmetric image that seems balanced is a neat trick to pull off, but it can be done.
Ultimately, the image maker needs to realize that symmetry is important to viewers. Symmetry can be used as tool to draw the viewer in, and to add emotional emphasis.
In science, symmetry is seen as an important organizing basis for life that helps enforce simplicity. As visual artists, perhaps it makes sense to look at symmetry similarly, and regard symmetry and partial symmetry as helpful organizational constraints.
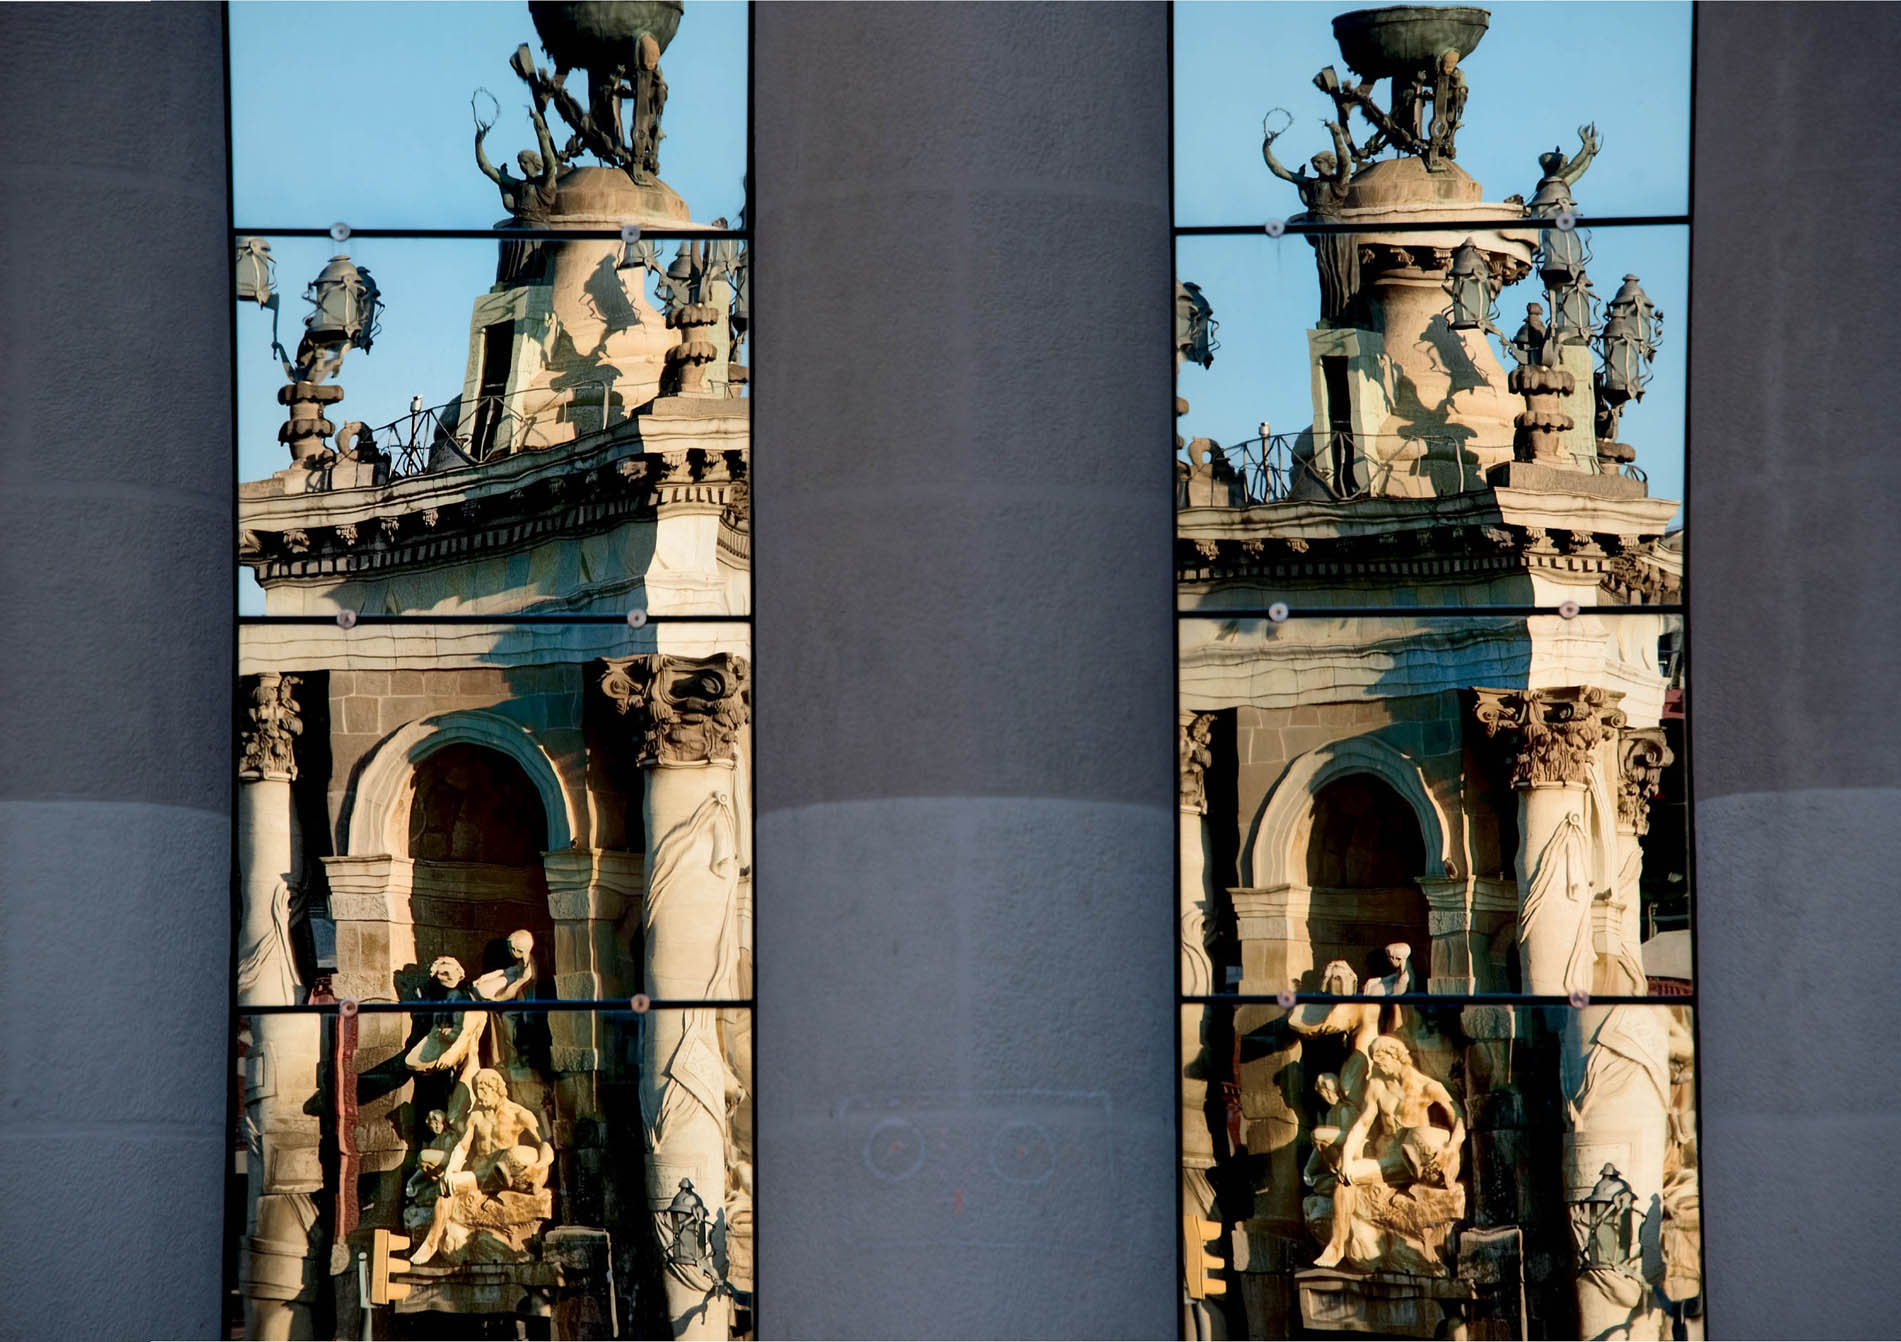
Plaça d’Espanya, Barcelona—Built on the occasion of the 1929 International Exposition, the Plaça d’Espanya is one of the most important public spaces in Barcelona. Located at the foot of Montjuïc, this is a grand public square with a central statue designed by a collaborator of Antoni Gaudi, a bull ring, and two mammoth Venetian towers that were the entrance to the exposition.
Photographing the Plaça d’Espanya presented me with a bit of a problem, as I didn’t just want to make a documentary image. What I found striking were the modern buildings that surrounded all the pomp-and-circumstance architecture from the last century.
Before deciding to just photograph the central monument, I took a moment to take stock of the situation. Looking around me, I turned 180 degrees away from the Gaudi-esque monument. Rather than aiming my camera directly at the statue, I decided to capture the contrast between the reflections of the elaborate statue and a stark, modern building on one side of the square. It seemed to me that the contrast was the most interesting photographic subject in the area and I was particularly intrigued by the partial symmetry between the two reflected images.
I was very pleased to discover that I was able to frame an image that showed two different reflections of the tower in the center of the square. Best of all, these two reflections were interspersed with the modern masonry of an office tower.
Framing this image with its symmetry of both the reflections and the panels of the modern building required me to be in exactly the right place and pay close attention to the camera position.
Nikon D810, 28-300mm Nikkor zoom at 190mm, circular polarizer, 1/160 of a second at f/8 and ISO 400, hand held.

Lower Deck—The Ponte Rodo-Ferroviária de Valença crosses the River Minho from Tui in Galicia, Spain, to Valença, Portugal. It is a double-decker, cast-iron bridge with train tracks on top and room for cars and foot traffic on the lower deck—sometimes pedestrians have to scramble out of the way of the cars, and traffic is mostly one way at a time.
I positioned the camera on the tripod precisely in the center of the road. Every time a car came by, I had to grab the camera and tripod and scamper to safety. If you try something like this, please be very careful!
Bridges, particularly those constructed of cast iron, are often highly symmetrical constructions (for another example, turn to page 57). With this composition, I worked hard to emphasize the bilateral symmetry running on both the horizontal and vertical axes. It is asymmetrical only in a few areas; for example, the pattern of the train tracks above is not exactly symmetrical with the paved roadway below.
Nikon D850, 28-300 Nikkor zoom at 35mm, four exposures with shutter speeds ranging from 1/30 to 0.4 of a second, each exposure at f/25 and ISO 64, tripod mounted.
Kinds of Symmetry
The world contains a lot of symmetry. It’s almost a given that any particular photographic frame will contain some symmetry or near-symmetrical elements. You really can’t avoid symmetry even if you want to—and why would you want to?—because symmetry, longing for symmetry, absence of symmetry, and asymmetry help provide the spice that makes the visual world interesting.
Once we’re clear that symmetry will almost always be involved, it makes sense to identify the most important kinds of symmetry. They are:
- Vertical symmetry: This is usually along a vertical axis, often the median axis.
- Horizontal symmetry: Usually along a horizontal axis, often the median axis.
- Radial symmetry: Most often seen in compositions that involve circles, spirals, or fractals.
- Reflective symmetry: Often involving mirrors, reflections in water, and shadows. This kind of symmetry flips the subject in a mirror-like fashion.
A key issue with vertical and horizontal symmetry is where the axis falls. When the axis is close to the center of the image, the symmetry is considered bilateral. Horizontal and vertical symmetry that is not bilateral is sometimes called proportional symmetry.
Composition and Symmetry
From a compositional viewpoint, the most important thing that the photographer can do is to consider the placement of the axis. When this axis is perpendicular to the image frame, then the symmetry is bilateral. Once the angle of the axis is no longer exactly at 90 degrees to the border frame, then the symmetry becomes proportional, and can quickly begin to verge on asymmetry.
As in some other aspects of photographic composition, the details of positioning the camera in relationship to the subject have a huge impact on the rendition of symmetry. So keep this in mind as you are composing your image.
If you intend the image to be symmetrical along an axis, like Lower Deck, shown on page 183, then you need to position yourself smack-dab in the middle of the road, even at the possible risk of being run over (as I did).
On the other hand, if you are trying to create a radically asymmetric image, then you should go for it! Don’t even put up a pretense of symmetry, and position the camera off to one side of the image, perhaps along an image entry point. (For more about entry and exit points, turn to page 136.) Small camera movements can make a big difference when it comes to symmetry.
Radial Symmetry
With radial symmetry, the elements of the image circle around an important element. What is this element? Why is it important? What is the radial pattern surrounding the central element?
Keep in mind that—with the possible exception of floral work—radial symmetry is relatively rare, and therefore special.
In nature, flowers almost always exhibit radial symmetry. Spirals, such as those that make up the matter of the universe, are exercises in radial symmetry. Domes are an architectural application of radial symmetry. Some examples of radial symmetry include mandalas, such as Lady Pink Apple Slices on page 178 (for more about mandalas, turn to page 49), flowers, such as the Coreopsis on page 197, and the Galleria Vittorio Emanuele II shown opposite.
Approaching radial symmetry with a camera, it’s important to behold and acknowledge the full extent of the symmetrical design. One strategy is to embrace a full circle; perhaps, the edges of the circle almost brush the inner border frame and are tangent to the border.
In some other cases, a circle may be too vast to capture in its entirety. The idea here would be to capture enough of the circle, perhaps a quarter of a turn, so that the entire circle is “completed” mentally by the viewer. The circle has been implied and strongly suggested but has not been shown in its entirety. For an example, take a look at Bottle Light Study on page 187.

Galleria Vittorio Emanuele II—Located across from the Duomo in Milan, Italy, the Galleria Vittorio Emanuele II is perhaps the world’s oldest covered shopping mall. The central octagonal space, shown in the image here, is topped with a glass dome.
Walking through the Galleria, staring up at this cast-iron marvel, I was struck by the incredible amount of symmetry in the architecture. The dome itself exhibits radial symmetry, the buildings on each side are symmetrically designed, and the galleries attaching to the dome were designed in pairs. When I looked up I could see not only radial symmetry in the dome, but also bilateral symmetry along both horizontal and vertical axes of the gallery as a whole.
To capture this symmetrical view, I got down as close to the ground as I could among the rush of fashionable shoppers, and used a horizontal fisheye lens.
Nikon D810, 16mm Nikkor horizontal fisheye, 1/320 of a second at f/8 and ISO 640, hand held.
Symmetry and Reflection
A different and important kind of symmetry is reflective. Reflective symmetry is really common and can be spectacular when used correctly.
There are many surfaces that can create reflective symmetry—plate glass windows in a skyscraper, a puddle, polished marble, a mirror, and more. A common photographic subject that uses reflective symmetry involves a landscape reflected in a body of water. Dawn on Lake Como on pages 192–193 is one example of this.
Reflective symmetry is uniquely manipulable and in some cases can even be created by the photographer. I once knew a photographer, Julius Vitali, who carried a portable puddle around so he could create reflections wherever he wanted.
The best starting place for understanding reflections is the Fundamental Law of Reflection, which states that the angle of reflection equals the angle of incidence (see the diagram above). In other words, this means that incoming light bounces off a reflective surface and exits at the same angle in relationship to the surface at which it entered.
Understanding the Fundamental Law of Reflection helps you to time your reflective photographs by waiting for the sunlight to hit a reflective surface such as lake or river at the right time.
To increase the amount of reflection, you can move the camera position as necessary to be located at the angle that corresponds to the angle of incidence. Putting this another way, if you want the most reflection in your photograph, then the angle of reflection should be as close as possible to the angle of incidence. Working backwards, you can get a good idea of the angle of incidence by looking at how the light strikes your subject. This should tell you how to position your camera at the angle of reflection.

Bottle Light Study—This image shows sunlight coming through a small glass bowl with blue-colored water in it. I used a Lensbaby to make the capture. The Lensbaby is a specially designed optic that presents the center as sharp and everything else as pleasantly out of focus when used (as here) wide open (at f/1.6).
The point of this image was to create an abstraction where the viewer doesn’t necessarily know how the image was made (for more about abstractions, turn to page 210).
This image shows several different kinds of symmetry, as many images do. From an overall viewpoint, the viewer can assume that the radial pattern of light rays continues around the circumference of the bowl to create a complete circle. In addition, there is a symmetric and diminishing relationship between the progression of the individual light rays.
Nikon D850, 85mm Lensbaby Velvet, 1/500 of a second at f/1.6 and ISO 200, hand held.

Making Faces—This photograph shows the sculpted face of a Vietnamese lion, taken from a Buddhist temple. I found this sacred lion on the grounds of the National Museum of Vietnamese History in Hanoi, Vietnam.
Like all faces, the face of this stone lion shows extensive symmetry. The primary symmetry in a face reflects around the vertical axis. As an example, we have two eyes that are fairly equidistant from the nose.
This stone lion additionally shows symmetry between the sharp-taloned paws, curly ears, and pretty much everything else. In addition, the prominent teeth are symmetrical across the horizontal axis that bisects the symbolic jewel in the lion’s mouth.
Nikon D810, 28-300 Nikkor zoom at 125mm, 1/100 of a second at f/5.6 and ISO 400, hand held.
Every subject has a surface. Another factor to consider is the surface’s index of reflectivity. The greater the index of reflectivity, the more you will get perfect reflective symmetry. For example, a lake in the morning when the water is perfectly calm has close to 100% index of reflectivity, and the buildings on the shoreline will be symmetrically reflected in the water. On the other hand, if a squall blows in, and the surface of the water becomes disturbed and choppy with whitecaps and waves, then the index of reflectivity decreases to close to 0% and there will be no reflections.
Any partial reflections under stormy conditions may be attractive to photograph, but they will not be symmetrical because the distortion in the water surface will distort the reflections.
Also, a reflective surface can be curved—for example, convex and concave mirrors, and water drops. In this case, when conditions are right, you will see a reflection that has been distorted due to refraction. The refracted reflection will not be entirely symmetrical—in fact, it may be wildly asymmetrical—but it can be striking and interesting in a photographic composition. For instance, take a look at Falling Flowers on pages 92–93.
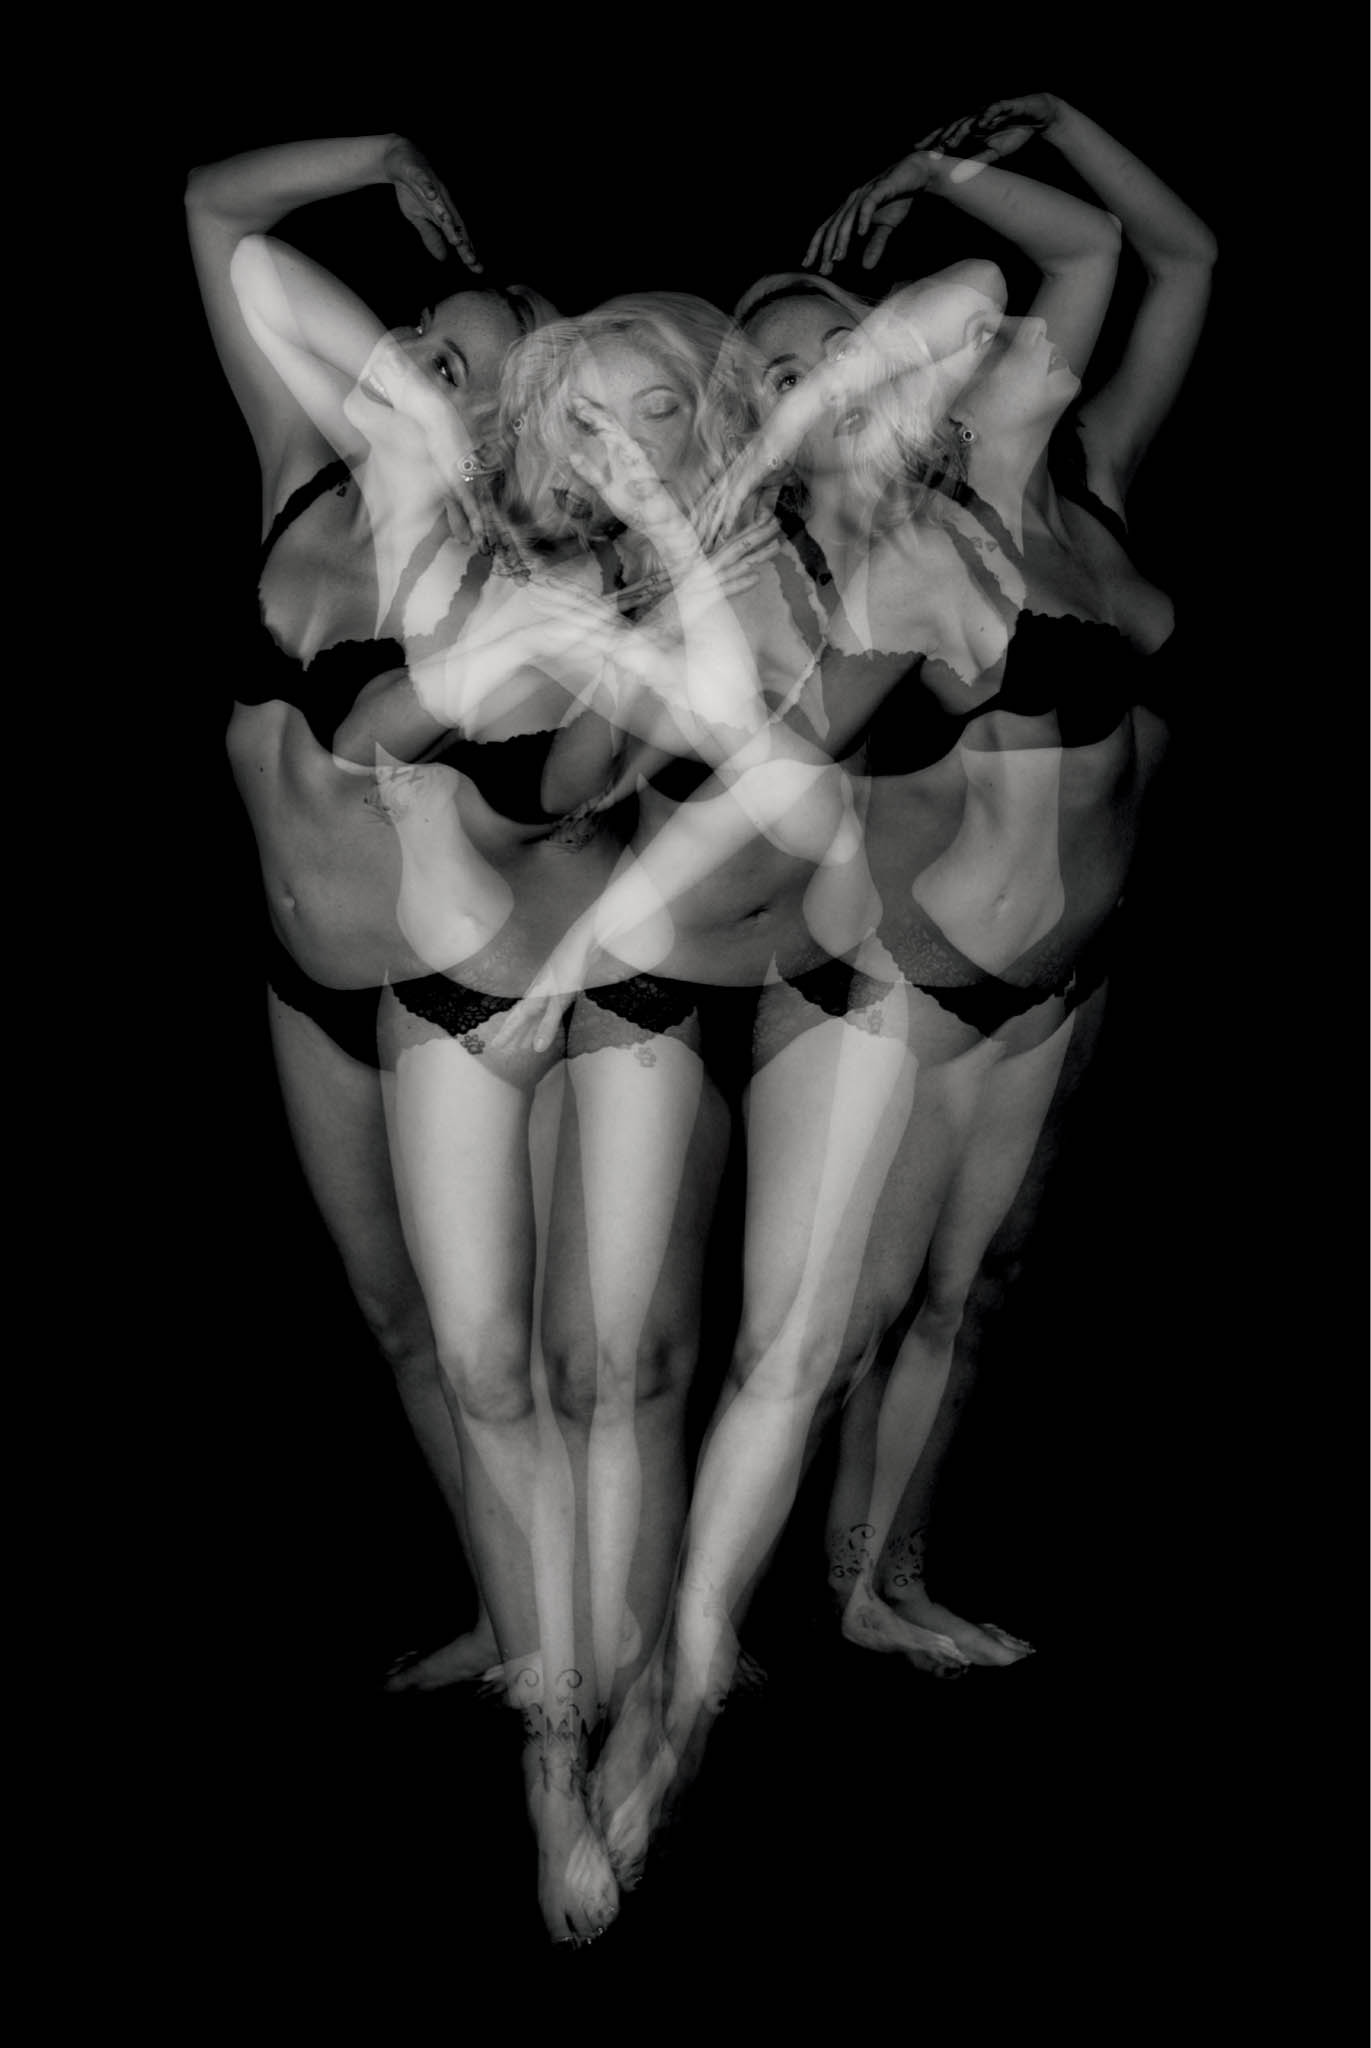
Vagaries of the Heart
With these in-camera multiple exposures, I clicked the shutter and fired the strobe each time the model moved into a new position. The model and I worked according to a plan to establish an outer shape. This shape would become the perimeter of the image.
With Vagaries of the Heart, we used five exposures to create the rough outlines of a heart. The partial symmetry here is along the vertical axis, and creates a mirroring effect.
Nikon D810, 28-300mm Nikkor zoom, single in-camera multiple exposure at 1/160 of a second, tripod mounted.

Near Symmetry
With Near Symmetry, the goal was to create a spiral shape, so this is an example of radial symmetry. In addition, there is also reflected symmetry from left to right over the vertical axis.
In both images, you can see examples of internal symmetry if you take a look at the models’ gestures and apparel.
To some extent, these figure studies can be regarded as examples of abstraction (turn to page 210 for more about abstractions). An image of this sort works if the viewer visually connects with it. In this case, the symmetry embodied in each image is an important part of a successful composition.
Nikon D810, 28-300mm Nikkor zoom, single in-camera multiple exposure at 1/160 of a second, tripod mounted.
Using a Polarizer
When it comes to reflections, one important tool in the photographer’s bag is the polarizer. A polarizer is a filter, also called a secondary lens, that fits at the end of the primary lens. The polarizer blocks some light from certain polarization angles, and allows other light to pass through it. There are two kinds of polarizers, linear and circular. A linear polarizer only allows horizontal or vertical light waves to enter the filter. Circular polarizers, which are usually better for photographic purposes, allow light waves that move in a circular direction to enter.
With a circular polarizer, there are two optical lenses sandwiched together. The outer optic rotates 360 degrees, compared to the inner optic, which is static once it has been affixed to the primary lens. As you rotate the outer optic, you change the effective angle of light that can enter and pass through the filter, an effect called polarizing. Perhaps you have seen this with polarized sunglasses: if you are oriented in the right direction, the sunglasses remove glare and reflection.
Having a circular polarizer mounted on a camera’s lens means that you can rotate the polarizer to cut out the light frequencies you don’t want and the emphasize the ones you do. This comes in handy when you are dealing with reflective water.
When you try it out on reflective water, depending on the angle of light striking the water, you can rotate the polarizer through almost complete transparency—meaning you can see down through the water—to almost complete opacity—which, depending on the conditions, emphasizes the reflections on the surface of the water. If the goal is to create an image with maximal reflective symmetry, then you may want to use a circular polarizer to help with this effect. For a photographer interested in reflections, a polarizer is their best friend.
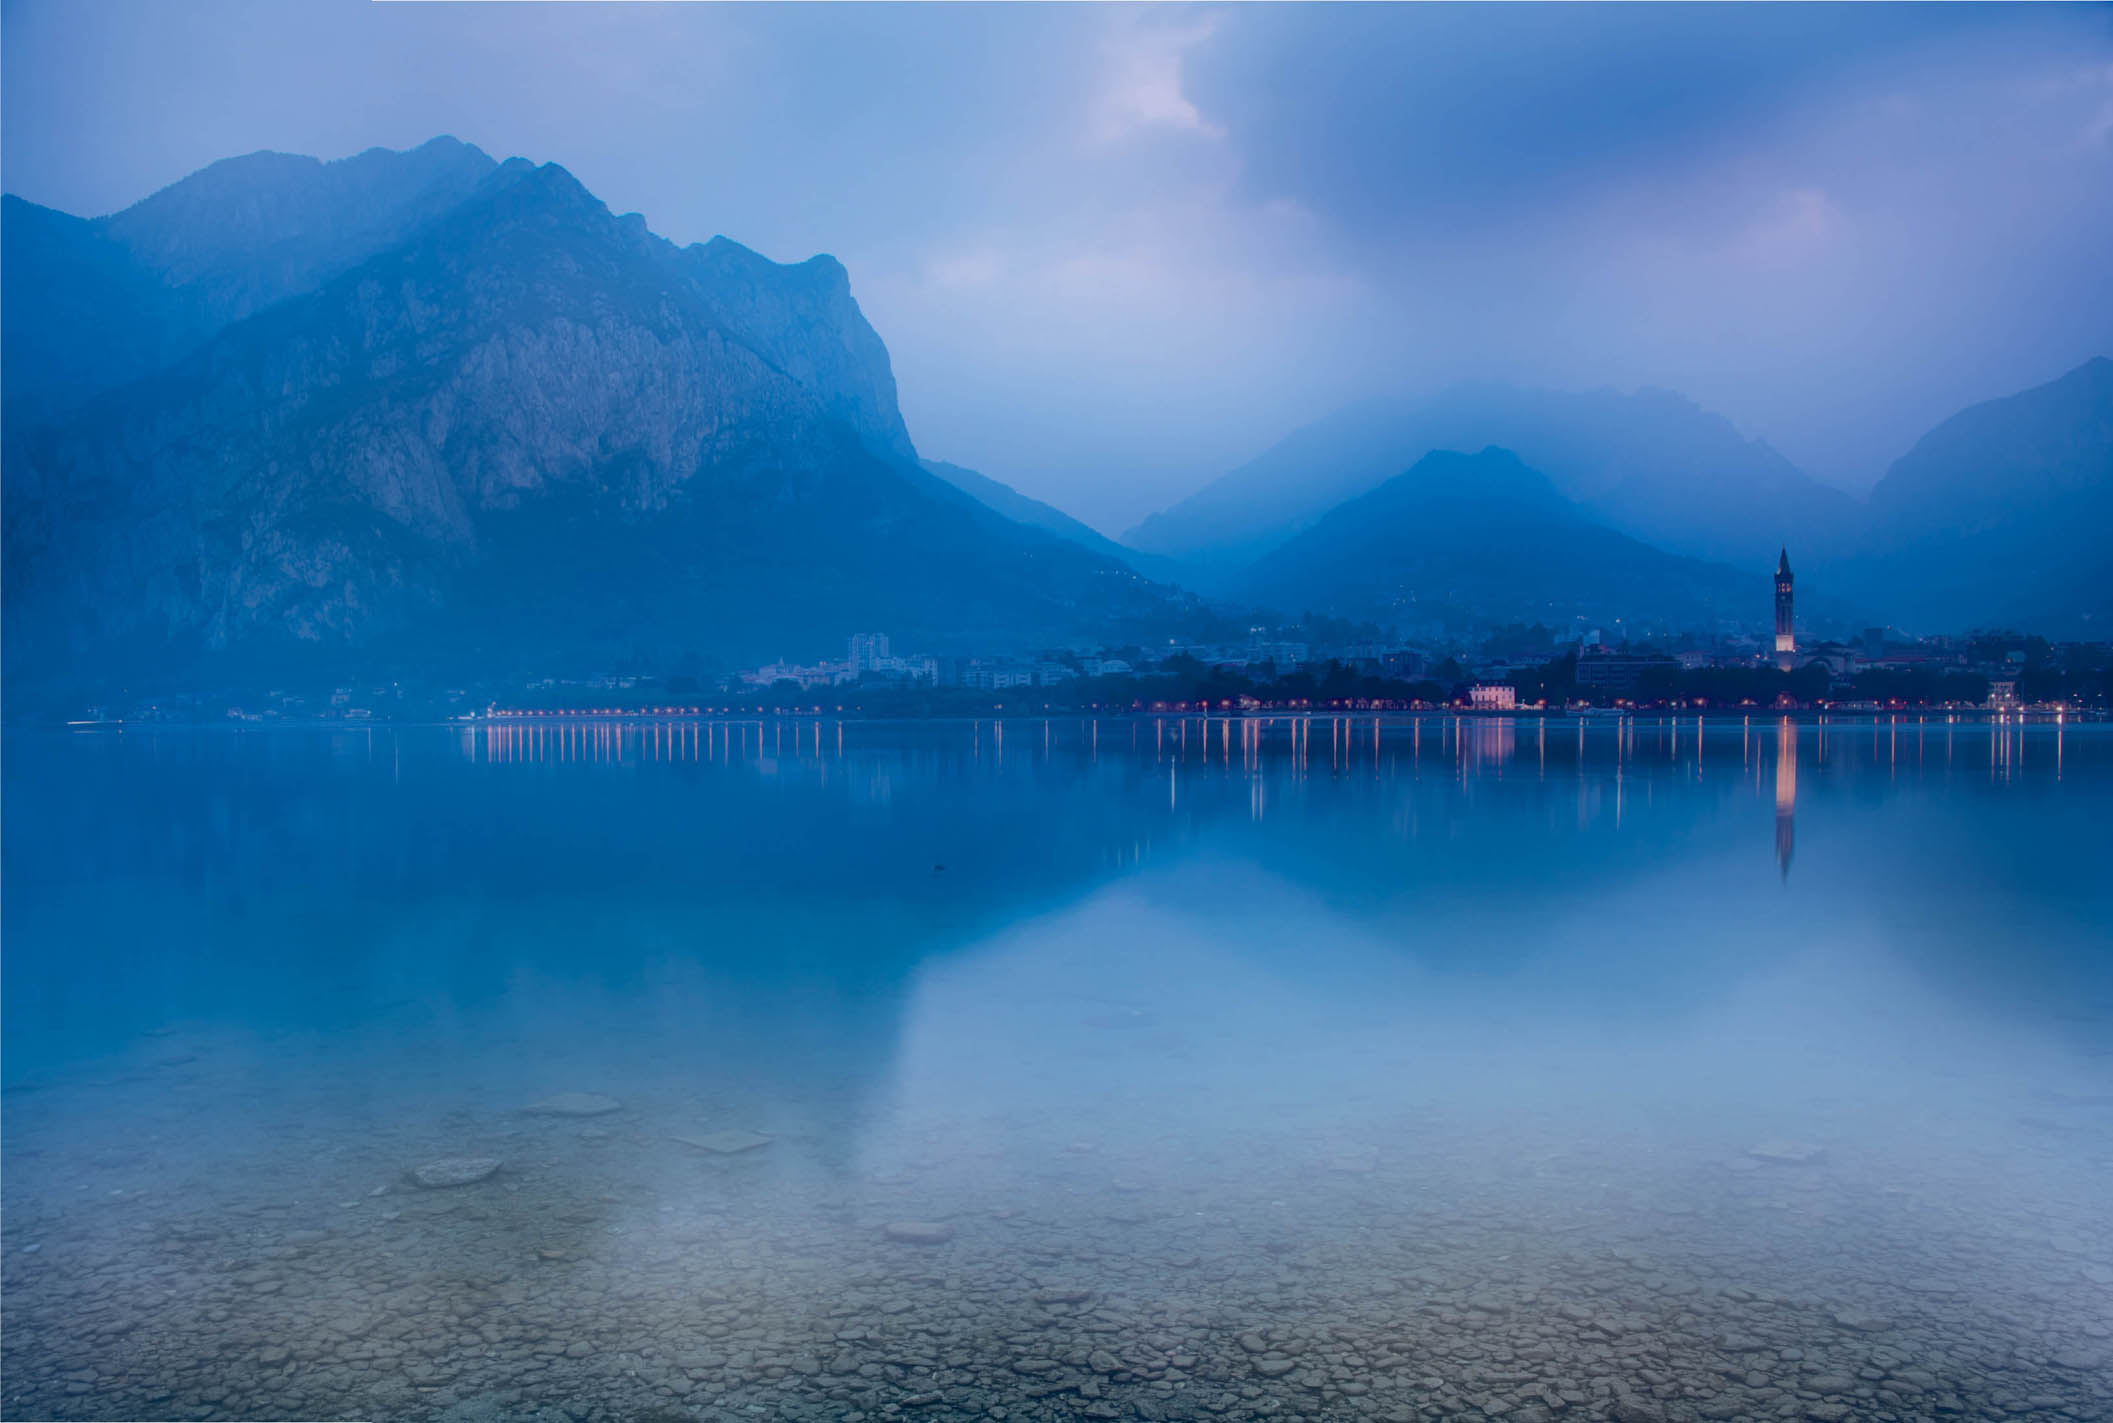
Dawn on Lake Como—On a cold autumn morning in pre-dawn darkness, I found myself on the shores of Lake Como in Italy.
I positioned myself across from the lights of the town of Lecco. As the sun rose, it became clear that the best position for the tripod was in shallow water. Shall we say that getting my feet soaking wet did not help to warm me up? But anything for a photo!
Like with many landscapes, reflective symmetry adds interest to this scene. It is particularly notable because of the soft luminescent blue of the predawn light.
In addition to the symmetry reflected along the shoreline of the lake opposite where I was positioned, the photograph shows some of the lake bed through the water. I used a polarizing filter to add clarity to the portion of the view through the water. The view of the lake bed adds compositional interest to the overall symmetry of the image.
Nikon D810, 28-300 Nikkor zoom at 28mm, circular polarizer, 3 seconds at f/8 and ISO 64, tripod mounted.

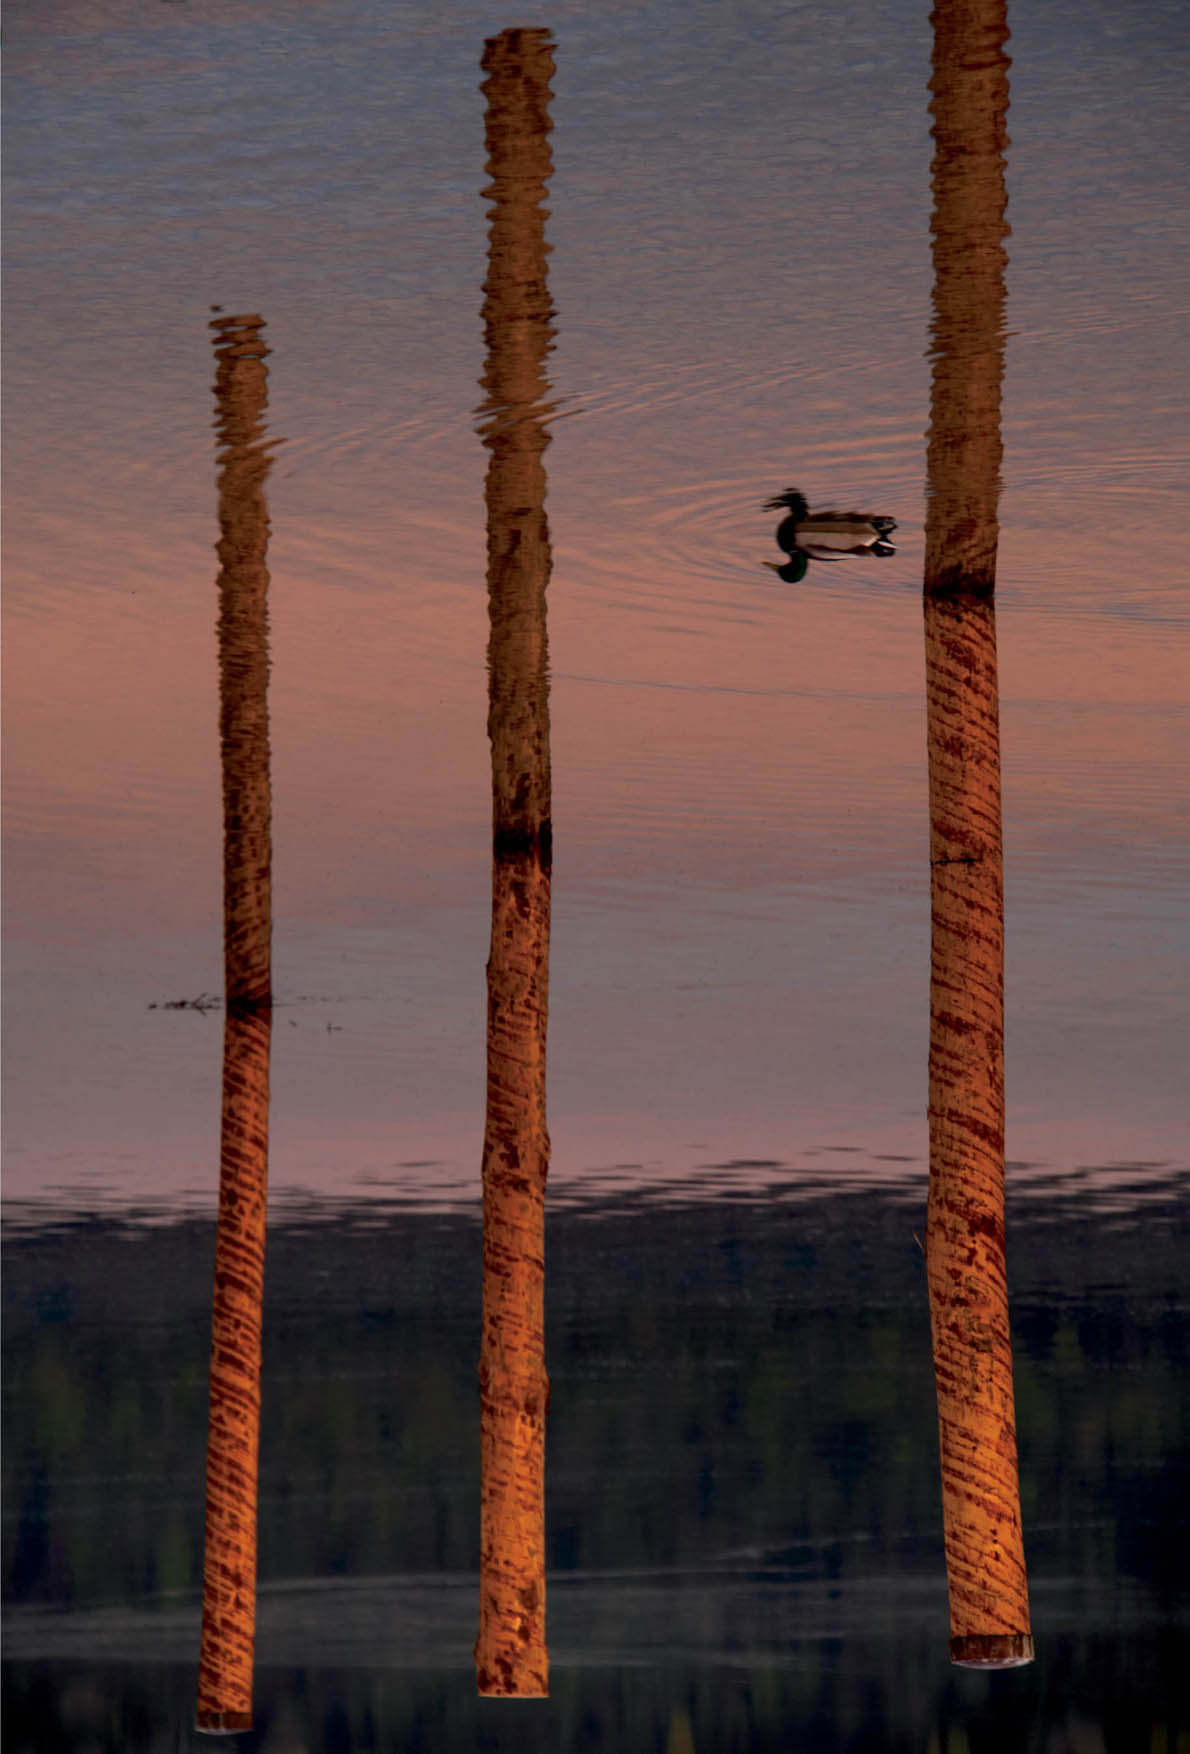
Reflections in the Untersee—I photographed this composition with reflections on the shores of the Untersee, which is between Germany and Switzerland and is part of Lake Constance.
The image reads as a realistic scene either as shot, or when flipped upsidedown. In this way, I think of it as a visual palindrome.
A palindrome is a phrase that can be read backward and forward. Some examples are: Madam I’m Adam, Able was I ere I saw Elba, and A man a plan a canal Panama.
While my photographic palindrome works top to bottom and bottom to top, rather than left to right and right to left, I still think it is fun!
Can you determine which of the two images is the original? And, how can you tell for sure? For the answer, turn to page 237.
Nikon D850, 28-300 Nikkor zoom at 180mm, 1/13 of a second at f/8 and ISO 64, hand held.
Keep in mind that a polarizing filter fits on the end of your lens and is therefore part of the optical setup that captures your photographs. If you are interested in photographing reflections, you should invest in an optically high-quality polarizer. Also, the thickness of the polarizer matters, because a polarizer that is too thick can lead to optical distortion and vignetting, particularly with wide-angle lenses.
Symmetry & Emphasis
Why is symmetry so important to us? To start with, for the most part we are symmetrical beings along a medial horizontal axis. We see the world in symmetrical patterns and seeing this symmetry helps us see the balance in things. We often recognize symmetry as an action that completes an image and will respond to symmetry in an image with an inner sigh of contentment.
Just as complete symmetry conveys satisfaction, breaking symmetry is a significant event that we notice. When an image is set up to be symmetrical but, in fact, is not entirely, it is a statement.
Symmetry can enhance a composition and lack of complete symmetry can call attention to portions of an image. Whatever your intentions are as an image creator, you should not ignore the potential of symmetry and asymmetry to create emphasis in your compositions.

Coreopsis—The coreopsis is a small but mighty flower! Shown here, photographed on a light box, the symmetry of the irregularly shaped petals is radial and mirrored across the vertical and horizontal axes.
While many macro photographs of small flowers are intriguing, this image gets the viewer’s attention because of the extensive symmetry involving irregularly shaped petals. All the petals are basically similar, but they are each uniquely patterned, colored, and variegated. Similarly, the spacing between the petals is close, but not exact.
It is noteworthy that at first glance this image seems highly symmetrical, but after studying it in detail, the viewer understands the natural and irregular aspects of the flower while still recognizing its symmetrical qualities.
Nikon D810, 85mm Zeiss Otus, 12mm extension tube, seven exposures with shutter speeds ranging from 1/4 of a second to 8 seconds, each exposure at f/16 and ISO 64, tripod mounted.