
In this chapter, you are going to start on the detail part of CriminalIntent. Figure 9.4 shows you what CriminalIntent will look like at the end of this chapter.
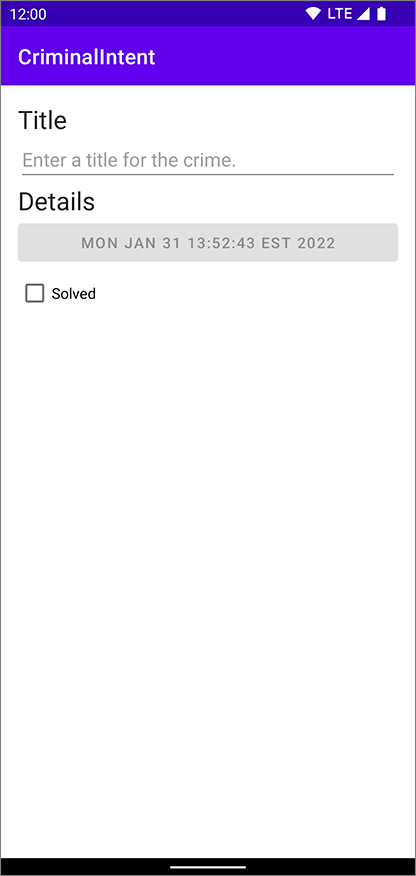
The screen shown in Figure 9.4 will be managed by a fragment named CrimeDetailFragment. An instance of CrimeDetailFragment will be hosted by an activity named MainActivity.
For now, think of hosting as the activity providing a spot in its view hierarchy to contain the fragment and its view (Figure 9.5). A fragment is incapable of getting a view onscreen itself. Only when it is inserted in an activity’s hierarchy will its view appear.

By the end of the project, CriminalIntent will be a large codebase, but you will begin much like the way you built GeoQuiz. After some build setup, you will define the Crime class, which will model the data you are displaying. Next, you will create the UI in an XML layout in fragment_crime_detail.xml. Once that is complete, you will create a CrimeDetailFragment to hook up the data to the view.
Those steps will feel familiar to the work you did back in GeoQuiz, even if the names are different this time. Since you are now working with fragments, you will also have to take care of one other step: You will add the CrimeDetailFragment to a container within MainActivity.
Let’s get started.
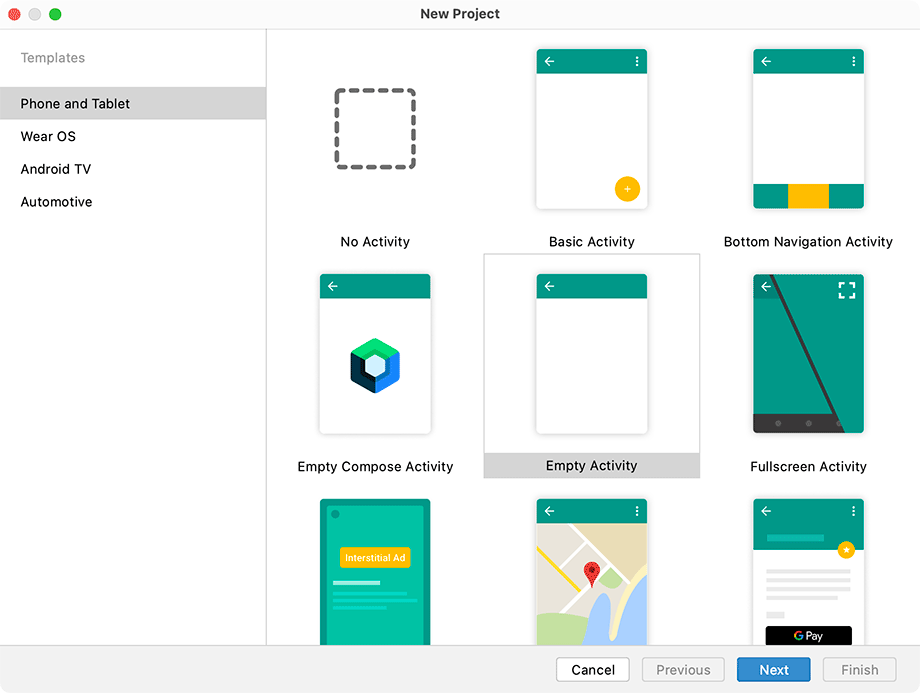
Create a new Android application (File → New → New Project...). Select the Empty Activity template (Figure 9.6). Click Next.
Configure your project as shown in Figure 9.7: Name the application CriminalIntent. Make sure the Package name is com.bignerdranch.android.criminalintent and the Language is Kotlin. Select API 24: Android 7.0 (Nougat) from the Minimum SDK dropdown.
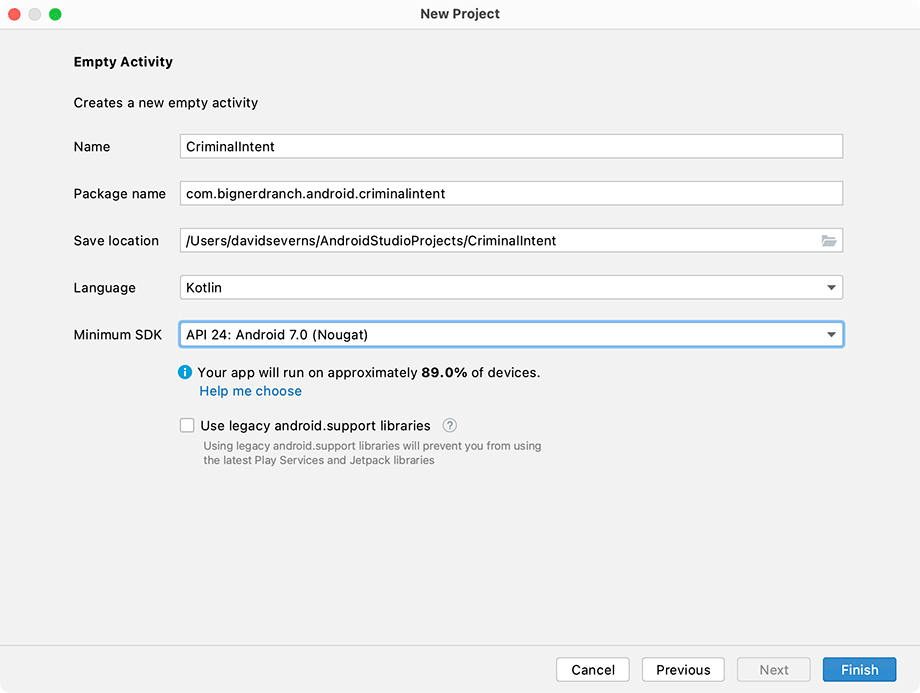
Click Finish to generate the project.
Before writing code, you need to make two changes to your Gradle build files. Open the build.gradle file labeled (Module: CriminalIntent.app). Like the ViewModel library you used in GeoQuiz, the Fragment library must be added as a dependency on your project. Also, enable View Binding, as you did for GeoQuiz. View Binding integrates seamlessly with fragments, and you will be using it in this project as well.
Listing 9.1 Setting up your project’s build (app/build.gradle)
...
android {
    ...
    kotlinOptions {
        jvmTarget = '1.8'
    }
    buildFeatures {
        viewBinding true
    }
}

dependencies {
    ...
    implementation 'androidx.constraintlayout:constraintlayout:2.1.3'
    implementation 'androidx.fragment:fragment-ktx:1.4.1'
    testImplementation 'junit:junit:4.13.2'
    ...
}
Do not forget to click the ![]() Sync Project with Gradle Files button or the Sync Now button after you have made these changes.
Now, on to the code.
Sync Project with Gradle Files button or the Sync Now button after you have made these changes.
Now, on to the code.